Chris H
master of boobies
14th October 2009
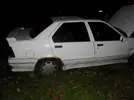
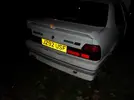
A white Chamade was offered on ebay this was the third time it was up so I went over for a look. Kevin and myself headed over in the 1 litre automatic mini, 104 miles round trip, the mini was ok just a bit slow.
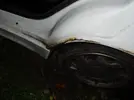
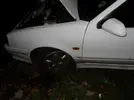
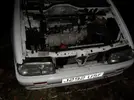
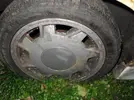
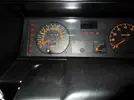
Anyway got there and talked to the owner, its not ran in a few years, flat tyres, slight hit in the face, mint interior, good trip comp etc.
Clutch issue, water leak and no spark were the issues, the fact the brake pedal went to the floor was also an issue.
So went through had a look, Kevin as always just about managed to stop from exploding with excitement, seriously if your buying a mar's bar he's wanting to witness it.
Took some pictures then left to contemplate it
[BREAK=Back at base]
16th October 2009
Well I bought it, went last night and collected it.
Was fun as the brakes were seized up, tyres flat but the winch yanked it onto the bed happily enough.
I got some paper work with the car, last tax disc was up in 2004. Last MOT expired August 14th 2004, I got the old style V5 and a new one which was nice.
The car will be 18 years old on Sunday.
I went up to the DVLA today, got it put in my name and SORNed so that's that dealt with.
Back at base it was time to actually look at it.
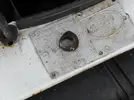
The non running issue was no spark, Common issue on them, I plugged in the module from the grey hatch, in the picture its the one that's on the scuttle panel. Anyway plugged it in and it started first turn of the key. Sounded good for sitting for a few years not running.
It was miss firing but I cleaned out the plug wells and it was perfect.
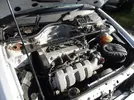
The pressure gauge works when it feels like it, the stater solenoid wires been scotch locked so its temperamental also no heat shield so it won't start if its warm
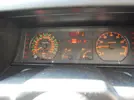
Then I decided to free off the brakes, started with the fronts
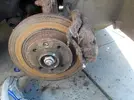
Piston was free, bottom slider wasn't, so worked that out and lubed it, this is it nearly out
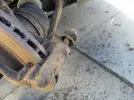
Other side was more of the same but the fronts were not the issue.
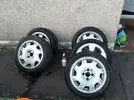
This is a new style of ph1 alloy top me, so there's 4 different types! Its also got 2 different styles of centre cap fitted
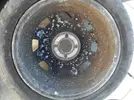
I then checked why the pedal hits the floor, one of the front to rear brake pipes is burst, easy enough fix.
I then worked on the rear callipers. Started with the offside rear, snapped nipple, old badly chewed union used with new pipe, no dust seal on piston, seized solid. Bang with hammer frees up a bit, same with the other side, so need to sort out rear callipers.
I left all the wheels off and on stands, I cleaned all the wheel arches thoroughly, they came up well, its very, very solid this car, I'm most impressed.
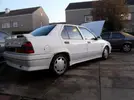
I then washed it, so here are pics of it just washed
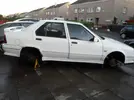
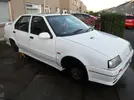
I removed the Renault diamond, that's where the damage is
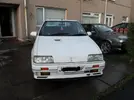
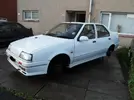
Looks like there's no exhaust but its there trust me, its been replaced, its the small half size tip which is annoying but still ok if no alternative shows up. The cats still fitted and rattle free, may be because its empty...
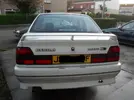
4 ph1 rims 1 ph2
back on its wheels
Problems that require rectification for MOT,
Rear fog light bulb
Rear number plate bulb
Brake pipe
rear callipers
One tyre isn't legal but they all have rim leaks
wiper blades
Issues for total completion,
Rear wheel arches
Bonnet pulled straight
n/s front wing behind headlight straightened
various stone chips
alloy refurb
boot lock central locking arm as per usual
clutch issue
front grille patched/replaced
aerial
[BREAK=Some work]
17th October 2009
Well I done some work today, I will start at the end and work back, its easier.
I fitted the aerial off the black chammy, much better.
I fixed the rear fog light and number plate light bulbs
Straightened out the nearside headlight mounting point and pulled the bonnet out a bit.
The main focus today was getting the black chammy back and the clutch issue on this car.
I really didn't want to have to pull the box out, so I started at the pedal, it felt ok, pulled it out and sadly it was fine, stuck the other I had in anyway to see if it made a difference, it didn't.
I then changed the cable, again no difference.
I then removed the airbox (air pipe was split , only became obvious when it was removed), then pulled the rubber release arm gaiter off, right away i saw an issue, I then decided I can do lots of things, keyhole surgery seems easy enough so I'll give that a go as well.
I successfully managed to remove the knackered release arm pivot bush, now this may not sound impressive but those that have changed them will know its very impressive removing it through the small window with the release arm still there and not dropping it into the box!
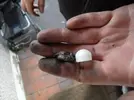
So here is the old knackered bush alongside a nice new one
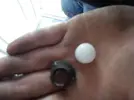
side on view, this is the worst one I can recall seeing
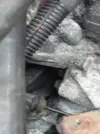
This is the small hole through which I had to perform my surgery, triple bypass? Easy in comparison!
I then had a closer look at the release arm, of course its worn and damaged due to it being used in this state, however there's also quite a large crack on it only visible on the back of it when the clutch is pressed!
This means the box has to come off to replace the release arm, oh well.
Another picture of the old bush
Hoo hum, looks like I will have this one a while as I'm pushed for spare time.
[BREAK=Freeing it off]
18th and 19th October 2009
Well the fact the beast was stuck fast may be handy if it was parked on a hill but my drives not on a hill. The fact it doesn't drive either doesn't help, the clutch is needed for delicate positioning in the drive.
So to look at the rear calipers. Well I started with the drivers rear, this is after I took the wheel off, looks pretty bad eh!
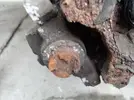
Well I wire brushed it, then worked at it, lubricating with brake fluid and believe it or not it cleaned up and actually works!
The passenger side, more of the same but I needed to get it moved quickly so just removed the pad carrier so I could move it easily.
The starter motors dodgy solenoid wires annoying, but will get sorted when I do the clutch.
The fan also works, the first time it kicked in aluminium dust went everywhere in a big cloud.
I topped it up with fresh fuel, the stuff in it was nearly 5 years old, it starts easier and smells better as well
I need to get the car moved over out the way so I can concentrate on the grey hatch which has been ignored recently.
[BREAK=not much has happened]
10th February 2010
Well not much but some stuff has happened.
Its now swapped places with the grey hatch.
The steelies I had put on have been changed for the Scenics alloys and it looks pretty good imo.
I also got some pics of it running before I stuck in the new CTS from the Scenic.
note outside temp, chilly! Roughly -3
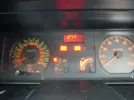
not running but sensor values for both AIT and CTS are erroneous
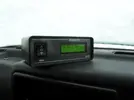
didn't stop it firing up though and after running for a few minutes
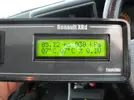
New CTS means its perfect all the time. So engine runs good shame it can't drive! :lol:
Some pics with the Lyras on it
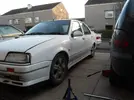
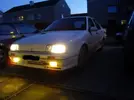
Need to get on with it so I can get it out the way and get the black chammy back down to strip.
[BREAK=Taking care of business]
12th February 2010
Well the mrs and the babies were off visiting, the sun was out, been out to Chiqutos for lunch, time to roll.
The plan was move the box back as the clutch has plenty of meat on it and fit a new arm and pivot bush,
And that plan was executed.
First job the rad, this was hilarious, never seen a failure like this on anything other than a truck
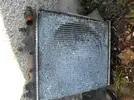
yes its broken properly
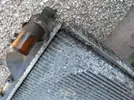
yes thats the bottom of the rad still on the subframe
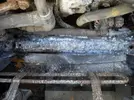
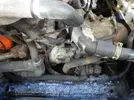
levered it out
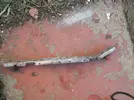
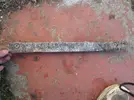
Need another rad then...
Onto the box splitting. Everything still connected apart from engine and box mounts and subframe link bar
Anyway pictures
starter off, all box to engine bolts removed
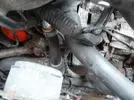
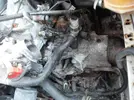
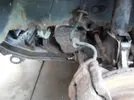
levered it a bit more
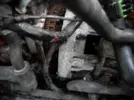
Now I could using my surgical skills get the release arm out through the starter motor hole, easier said than done. But I managed.
Then I had to fit the new bush through the release arm hole. So how to do this? Well my genius knows no bounds, so hot water and tape it to a spanner
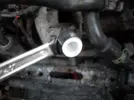
oh yeah
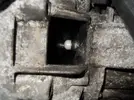
new arm in through the starter hole,
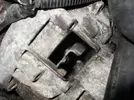
As it sits just now the box etc is bolted back up, just need to do the rear mount up, get a rad etc which I will do tomorrow.
The clutch arm now moves as it should but the clutch is seized as expected as there is a coolant leak onto it from the t-piece. It'll free up ok though
Hopefully I will be able to move it under its own power tomorrow.
[BREAK=Clutch]
14th February 2010
Well after yesterdays success of getting it back together etc the clutch was stuck, not helped by the coolant leak onto it either.
Had this with a few of them, normally in gear and start it bangs them free, this one took a bit more.
Anyway pry bar freed it off this morning. I started it in gear and it was fine, yay, got into first and reverse no problem and moved the car, for the first time in about 4 years under its own power.
Anyway as it heated up it no longer worked, the clutch dragged. Damn.
Thing is I think its the cable as I chucked an old one on when trying to diagnose it at first and the pedal ratchet, so will put the other cable back on I think.
Also the other issue is theres no heatshields on it or even the brackets for them, I have them and will fit them though.
Still it moves itself!
Get that sorted and the brake pipe then we are motoring.
[BREAK=clearing up the clutch job]
17th February 2010
Well I decided to sort this properly once and for all. I had a Renault cable in the boot so stuck that one, there was some slight differences to the cable in length, put it in and it was worse.
So the last thing was the pedal, I pulled the pedal again, ratchet teeth perfect etc, compared to the old pedal, it was slightly bent. The slight bend at the pivot was about 15mm at the end.
Pedal back in and perfect.
So I then could out the heater duct back in and put the bottom of the dash back up etc leaving me with this
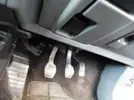
I also remember to get pics of the old release arm.
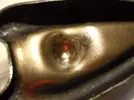
As you can see the cracking is extensive
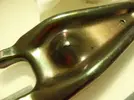
the pivot bush side, not a good pic but good enough
[BREAK=it goes, now make it stop]
18th February 2010
Well out, started the beast up selected reverse reversed out turned it round then reversed it back in. Nice.
This meant I could get the back end up and work on it without an audience.
So the brake pipe. This would also be the first time I had a good look underneath.
Exhaust first, a straight through mid section, nice
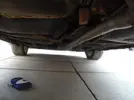
the rubbers looking tired though...
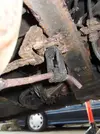
Then I saw the fuel filter bracket was rotten, so pulled that off, or what was left of it anyway, so need to sort out a replacement.
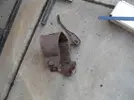
Onto the pipe, this is rather rotten, both front to rear pipes are screwed as are the bias valve pipes. Might as well do the front brake pipes as well then
Two rotten sections
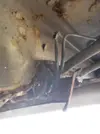
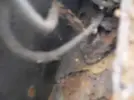
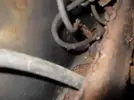
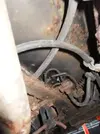
Off the car
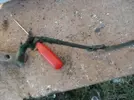
Then the tricky bit was getting the bias valve and bracket out without covering myself in brake fluid or damage it to much.
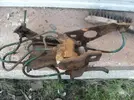
After a fiddle here it is off and wire brushed a bit etc
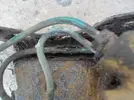
rotten pipe
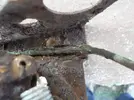
same pipe further along it
an inlet from the master cylinder pipe, rotten
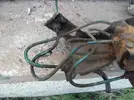
The valve was seized but now moves freely
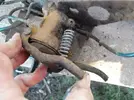
the bottom of it, had to work on those bolts that hold the valve
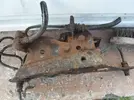
the arm that connected the valve to the rear axle, worn in the usual place
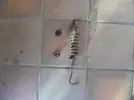
the unions that need to be replaced
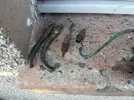
the bracket off the assembly
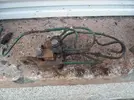
the bracket
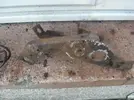
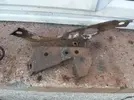
thats plus gas on the unions after a blast from the blowtorch
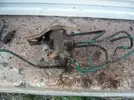
I fancy cleaning up the bracket properly and painting it. I'm drawn to white, yes a bit chavvy but I don't care.
The other thought is I need to get somewhere that's good at powder coating. So maybe hand it in tell them to blast it and stick it in with whatever they are doing, so it may come out any colour, pink, black, blue, silver etc. Should allow me to gauge how good they are.
[BREAK=Bias valve re-pipe]
1st March 2010
Well I had a spare 30 minutes today and I found a white rattle can, so I decided to paint the bias valve bracket and the pipes need done anyway. For some reason I am out of the larger male unions so could only do the lower pipes in the valve.
Yeah the paint job is poor but its better than it was. Note brand new flexi pipe as well.
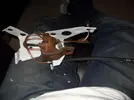
Just need the other unions and the pipe spring clip things that hold it all securely.
[BREAK=Bias valve done]
3rd March 2010
Finished up the bias valve today, thing is I need to get normal unions to do the front to back pipe as my packet I got has vanished.
Anyway here it is all finished, yes so its not all new, it is however correct and safe which is all that matters.
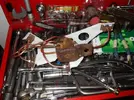
some impressive pipe bending there people!
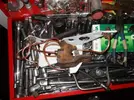
So tomorrow the plan is hopefully to fit this back up, do all the other brake pipes, bleed it and then it will have brakes for the first time since who knows when.
Whilst looking for my missing unions I found a fuel filter, nice one, outsides a bit tatty but its fine, just like new old stock if you will
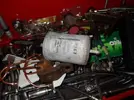
I am getting quotes for new arches to be welded in as I don't have the time to do them myself really.
[BREAK=New brake pipes]
6th March 2010
Well I managed to get an agreement about getting the arches cut off and fitted TODAY but I was let down. Arse. So the bodywork wasn't done.
I was up the back of 6 today as well to get the brakes finished.
Anyway new brake pipes front to rear, on the rear axle 4 new flexis as well. Having trouble getting a pedal so think I may need to do the master cylinder as well which I hadn't planned on. All 4 brakes work just really crappily.
Anyway got a few pics, not many as I was mostly covered in brake fluid and freezing cold.
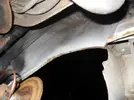
This is a pic of the offside rear inner arch, thats pretty damn clean there!
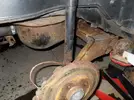
new offside rear brake line, the wet patch on the floor is brake fluid, always let it drain through to prevent air locks
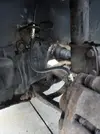
New nearside front flexi, note new steering rack gaiter.
Got a bit fed up with it today so left it after I failed to get a good pedal, if needs be a new master cylinder it will have one, a load of snotty water mix came out on initial bleeding which tbh makes me think the master cyl is the failure.
Also checked out the black chammy and its fuel filter bracket is pretty sound so will get that off that tomorrow and fit it to this car.
[BREAK=Coolant leak]
8th March 2010
There has been a coolant leak from the metal pipe that runs along the top of the gearbox, a pinhole leak that's sprays coolant out. So it needed another pipe so I dug one out.
This pipe came from the grey hatches engine, it looks rough but it cleaned up lovely, there's no issues with its structural integrity at all.
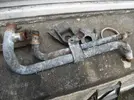
This is the pipe to the oil cooler, totally blocked, so had to clean it out
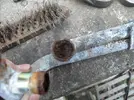
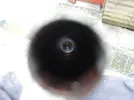
Pipe cleaned out and inside it is totally mint! Must have never had any coolant flow through it it just clogged instead!
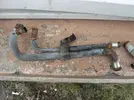
So that's the pipe cleaned out ready to be fitted most likely tomorrow, I also got a new dowel for the starter motor so its located perfectly so will fit that as well.
[BREAK=Cooling system leaks stopped]
9th March 2010
Well today I fitted the locating dowel to the starter motor, this has made the car a bit quieter when cranking..
I put another fiver of fuel into it.
And I sorted the coolant leaks.
The main leak was as shown previously the metal coolant pipe along the side of the head, there was another leak from the radiator bleed screw.
To sort the bleed screw another bleed screw was fitted after I re-cut the threads in the radiator end tank.
Onto the metal pipe, the old one came off without any drama and I fitted the new pipe. Pressure is held in the system, no leaks but it needs a thorough flush through to clean it out properly.
Some pics of the old pipe, as you can see it had corroded in a few areas
here is the actual leak source
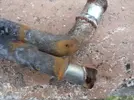
all sorted now though
[BREAK=New master cylinder]
25th March 2010
Well the other day bought a new master cylinder.
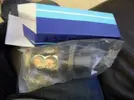
Then the next job was removing the old one. The first job I did was drain the old reservoir, then to get the fluid out of the lines crack open the bleed points on the front callipers and pump away to drain the fluid out.
Then it was a case of removing the reservoir and the pipes tot he master cylinder.
All were removed and all were thoroughly cleaned out, the right angle plastic feed at the MC had to be cleaned out with cotton buds, which was a bit annoying. But I want it spotless so theres no contamination.
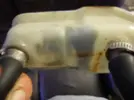
The bottle picture shows the crud that was in the system, this sediment is actually from the rubber seal on the cap! Its broken down and is now sticky and small bits fall off when you touch it. So need to get a new gasket, got some out in the stores. This is the pic, the rusty mark is from the mounting bracket, its NOT inside the bottle.
This is the new MC fitted to the servo, the brake lines, I will be replacing the 2 front brake pipe, the rears are in perfect condition, the drivers front is fine but its only short so will replace it, the passenger one has an iffy bit on it where it bends for the inner arch so will change it.
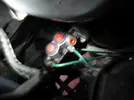
The old MC removed, in the inlet ports there was indeed a load of rubber debris, so that should be the issue resolved.
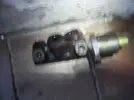
So what I need to do is do the pipe, then re-attach the reservoir and the pipes that feed the mc from it, undo the brake pipes at each calliper flush through them (to ensure no debris remains in the system) then reattach and bleed and I should be laughing.
Attach all the heatshields back on then its good to go.
The plan is brakes done, car down at weekend to get welded and fingers crossed MOT'd as well.
Then its just a case of sorting the bonnet and the rear arches for an invisible repair.
Oil and filter, change, cambelt etc still have to be done.
[BREAK=Slowly Slowly catchy monkey]
4th April 2010
Well got a new rear calliper on the nearside rear, had to cut the old cable, just as well I have new cables to go on eh! Need to do the other rear calliper.
Then get the fuel filter bracket sorted out.
I did however sort out the boot lock today, repaired the bit that breaks on the lock barrel and repaired the wires which snap from the shell to boot lid.
Wasn't in the mood for pics but I did take one.
In this picture you can see 3 wires, 1 beige 2 purple, the long purple one is a new wire, its been let in on the boot lid side (about 5 inches back from the break so to avoid any corrosion) and its about to be put in on the shell side, again this was cut right back to allow it to avoid any corrosion. If doing this repair make sure you pass the new wire through the grommet first!
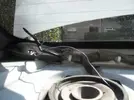
Need to get a move on with this.
[BREAK=Update - nothing has happened]
22nd October 2010
Well thought I would update this, its just being used as a store for oils etc just now.
But today I put the battery back in and it fired up first turn. It had a tappy lifter for about 15 minutes then went silent. Its so smooth and quiet, it doesn't even sound like a 16V, very quiet and smooth.
It has also just turned 19 years old. It was registered on the 18th October 1991.
I just wish I had time to work on it, especially as it only needs the back calipers fitted.
[BREAK=First Start up this year]
17th February 2011
Well not done anything to this thing in months.
I popped the blue chammys battery into it in place of the dead one that was in it, and it fired right up and settled to a silky smooth quiet idle.
I was quite impressed, it start like it had been last turned off 10 minutes beforehand.
Dash pics to prove it was running, oil pressure gauge does the usual dancing about
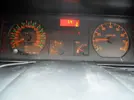
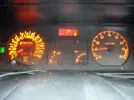
I even moved it back and forth about 2 feet. So it still moves etc.
Just waiting on the weather to improve as I want this gone so I can put the motorbike in its place.
The nearside rear door switch was iffy making the interior light stay on so that's why the other battery was dead. Poking at it seemed to fix it though.
The electric windows on it are very fast and smooth compared to my blue Chammy, faster than the Laguna's as well.
[BREAK=Work starts again...]
3rd March 2011
Well yesterday I sorted a rear caliper and today it was time to fit it to the car. Also last night I also fibre-glassed the front grille back into 1 piece.
I will start with the grille, this came with the car in 3 bits, now its back in 1 piece. Its not finished, it needs filled and painted to become invisible. It was broken obviously in the front end shunt the previous owners wife had.
Anyway pictures
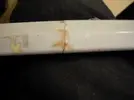
the back
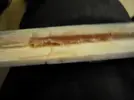
I stuck it on the car so its safe and out the way.
Then it was onto the rear offside caliper.
before I start this should not be attempted by anyone, jacking on grass is silly. Always jack on flat solid ground. Do as I say not as I do...
Old caliper on, the new line isn't so shiny now is it.
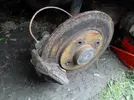
Jack sinking into the ground, this is why you always jack on a solid surface. But I was lazy and couldn't be4 bothered moving it.
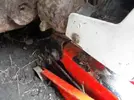
replacement caliper bolted up, old caliper on the ground, I then hack-sawed through the old handbrake cable to remove it, new cables still in the car
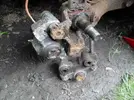
New nipple etc, I rebuilt this caliper yesterday.
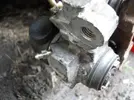
old caliper
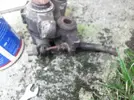
I just need to sort out the rear passenger caliper and sort out the broken nipples on the front calipers and fit the new handbrake cables.
The braking system will then be sorted.
Also removed the 17 inch alloy that was on the osr and fitted the proper ph1 alloy to it.
[BREAK=ph1 rims back on]
April 2011
Well I was fed up tripping over the ph1 rims I took off my blue chammy so stuck them on the white one to get them out of the way.
So the dodgy mismatched 17's off and back on to 3 ph1's the other ph1 tyre has serious rim leak issues.
To do this entailed moving it, as the car is enclosed on 3 sides where it usually lives.
So battery out the blue chammy and into the white one. Fired up first turn of the key no bother as always.
Drove out fine, still need to bleed the brakes (snapped nipples) so the brakes were crap.
Here it is just as I was about to pull the 17's off of it
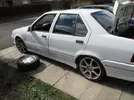
I have to admit it looks pretty damn nice with those 7 spoke alloys on it!
No pics but we all know what it looks like with standard alloys on it.
The weather is the biggest issue with this car, I need to pull the other 3 calipers off and get the broken nipples out, bleed it then it will be stopping as it should.
Really the brakes and fuel filter bracket (rotten to nothing) are all that’s stopping it from being mot'd.
[BREAK=SORN'ed again]
16th September 2011
Wow nearly 2 years I have had this.
Sod all has happened since the last update. I have moved it a few times to cut the hedge and grass. I go out connect the battery and it fires up first turn of the key, get in put it in gear and move it, do the tasks get back in start it drive it back.
I have had no time or the weather to actually do any work on it. In all honesty I doubt I will have any time to do anything on it in the next few years which is a shame.
Its so close to being mot ready as well, just need to sort the broken caliper bleed nipples, handbrake cables, fuel filter bracket and tidy the arches up.
[BREAK=Front brakes]
16th May 2012
So a few weeks back I popped over to see Mike at webuyoldrenaults/PCS and done a trade for some calipers with freed nipples.
Finally I got some time to get on with it.
First thing, the car hasn't been started since last year. The battery was in the car unconnected but connected to a solar panel thing. So about 6 months since last start.
I connected the battery, turned the key and it started right up to a smooth idle. This thing is awesome, the best running 16V I can remember ever hearing. It always starts like it was just switched off.
and the engine actually running, hard to tell but the alt pulley gives it away
So with it started I moved it onto the slabs so I could jack it up, a bit awkward with no brakes.
Anyway the brakes. New hoses etc on there from last year, year before? I can't remember, it all goes smoothly.
So offside first, bolted up grand. I also ran it up and dragged the brakes to clean the discs off, done not bad for no load actually
and done the same with the nearside
And now we have a pedal, the rear nearside caliper is still to be sorted but the brakes actually work now. Progress finally.
I haven't washed this since I got it nearly 3 years ago so its a bit dirty. It has fall out from that volcano on it, it comes off easy though. I got some pics of the side.
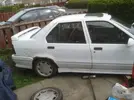
17 on the front as it holds air, the 15 has numerous rim leaks, easy sorted though
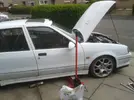
The black is the ash cloud crap, I gave it a wipe with a wet rag, comes off easy

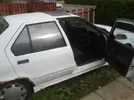
Back in position
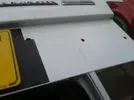
I also put the rear reflector back on, I repaired the studs months ago but I cleaned the boot lid up and stuck it back on.
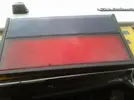
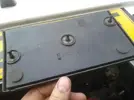
done
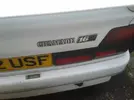
Before I put it away I let Sophie check it over, Elizabeth was in the blue chammy, they were driving to the beach apparently.
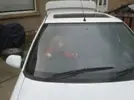
Getting closer at last.
[BREAK=Handbrake cables]
12 August 2012
Having had to pull the vehicle out I decided I best do something to it before putting it back into its space.
Its had the handbrake cables sitting in the passenger footwell for a couple of years now, not good enough. I decided to fit them and have a general check over underneath.
This is the 2 new cables and note I have nice cleaned up with new screw cable holders already on them.
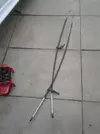
New and old cables side by sides
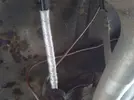
Poor picture but old cable and holder in foreground, new cable and clean holder in background
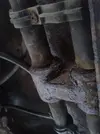
New cables on handbrake lever. You fit the caliper end last for an easier time
Caliper end, at least the bleed nipples are still shiny, the rest of the caliper seems to be a spiders haven
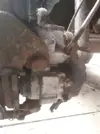
Now normally some idiot hasn't touched the adjuster at the lever, this means you can put the cables on and its ok right away. Sadly more often than not some clown instead of buying new cables/unseizing the caliper etc, you know the sensible stuff and fix the issue will instead wind up the adjustment. As it was the levers would be nearly full on if I left it as it was.
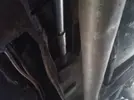
So I had to adjust the handbrake. Some plus gas and they cracked off easy with spanners. I then got a deep socket and slid it on and could wind both nuts back at the same time as the picture shows
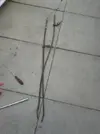
The handbrake was adjusted and feels bang on, really good. Firm even engagement clean release, just as it should be.
These are the old cables, in a poor state as you can see
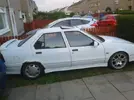
I also gave it a quick wash, not a full detail or anything, 20 mins with a sponge basically. Came up quite well, would look really nice if some time was spent on it.
The back arches are the biggest let down on the thing, they look worse than they are though.
Jobs for MOT;
Replace offside number plate bulb
Replace 3 exhaust rubbers
Nearside headlight alignment (assumption, not checked it properly)
Fit fuel filter bracket
Wiper blades
Jobs that need done;
heatshields put back in
airbox and bracket refitted
interior cleaned out (the boot mostly has been used as a store for parts)
oil and filter change
grille thing bolted in (I bonded it back together and just slid it in so it would be safe)
Won't take much to get it on the road actually. Thinking of maybe getting it on the road and using it for a bit whilst I sort out the blue chamade then sell it.
[BREAK=Almost done]
16th August 2012
Had a spare afternoon today so got on with this.
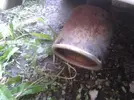
Exhaust tip wee clean
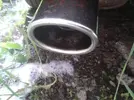
To this, not much better but from a distance better
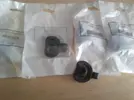
New rubbers
One of the old rubbers and new rubber
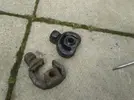
Old mid one before replacement
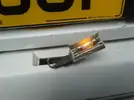
Put a new bulb in the blown number plate light, its dull because all the lights are on and its not running
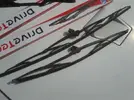
Old wipers off, new wipers still in the boxes, much better
The replacement fuel filter bracket was too far gone so had to mack up a new one
template on some glavy sheet
old filter to check
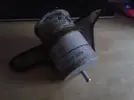
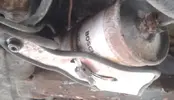
Fitted, yeah I know never put a new one on not sure where the new filter I got is.
Its not the best but its on and secure and MOT passable
So I also gave it a hoover out
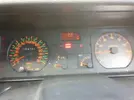
this is the dash display today
Ignore the blue chamades head on the back seat
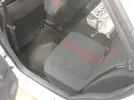
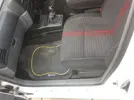
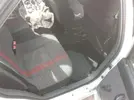
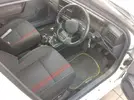
very tidy interior tbh
I also swapped the wheels from my blue chamade onto it, this means it has just over a year old Toyo T1R's on it.
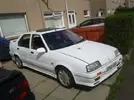
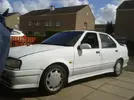
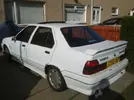
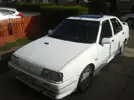
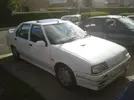
Pretty much ready to go. MOT could be done. But the heatshields under the engine bay and airbox etc still aren't fitted but that stuff doesn't take long to do.
Came along a lot in a couple of hours today. First real progress in well over a year.
I'm very tempted to use it myself and sort out the blue one properly.
The main reason I'm hesitant is the lack of aircon. I love the a/c in the Safrane, I hate going in anything without a/c these days.
A white Chamade was offered on ebay this was the third time it was up so I went over for a look. Kevin and myself headed over in the 1 litre automatic mini, 104 miles round trip, the mini was ok just a bit slow.
Anyway got there and talked to the owner, its not ran in a few years, flat tyres, slight hit in the face, mint interior, good trip comp etc.
Clutch issue, water leak and no spark were the issues, the fact the brake pedal went to the floor was also an issue.
So went through had a look, Kevin as always just about managed to stop from exploding with excitement, seriously if your buying a mar's bar he's wanting to witness it.
Took some pictures then left to contemplate it


[BREAK=Back at base]
16th October 2009
Well I bought it, went last night and collected it.
Was fun as the brakes were seized up, tyres flat but the winch yanked it onto the bed happily enough.
I got some paper work with the car, last tax disc was up in 2004. Last MOT expired August 14th 2004, I got the old style V5 and a new one which was nice.
The car will be 18 years old on Sunday.
I went up to the DVLA today, got it put in my name and SORNed so that's that dealt with.
Back at base it was time to actually look at it.
The non running issue was no spark, Common issue on them, I plugged in the module from the grey hatch, in the picture its the one that's on the scuttle panel. Anyway plugged it in and it started first turn of the key. Sounded good for sitting for a few years not running.
It was miss firing but I cleaned out the plug wells and it was perfect.

The pressure gauge works when it feels like it, the stater solenoid wires been scotch locked so its temperamental also no heat shield so it won't start if its warm

Then I decided to free off the brakes, started with the fronts

Piston was free, bottom slider wasn't, so worked that out and lubed it, this is it nearly out

Other side was more of the same but the fronts were not the issue.
This is a new style of ph1 alloy top me, so there's 4 different types! Its also got 2 different styles of centre cap fitted

I then checked why the pedal hits the floor, one of the front to rear brake pipes is burst, easy enough fix.
I then worked on the rear callipers. Started with the offside rear, snapped nipple, old badly chewed union used with new pipe, no dust seal on piston, seized solid. Bang with hammer frees up a bit, same with the other side, so need to sort out rear callipers.
I left all the wheels off and on stands, I cleaned all the wheel arches thoroughly, they came up well, its very, very solid this car, I'm most impressed.
I then washed it, so here are pics of it just washed


I removed the Renault diamond, that's where the damage is


Looks like there's no exhaust but its there trust me, its been replaced, its the small half size tip which is annoying but still ok if no alternative shows up. The cats still fitted and rattle free, may be because its empty...

4 ph1 rims 1 ph2

back on its wheels

Problems that require rectification for MOT,
Rear fog light bulb
Rear number plate bulb
Brake pipe
rear callipers
One tyre isn't legal but they all have rim leaks
wiper blades
Issues for total completion,
Rear wheel arches
Bonnet pulled straight
n/s front wing behind headlight straightened
various stone chips
alloy refurb
boot lock central locking arm as per usual
clutch issue
front grille patched/replaced
aerial
[BREAK=Some work]
17th October 2009
Well I done some work today, I will start at the end and work back, its easier.
I fitted the aerial off the black chammy, much better.
I fixed the rear fog light and number plate light bulbs
Straightened out the nearside headlight mounting point and pulled the bonnet out a bit.
The main focus today was getting the black chammy back and the clutch issue on this car.
I really didn't want to have to pull the box out, so I started at the pedal, it felt ok, pulled it out and sadly it was fine, stuck the other I had in anyway to see if it made a difference, it didn't.
I then changed the cable, again no difference.
I then removed the airbox (air pipe was split , only became obvious when it was removed), then pulled the rubber release arm gaiter off, right away i saw an issue, I then decided I can do lots of things, keyhole surgery seems easy enough so I'll give that a go as well.
I successfully managed to remove the knackered release arm pivot bush, now this may not sound impressive but those that have changed them will know its very impressive removing it through the small window with the release arm still there and not dropping it into the box!
So here is the old knackered bush alongside a nice new one

side on view, this is the worst one I can recall seeing

This is the small hole through which I had to perform my surgery, triple bypass? Easy in comparison!

I then had a closer look at the release arm, of course its worn and damaged due to it being used in this state, however there's also quite a large crack on it only visible on the back of it when the clutch is pressed!
This means the box has to come off to replace the release arm, oh well.
Another picture of the old bush

Hoo hum, looks like I will have this one a while as I'm pushed for spare time.
[BREAK=Freeing it off]
18th and 19th October 2009
Well the fact the beast was stuck fast may be handy if it was parked on a hill but my drives not on a hill. The fact it doesn't drive either doesn't help, the clutch is needed for delicate positioning in the drive.
So to look at the rear calipers. Well I started with the drivers rear, this is after I took the wheel off, looks pretty bad eh!

Well I wire brushed it, then worked at it, lubricating with brake fluid and believe it or not it cleaned up and actually works!
The passenger side, more of the same but I needed to get it moved quickly so just removed the pad carrier so I could move it easily.
The starter motors dodgy solenoid wires annoying, but will get sorted when I do the clutch.
The fan also works, the first time it kicked in aluminium dust went everywhere in a big cloud.
I topped it up with fresh fuel, the stuff in it was nearly 5 years old, it starts easier and smells better as well
I need to get the car moved over out the way so I can concentrate on the grey hatch which has been ignored recently.
[BREAK=not much has happened]
10th February 2010
Well not much but some stuff has happened.
Its now swapped places with the grey hatch.
The steelies I had put on have been changed for the Scenics alloys and it looks pretty good imo.
I also got some pics of it running before I stuck in the new CTS from the Scenic.
note outside temp, chilly! Roughly -3

not running but sensor values for both AIT and CTS are erroneous

didn't stop it firing up though and after running for a few minutes

New CTS means its perfect all the time. So engine runs good shame it can't drive! :lol:
Some pics with the Lyras on it


Need to get on with it so I can get it out the way and get the black chammy back down to strip.
[BREAK=Taking care of business]
12th February 2010
Well the mrs and the babies were off visiting, the sun was out, been out to Chiqutos for lunch, time to roll.
The plan was move the box back as the clutch has plenty of meat on it and fit a new arm and pivot bush,
And that plan was executed.
First job the rad, this was hilarious, never seen a failure like this on anything other than a truck

yes its broken properly

yes thats the bottom of the rad still on the subframe


levered it out


Need another rad then...
Onto the box splitting. Everything still connected apart from engine and box mounts and subframe link bar
Anyway pictures
starter off, all box to engine bolts removed


levered it a bit more

Now I could using my surgical skills get the release arm out through the starter motor hole, easier said than done. But I managed.
Then I had to fit the new bush through the release arm hole. So how to do this? Well my genius knows no bounds, so hot water and tape it to a spanner

oh yeah

new arm in through the starter hole,

As it sits just now the box etc is bolted back up, just need to do the rear mount up, get a rad etc which I will do tomorrow.
The clutch arm now moves as it should but the clutch is seized as expected as there is a coolant leak onto it from the t-piece. It'll free up ok though
Hopefully I will be able to move it under its own power tomorrow.
[BREAK=Clutch]
14th February 2010
Well after yesterdays success of getting it back together etc the clutch was stuck, not helped by the coolant leak onto it either.
Had this with a few of them, normally in gear and start it bangs them free, this one took a bit more.
Anyway pry bar freed it off this morning. I started it in gear and it was fine, yay, got into first and reverse no problem and moved the car, for the first time in about 4 years under its own power.
Anyway as it heated up it no longer worked, the clutch dragged. Damn.
Thing is I think its the cable as I chucked an old one on when trying to diagnose it at first and the pedal ratchet, so will put the other cable back on I think.
Also the other issue is theres no heatshields on it or even the brackets for them, I have them and will fit them though.
Still it moves itself!
Get that sorted and the brake pipe then we are motoring.
[BREAK=clearing up the clutch job]
17th February 2010
Well I decided to sort this properly once and for all. I had a Renault cable in the boot so stuck that one, there was some slight differences to the cable in length, put it in and it was worse.
So the last thing was the pedal, I pulled the pedal again, ratchet teeth perfect etc, compared to the old pedal, it was slightly bent. The slight bend at the pivot was about 15mm at the end.
Pedal back in and perfect.
So I then could out the heater duct back in and put the bottom of the dash back up etc leaving me with this

I also remember to get pics of the old release arm.
As you can see the cracking is extensive

the pivot bush side, not a good pic but good enough

[BREAK=it goes, now make it stop]
18th February 2010
Well out, started the beast up selected reverse reversed out turned it round then reversed it back in. Nice.
This meant I could get the back end up and work on it without an audience.
So the brake pipe. This would also be the first time I had a good look underneath.
Exhaust first, a straight through mid section, nice

the rubbers looking tired though...

Then I saw the fuel filter bracket was rotten, so pulled that off, or what was left of it anyway, so need to sort out a replacement.

Onto the pipe, this is rather rotten, both front to rear pipes are screwed as are the bias valve pipes. Might as well do the front brake pipes as well then
Two rotten sections


Off the car

Then the tricky bit was getting the bias valve and bracket out without covering myself in brake fluid or damage it to much.
After a fiddle here it is off and wire brushed a bit etc

rotten pipe

same pipe further along it

an inlet from the master cylinder pipe, rotten

The valve was seized but now moves freely

the bottom of it, had to work on those bolts that hold the valve

the arm that connected the valve to the rear axle, worn in the usual place

the unions that need to be replaced

the bracket off the assembly

the bracket


thats plus gas on the unions after a blast from the blowtorch

I fancy cleaning up the bracket properly and painting it. I'm drawn to white, yes a bit chavvy but I don't care.
The other thought is I need to get somewhere that's good at powder coating. So maybe hand it in tell them to blast it and stick it in with whatever they are doing, so it may come out any colour, pink, black, blue, silver etc. Should allow me to gauge how good they are.
[BREAK=Bias valve re-pipe]
1st March 2010
Well I had a spare 30 minutes today and I found a white rattle can, so I decided to paint the bias valve bracket and the pipes need done anyway. For some reason I am out of the larger male unions so could only do the lower pipes in the valve.
Yeah the paint job is poor but its better than it was. Note brand new flexi pipe as well.

Just need the other unions and the pipe spring clip things that hold it all securely.
[BREAK=Bias valve done]
3rd March 2010
Finished up the bias valve today, thing is I need to get normal unions to do the front to back pipe as my packet I got has vanished.
Anyway here it is all finished, yes so its not all new, it is however correct and safe which is all that matters.

some impressive pipe bending there people!

So tomorrow the plan is hopefully to fit this back up, do all the other brake pipes, bleed it and then it will have brakes for the first time since who knows when.
Whilst looking for my missing unions I found a fuel filter, nice one, outsides a bit tatty but its fine, just like new old stock if you will

I am getting quotes for new arches to be welded in as I don't have the time to do them myself really.
[BREAK=New brake pipes]
6th March 2010
Well I managed to get an agreement about getting the arches cut off and fitted TODAY but I was let down. Arse. So the bodywork wasn't done.
I was up the back of 6 today as well to get the brakes finished.
Anyway new brake pipes front to rear, on the rear axle 4 new flexis as well. Having trouble getting a pedal so think I may need to do the master cylinder as well which I hadn't planned on. All 4 brakes work just really crappily.
Anyway got a few pics, not many as I was mostly covered in brake fluid and freezing cold.
This is a pic of the offside rear inner arch, thats pretty damn clean there!

new offside rear brake line, the wet patch on the floor is brake fluid, always let it drain through to prevent air locks

New nearside front flexi, note new steering rack gaiter.

Got a bit fed up with it today so left it after I failed to get a good pedal, if needs be a new master cylinder it will have one, a load of snotty water mix came out on initial bleeding which tbh makes me think the master cyl is the failure.
Also checked out the black chammy and its fuel filter bracket is pretty sound so will get that off that tomorrow and fit it to this car.
[BREAK=Coolant leak]
8th March 2010
There has been a coolant leak from the metal pipe that runs along the top of the gearbox, a pinhole leak that's sprays coolant out. So it needed another pipe so I dug one out.
This pipe came from the grey hatches engine, it looks rough but it cleaned up lovely, there's no issues with its structural integrity at all.

This is the pipe to the oil cooler, totally blocked, so had to clean it out

Pipe cleaned out and inside it is totally mint! Must have never had any coolant flow through it it just clogged instead!

So that's the pipe cleaned out ready to be fitted most likely tomorrow, I also got a new dowel for the starter motor so its located perfectly so will fit that as well.
[BREAK=Cooling system leaks stopped]
9th March 2010
Well today I fitted the locating dowel to the starter motor, this has made the car a bit quieter when cranking..
I put another fiver of fuel into it.
And I sorted the coolant leaks.
The main leak was as shown previously the metal coolant pipe along the side of the head, there was another leak from the radiator bleed screw.
To sort the bleed screw another bleed screw was fitted after I re-cut the threads in the radiator end tank.
Onto the metal pipe, the old one came off without any drama and I fitted the new pipe. Pressure is held in the system, no leaks but it needs a thorough flush through to clean it out properly.
Some pics of the old pipe, as you can see it had corroded in a few areas

here is the actual leak source

all sorted now though
[BREAK=New master cylinder]
25th March 2010
Well the other day bought a new master cylinder.

Then the next job was removing the old one. The first job I did was drain the old reservoir, then to get the fluid out of the lines crack open the bleed points on the front callipers and pump away to drain the fluid out.
Then it was a case of removing the reservoir and the pipes tot he master cylinder.
All were removed and all were thoroughly cleaned out, the right angle plastic feed at the MC had to be cleaned out with cotton buds, which was a bit annoying. But I want it spotless so theres no contamination.
The bottle picture shows the crud that was in the system, this sediment is actually from the rubber seal on the cap! Its broken down and is now sticky and small bits fall off when you touch it. So need to get a new gasket, got some out in the stores. This is the pic, the rusty mark is from the mounting bracket, its NOT inside the bottle.

This is the new MC fitted to the servo, the brake lines, I will be replacing the 2 front brake pipe, the rears are in perfect condition, the drivers front is fine but its only short so will replace it, the passenger one has an iffy bit on it where it bends for the inner arch so will change it.

The old MC removed, in the inlet ports there was indeed a load of rubber debris, so that should be the issue resolved.

So what I need to do is do the pipe, then re-attach the reservoir and the pipes that feed the mc from it, undo the brake pipes at each calliper flush through them (to ensure no debris remains in the system) then reattach and bleed and I should be laughing.
Attach all the heatshields back on then its good to go.
The plan is brakes done, car down at weekend to get welded and fingers crossed MOT'd as well.
Then its just a case of sorting the bonnet and the rear arches for an invisible repair.
Oil and filter, change, cambelt etc still have to be done.
[BREAK=Slowly Slowly catchy monkey]
4th April 2010
Well got a new rear calliper on the nearside rear, had to cut the old cable, just as well I have new cables to go on eh! Need to do the other rear calliper.
Then get the fuel filter bracket sorted out.
I did however sort out the boot lock today, repaired the bit that breaks on the lock barrel and repaired the wires which snap from the shell to boot lid.
Wasn't in the mood for pics but I did take one.
In this picture you can see 3 wires, 1 beige 2 purple, the long purple one is a new wire, its been let in on the boot lid side (about 5 inches back from the break so to avoid any corrosion) and its about to be put in on the shell side, again this was cut right back to allow it to avoid any corrosion. If doing this repair make sure you pass the new wire through the grommet first!

Need to get a move on with this.
[BREAK=Update - nothing has happened]
22nd October 2010
Well thought I would update this, its just being used as a store for oils etc just now.
But today I put the battery back in and it fired up first turn. It had a tappy lifter for about 15 minutes then went silent. Its so smooth and quiet, it doesn't even sound like a 16V, very quiet and smooth.
It has also just turned 19 years old. It was registered on the 18th October 1991.
I just wish I had time to work on it, especially as it only needs the back calipers fitted.
[BREAK=First Start up this year]
17th February 2011
Well not done anything to this thing in months.
I popped the blue chammys battery into it in place of the dead one that was in it, and it fired right up and settled to a silky smooth quiet idle.
I was quite impressed, it start like it had been last turned off 10 minutes beforehand.
Dash pics to prove it was running, oil pressure gauge does the usual dancing about


I even moved it back and forth about 2 feet. So it still moves etc.
Just waiting on the weather to improve as I want this gone so I can put the motorbike in its place.
The nearside rear door switch was iffy making the interior light stay on so that's why the other battery was dead. Poking at it seemed to fix it though.
The electric windows on it are very fast and smooth compared to my blue Chammy, faster than the Laguna's as well.
[BREAK=Work starts again...]
3rd March 2011
Well yesterday I sorted a rear caliper and today it was time to fit it to the car. Also last night I also fibre-glassed the front grille back into 1 piece.
I will start with the grille, this came with the car in 3 bits, now its back in 1 piece. Its not finished, it needs filled and painted to become invisible. It was broken obviously in the front end shunt the previous owners wife had.
Anyway pictures

the back

I stuck it on the car so its safe and out the way.
Then it was onto the rear offside caliper.
before I start this should not be attempted by anyone, jacking on grass is silly. Always jack on flat solid ground. Do as I say not as I do...
Old caliper on, the new line isn't so shiny now is it.

Jack sinking into the ground, this is why you always jack on a solid surface. But I was lazy and couldn't be4 bothered moving it.

replacement caliper bolted up, old caliper on the ground, I then hack-sawed through the old handbrake cable to remove it, new cables still in the car

New nipple etc, I rebuilt this caliper yesterday.

old caliper

I just need to sort out the rear passenger caliper and sort out the broken nipples on the front calipers and fit the new handbrake cables.
The braking system will then be sorted.
Also removed the 17 inch alloy that was on the osr and fitted the proper ph1 alloy to it.
[BREAK=ph1 rims back on]
April 2011
Well I was fed up tripping over the ph1 rims I took off my blue chammy so stuck them on the white one to get them out of the way.
So the dodgy mismatched 17's off and back on to 3 ph1's the other ph1 tyre has serious rim leak issues.
To do this entailed moving it, as the car is enclosed on 3 sides where it usually lives.
So battery out the blue chammy and into the white one. Fired up first turn of the key no bother as always.
Drove out fine, still need to bleed the brakes (snapped nipples) so the brakes were crap.
Here it is just as I was about to pull the 17's off of it

I have to admit it looks pretty damn nice with those 7 spoke alloys on it!
No pics but we all know what it looks like with standard alloys on it.
The weather is the biggest issue with this car, I need to pull the other 3 calipers off and get the broken nipples out, bleed it then it will be stopping as it should.
Really the brakes and fuel filter bracket (rotten to nothing) are all that’s stopping it from being mot'd.
[BREAK=SORN'ed again]
16th September 2011
Wow nearly 2 years I have had this.
Sod all has happened since the last update. I have moved it a few times to cut the hedge and grass. I go out connect the battery and it fires up first turn of the key, get in put it in gear and move it, do the tasks get back in start it drive it back.
I have had no time or the weather to actually do any work on it. In all honesty I doubt I will have any time to do anything on it in the next few years which is a shame.
Its so close to being mot ready as well, just need to sort the broken caliper bleed nipples, handbrake cables, fuel filter bracket and tidy the arches up.
[BREAK=Front brakes]
16th May 2012
So a few weeks back I popped over to see Mike at webuyoldrenaults/PCS and done a trade for some calipers with freed nipples.
Finally I got some time to get on with it.
First thing, the car hasn't been started since last year. The battery was in the car unconnected but connected to a solar panel thing. So about 6 months since last start.
I connected the battery, turned the key and it started right up to a smooth idle. This thing is awesome, the best running 16V I can remember ever hearing. It always starts like it was just switched off.

and the engine actually running, hard to tell but the alt pulley gives it away

So with it started I moved it onto the slabs so I could jack it up, a bit awkward with no brakes.
Anyway the brakes. New hoses etc on there from last year, year before? I can't remember, it all goes smoothly.
So offside first, bolted up grand. I also ran it up and dragged the brakes to clean the discs off, done not bad for no load actually

and done the same with the nearside

And now we have a pedal, the rear nearside caliper is still to be sorted but the brakes actually work now. Progress finally.
I haven't washed this since I got it nearly 3 years ago so its a bit dirty. It has fall out from that volcano on it, it comes off easy though. I got some pics of the side.

17 on the front as it holds air, the 15 has numerous rim leaks, easy sorted though

The black is the ash cloud crap, I gave it a wipe with a wet rag, comes off easy

Back in position

I also put the rear reflector back on, I repaired the studs months ago but I cleaned the boot lid up and stuck it back on.


done

Before I put it away I let Sophie check it over, Elizabeth was in the blue chammy, they were driving to the beach apparently.

Getting closer at last.
[BREAK=Handbrake cables]
12 August 2012
Having had to pull the vehicle out I decided I best do something to it before putting it back into its space.
Its had the handbrake cables sitting in the passenger footwell for a couple of years now, not good enough. I decided to fit them and have a general check over underneath.
This is the 2 new cables and note I have nice cleaned up with new screw cable holders already on them.

New and old cables side by sides

Poor picture but old cable and holder in foreground, new cable and clean holder in background

New cables on handbrake lever. You fit the caliper end last for an easier time

Caliper end, at least the bleed nipples are still shiny, the rest of the caliper seems to be a spiders haven

Now normally some idiot hasn't touched the adjuster at the lever, this means you can put the cables on and its ok right away. Sadly more often than not some clown instead of buying new cables/unseizing the caliper etc, you know the sensible stuff and fix the issue will instead wind up the adjustment. As it was the levers would be nearly full on if I left it as it was.
So I had to adjust the handbrake. Some plus gas and they cracked off easy with spanners. I then got a deep socket and slid it on and could wind both nuts back at the same time as the picture shows

The handbrake was adjusted and feels bang on, really good. Firm even engagement clean release, just as it should be.
These are the old cables, in a poor state as you can see

I also gave it a quick wash, not a full detail or anything, 20 mins with a sponge basically. Came up quite well, would look really nice if some time was spent on it.
The back arches are the biggest let down on the thing, they look worse than they are though.

Jobs for MOT;
Replace offside number plate bulb
Replace 3 exhaust rubbers
Nearside headlight alignment (assumption, not checked it properly)
Fit fuel filter bracket
Wiper blades
Jobs that need done;
heatshields put back in
airbox and bracket refitted
interior cleaned out (the boot mostly has been used as a store for parts)
oil and filter change
grille thing bolted in (I bonded it back together and just slid it in so it would be safe)
Won't take much to get it on the road actually. Thinking of maybe getting it on the road and using it for a bit whilst I sort out the blue chamade then sell it.
[BREAK=Almost done]
16th August 2012
Had a spare afternoon today so got on with this.
Exhaust tip wee clean

To this, not much better but from a distance better

New rubbers

One of the old rubbers and new rubber

Old mid one before replacement

Put a new bulb in the blown number plate light, its dull because all the lights are on and its not running

Old wipers off, new wipers still in the boxes, much better

The replacement fuel filter bracket was too far gone so had to mack up a new one
template on some glavy sheet

old filter to check

Fitted, yeah I know never put a new one on not sure where the new filter I got is.
Its not the best but its on and secure and MOT passable

So I also gave it a hoover out
this is the dash display today

Ignore the blue chamades head on the back seat


very tidy interior tbh

I also swapped the wheels from my blue chamade onto it, this means it has just over a year old Toyo T1R's on it.


Pretty much ready to go. MOT could be done. But the heatshields under the engine bay and airbox etc still aren't fitted but that stuff doesn't take long to do.
Came along a lot in a couple of hours today. First real progress in well over a year.
I'm very tempted to use it myself and sort out the blue one properly.
The main reason I'm hesitant is the lack of aircon. I love the a/c in the Safrane, I hate going in anything without a/c these days.
Last edited by a moderator:

