me40
New Member
Hello everybody! I joined this forum 4 years ago, and after so many years reading and watching here - now is the first time I have something to share here 
I had before one lovely R19 coupe in very good condition I planned to start a project with it, but anyway it failed and I sold it - it was really nice - white one "S-Sprint" modification - black interior, black dash, black carpet, "recaro" style seats with engine 1.8 single point injection 90 h.p. - I added to it many "extras" like - central locking, el.windows and el.mirrors, a/c, trip computer, dual head lamps ... was lovely ...but finally I sold it last summer as there were nobody to drive it and was only resting.
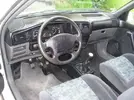
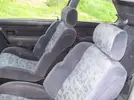
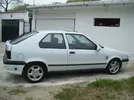
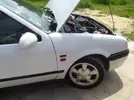
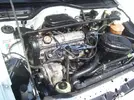
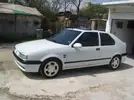
So this was the predecessor of my presrent project.
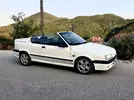
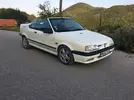
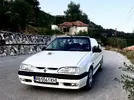
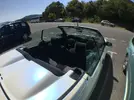
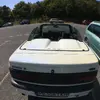
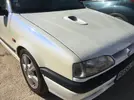
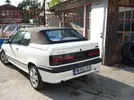
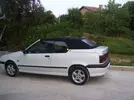
The very next day I sold that coupe I realized that doesn't have even one R19 is not a good idea for me, so I checked the second hand car online sites and found that one - R19 cabby (white!) 1994, 1.8 SPI and immediately decided to have it - it took me only 2 min to take the decision, so ... this was the project ONE
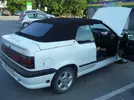
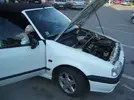
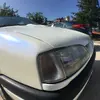
What I took real care was the body to be as much as possible "rust free" and in good condition - all the other I didn't care as was planned all other to be renewed.
I think the condition is ok as for 17 years old car, so I bought it ...
[Break=To-Do List]
(this page does not contain pictures :lol
As I already got the car here comes my "To-Do" list for it:
(As I was planning to make a project since a long time ago, many of the tasks were already crystal clear in my head for a long time)
- to swap to new engine - my wish was for 2.0 8v or 16v - after many reasons counted final decision was to gain 2.0 8v from laguna/megane/scenic
- to improve the R19's brakes, well-known as not so great
- to install a/c
- to install trip computer
- to install dual head lights
- to arrange new "lower" suspension
- to arrange a leather interior from cabby - black!
- to install ABS Bosch
- sound-proof the cab
- etc.
Here are some details about each item:
- enginie - everybody will prefer 2.0 16v from megane, but for the cabby was a big deal to install it together with and a/c, as megane engine bay is larger than R19s, so there will be a lot of troubles with the a/c compressor and hydr.steering pump installation, with the radiator mounting and air filter box, finally el.harness installation will require a lot of work and will not look like "original" after all, so I prefered 2.0 8v from laguna/megane/scenic - the power is 115 h.p. which I believe with a remap can goes to 120-122 h.p. Torque is not so bad at all - initial torque power is 168 Nm, after remap I believe can obtain about 175 Nm (compared to 185 Nm from 2.0 16v), but the great advantage for 2.0 8v is that this torque I can have it at lower rpm's so will be much more practical for cabby, as the idea of the cabby for me is not the speed, but the look . Last, but not at least, engine of 1.8 and 2.0 are ideantical as sizes and suspension, so this will ease a lot the project. Also gainig and el.harness from R19 1.8 Baccara will make the el.istallation to look like original from Renault, as both them 1.8 MPI and 2.0 MPI have the same sensors and periphery
- brakes - for front brakes idea is seen in this lovely site - to upgrade them to 285mm discs from R21 TXI, and the rear brakes - just to install 238mm disc kit from R19 1.8 16v. Front calipers for 288mm discs have a piston diameter of 54mm compared to 48mm presently. Also have an idea to change the master brake cylinder with one from laguna 2.0 where the piston diameter is 23,81mm compared to 21mm presently. I believe all this will be enough good to achieve braking similar to my megane 2.0 16v which I find to be very good.
- a/c - many ppl think that cabby doesn't need a/c, but I think on opposite, so an a/c will be installed. The biggest challenge here is that I don't want to install the original a/c compressor from R19, which is Sanden 7H15, but I would like to fit the one from megane 2.0 16v - Sanden 7V16 which has a variable displacement and much more efficiency running on low rpms. For that reason compressor installing will follow the laguna type - compressor will be at the lowest postion, above it - the steering hydr.pump and above them - the alternator. Originally on R19's lowest postition is from the steering hydr.pump and a/c compressor is above it. So laguna alternator bracket should be obtained for the project. Also keeping in mind that 2.0 at laguna has an upper suspension on the belt side, but R19 has lower suspension below the hydr.pupm, so modification on the alternator bracket from laguna and the original engine suspension bracket should be made to accomodate both of them
- trip computer - it's just a matter of putting as mush as possible original "extras" to my project. The trip computer and board should be from R19 16v - the idea is to use the built-in oil pressure gauge - for that purpose would obtain and oil pressure sensor from R19 16v
- as the previous item - dual head lights should be arranged - I like to be with el.regulating leveling so to be "full extra" For that reason the headlamps el.harness should be changed
- "lower suspension" for the cabby - no need to explain it. The problem is just to decide what to use - the original 1.8 16v one or to buy coil overs for my project
- leather black interior for cabby - this is the hardest item, especially if I want to find interior in mint condition
- ABS Bosch - I really preffer the cabby to be equipped with ABS, but hate the Bendix one, the really good one is the Bosch type, but unfortunately it's very rare, as is installed after 11/94 and not on all version, so this is also hard to complete item
- sound-proof - I think no need to explain it, it's just better to have it
- etc. - all the rest not mentioned till now :lol:
[BREAK=New Engine 01]
As I'm not currently at home the project started remotely - I'm searching and locating all the parts I need from internet and a friend of mine is receiving and collecting them in Bulgaria, preparing everything for the project. This great friend of mine will take care for engine renewing and replacing, for the brakes changes, and for the new suspension. I will do the rest. (A little secret - this friend of mine has also a project - R5 GTE 2.0 8v with a lot of extras, el.steering, a/c e.t.c.)
As I keep always an eye on Bulgarian's Renault forum I know all the time where I can find the parts I need, at best prices, and all the time can relay on friends from that forum to check locally for each part I intend to buy.
So a friend from the forum working in car's scrap yard for Renault breaking cars recommended me a good engine 2.0 8v from laguna (they had 4 pcs, so he assured me that one was the best one of all four). So I sent my great friend and project supporter No.1 to go and buy it.
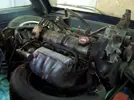
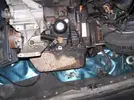
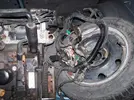
New engine was moved to his garage (I call it "chop shop" and when he has a free time he will start with the engine rebuild
[BREAK=Front Brakes 01]
I succeeded to find from internet front brakes from R21 TXI 285mm, so we bought them. Calippers went for recycling (I hope there will be repair kit for those old Bosch-Bendix ones). Discs will not be replaces for now, only will be machined, after all the system is completed and I'm sure it works fine will buy new discs. Adapter brakes will be produced following the dimensional drawing I found in internet for that upgrade to 285mm.
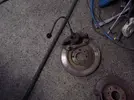
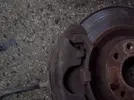
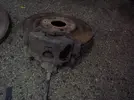
Adapters were ready soon after that:
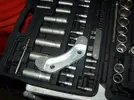
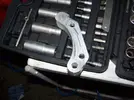
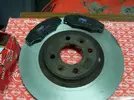
Discs were machined, so only remained to see the result of the calipper's recycling
[BREAK=New Engine 02]
My friend and his "chop shop" started the new engine re-biuld.
Cylinder head first was cleaned good and fully dismantled, after that went for face flatness check and control machining. Valves and valve seats will be machined too. New valve stems will be fitted. As "chop shop" reported new valve guides will be required.
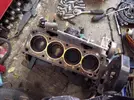
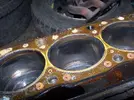
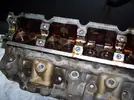
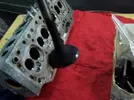
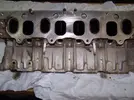
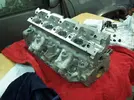
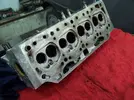
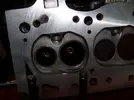
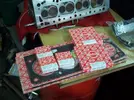
Off course all seals and gaskets will be changed - I prefered Elring - most of the Renault engines from that years (94-96) come out from the factory with Elring:
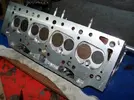
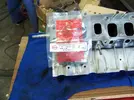
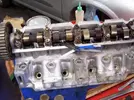
Cylinder head was overhauled and mounted back, valves clearances were adjusted:
[BREAK=Cooling 01]
No need to mention how important is cooling - my idea was everything in this system to be new. The original 1.8 radiator will be replaced by radiator from 1.8 16v for model with a/c. So we bought one brend new:
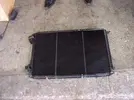
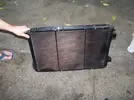
Most of you probably know that on R19 1.8 16v version with a/c radiator and a/c condenser have a little strange (weird) installation:
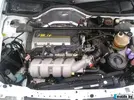
So, had to find out also the support brackets from 1.8 16v:
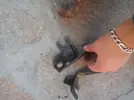
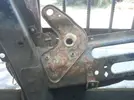
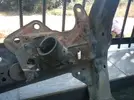
Should be de-rusted and painted again, but this will postponed, because initially I think to run the car with the original radiator, as a/c installation will be earliest next summer.
We bought a 2-speed cooling fan from 1.8 16v in not so bad condtion - shaped for a low-mounted a/c compressor - perfect for the project:
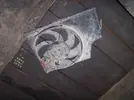
(good washing required)
Also supplied a/c condenser - 2 pcs - one copper and one aluminium
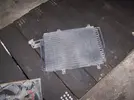
Plan is to arrange and to buy brand new thermostat and cooling system hoses.
[BREAK=Various Parts 01]
Meanwhile in the background I continued to hunt for parts required for my project - some of them - brand new and some - second hand
The Big Hit was that I succeeded to find out engine harness from R19 1.8 MPI Baccara - great advantage is that it fits perfect the new 2.0 engine (all sensors, tps, injectors, battery .. everything is on the right place), also fits perfect for the a/c 2-speed cooling fan and the freon pressostat ... just the perfect solution for the project:
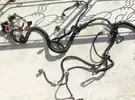
Needs only a minor modification - alternator connection, extending the a/c compressor "+" line and to check the injector supply as on R19 1.8 are full group , and on Laguna 2.0 are 2x2.
Luckily from same car I bought el.harness for dual head lights with el.regulating leveling. I said luckily, because that car was scrapped in 2004 but the owner kept some parts from it till now.
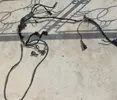
I bought also engine el.harness from R19 1.8 16 with a/c - just to modificate my el.harness to be close to perfect - from that one will take the cable for the oil pressure sensor, also can adjust the radiator switch for the cooling fan, as the position is different on 1.8 8v and 16v with a/c
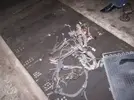
Arranged also panel for cabin heating for model with a/c
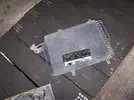
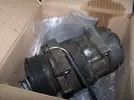
Also an a/c compressor Sanden 7V16 from Megane 2.0 16v were bought again via internet:
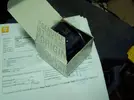
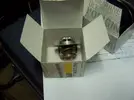
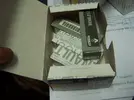
Some parts were supplied meanwhile from Renault, and other were ordered for later supply:
In that time the ONE is just sleeping 400km away from the "chop shop" not guessing what will happen soon (I believe)
[BREAK=Transmission 01]
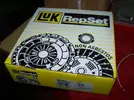
New clutch kit were supplied for the project - LUK on 200mm as the original one we took off from the engine:
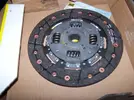
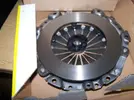
The flywheel was machined with 1.5mm to obtain perfect flatness for the new clutch:
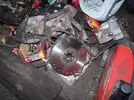
Later all will be installed on the engine
[BREAK=New Engine 03]
After the cylinder head overhaul the work on the engine re-build continued with the crankcase investigation. What "chop whop" discovered was not so bad for an Italian maintained engine:
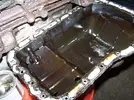
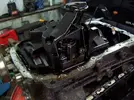
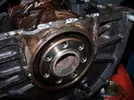
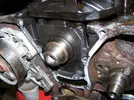
Leaks from the crankcase cover and the last bearing cover were discovered.
Last main bearing were opened for inspection and was found in OK condition, so I decided to not replace the bearings and the piston rings - some may say this is a mistake, but prefer the original ones if they are OK instead of after market ones.
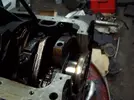
Oil seals were replaces, crankcase was closed and clutch was installed:
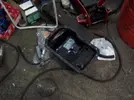
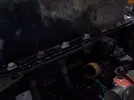
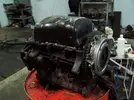
So everything was ready for "closing" the engine:
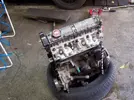
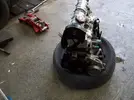
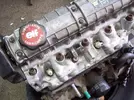
Here can be seen also the oil pressure sensor we supplied from R19 1.8 16v. Will install it after the replacment of the engines - it has position on the back side of the cylinder block - presently blinded by bolt (near the driving shaft for the oil pump)
[BREAK=Suspension 01]
There were two ideas for the suspension - original one from R19 16v or after market - coil overs most probably. Finally I decided to be after market. For that purpose I bought (again via internet) a pair of megane 2.0 16v front suspension strut mounts - they are same as R19 1.8 16v, but unlikely the ones for R19 do not have split problems. I bought used ones but in very good conditions - new ones would havily break the budget :roll:
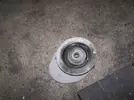
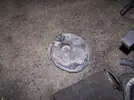
Plates covers for the shock absorbers were supplied (not very good condition, but after some de-rusting and painting will be like new ones )
)
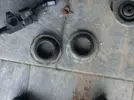
Also new strut bearing were bought (as can be seen meanwhile dashboard from 1.8 16v with trip computer were supplied, remains now to obtain a level gauge for fuel tank from a car with trip computer)
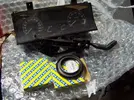
So, here came the key moment for the suspension After long look up and discussing with many friends I decided to order ones from "Raceland" - 3 friends already ordered and assured me that is very good deal for the money. So I ordered too - front coil overs lowering up to 60mm, and rear shock absorbers for lowered suspension:
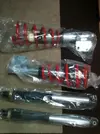
So now this item is almost done - remains only inspection of the torsion bars and lowering the rear suspension.
[BREAK=Rear Brakes 01]
From other project (that bankrupted) bought rear brake discs and pads and calipers - calipers are in very good condition and no need revising, the discs are less than 2000 km, so I think it was a good deal:
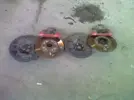
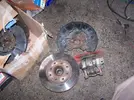
Have to buy a brake load distributor and to revise it, also braking wires for the hand brake
[BREAK=Various Parts 02]
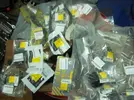
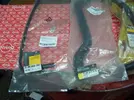
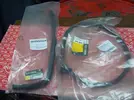
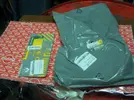
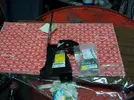
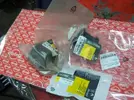
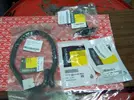
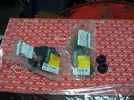
The parts from Renault ordered a month ago arrived (unfotunately not all )
)
I ordered struts for the wheel , fuel hoses In and Out of the fuel ramp, water cooling hoses, air supply and recirculation hoses, support for the rear brakes load distributor, some accessories ...
[BREAK=Winter marches on]
First week of the New Year the "White swan" was moved to the Chop shop
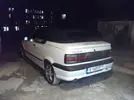
And then came the rain (snow) ... :lol:

The result was 4 weeks no work on the project and ... roof dameged from the temperatures (-25 for a week). Good looking one was bought from Austrian scrapyard.
[BREAK=14 months hunting ended with success - ABS Bosch was found!!!]
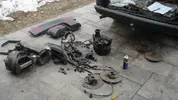
After so long searching (from November 2010 for the previous R19) car for breaking with ABS Bosch was finally found ... 1996 1.8MPI 110 h.p. Very rare one indeed - this ABS Bosch which replaced ABS Bendix is installed after 11/1994 and not to all models - models DT and 1.8 16v with A/C which require electrical power steering have been continued to be produced with Bendix. So the Chop shop crew travelled 320 km to the donor and back
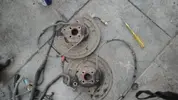
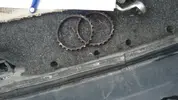
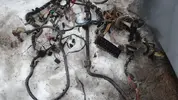
The donor was perfectly equiped with A/C, so the evaparator, fan and flap all harnes and control module were taken too
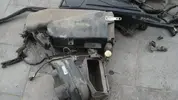
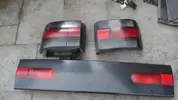
The original back pannel and fore lights were replaced with the darkest ones from the donor too
[BREAK -Day]
-Day]
Soo, nearly month ago ...D-Day came :roll: The cabrio entered into the Chop shop
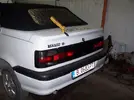
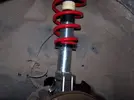
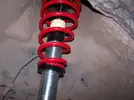
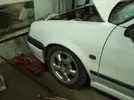
They lowered it down down down Most probably will not remain so low, I'll ask the Chop shop to rise it up a little bit, but first to find the propper 16' alloy wheels.
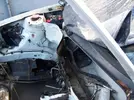
Then started the taking the engine out of the bay
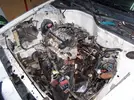
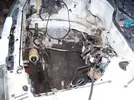
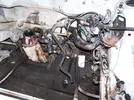
The engine mountings were o.o.o. (out of order), even worse
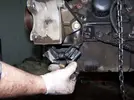
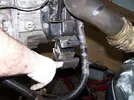
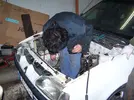
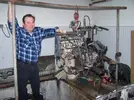
Just painted and with new bushes Kleber
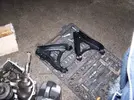
Steering rack was inspected - the original one was leaking so I found out another second hand one in good condition, but with problem in the hose connection, so from two was made one good New genuine mounting bushes were arranged already from Renault
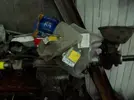
Gear box was washed, later overhauled, and the sealing for the selector fork was changed as it was leaking
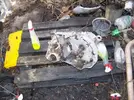
The engine bay was washed and looked like brand new
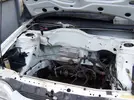
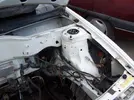
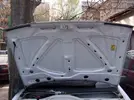
Hope more to come soon. In fact Bulgarian Renault Fest this year is on 9-th of June, so this is the aim ...
[BREAK=More preparations]
What about the breaks :arrow: .... front brakes soon has to be reconditioned (staying 5 months at a recondition shop) and I bought break master cylinder from Laguna 2.0 8v without ABS and break servo from R19 16v, so:
- front brakes cylinder - 54mm
- master cylinder 23.88mm
- brake servo - 11 inches
My original idea was to put break servo from Megane 2.0 16v - but unfortunately will be in collision with the hydraulic pump unit of the ABS, so will have to accept the one from R19 16v, but I believe it will be enough for significially improment of the braking.
For the rear braking there are no surprises:
- brake pressure distributor and rear disc brakes from R19 16v
Also progress on the A/C part was achieved - was arranged the mountig space for the evaporater, fan and recycling flap.
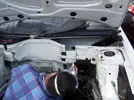
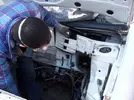
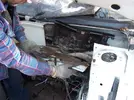
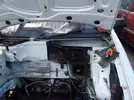
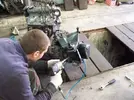
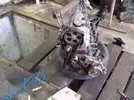
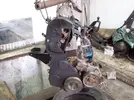
Engine and the gearbox were coupled together.
and one more hit for the project - we succeed to find out the exact model wheels I've always imagined the project
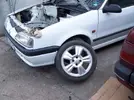
Lyra 16 inched, 6.5J, ET35, tyres will be 195x50x16 :idea:
[Break=Engine - In]
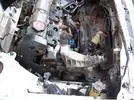
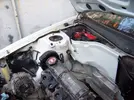
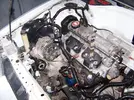
Long time no reporting from me. The bracket for the AC compressor was cut a little bit, the plate for the lower engine mounting was modified too, as can be seen from the pic.
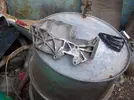
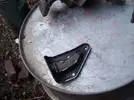
So, engine was lowered in the bay finally ...
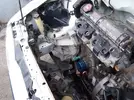
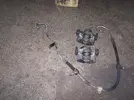
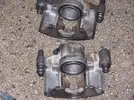
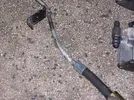
Front calipers came back from recondition meanwhile, and hydraulic hoses were modified accordingly to fit the 19's system with the Laguna's configuration and location.
[Break=Few Aspects of the Headlights - Part I]
I've collected few headlights - all of them dual sections light, but not all of them with electrical level regulation, so dismantled all of them and prepared two pieces from the best parts I had at the time
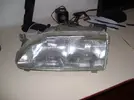
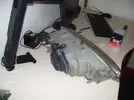
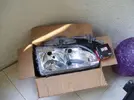
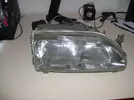
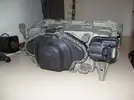
Had the idea to send the reflectors for new coating, but didn't done it (yet).
[Break=ABS Installation - Part I]
The Chop Shop started the preparation for the ABS installing. They've prepared the hydro-module bracket installation carefully.
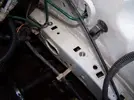
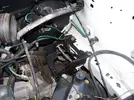
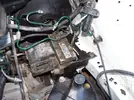
There was a little fighting from a 400 km distance why they didn't clean the module before they install it. Finally I cleaned it few months later and forgive them about it
The suction manifold were branded by the Chop Shop and fixed in the engine
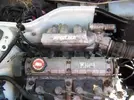
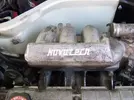
The brake servo we installed was from R19 16v. Unfortunately it had a leak at the test later and was replaced with another one, which came with the ABS set.
Main brake pump is from Laguna 1 2.0 engine with diameter of the plunger 23.8mm instead of the original R19 20.9mm plunger.
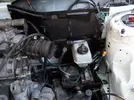
For two of the brake lines we needed and adapters

[Break=Rear Suspension Revision]
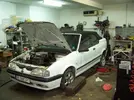
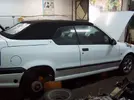
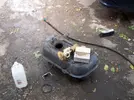
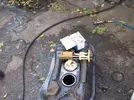
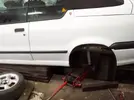
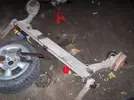
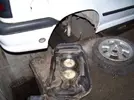
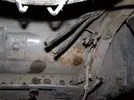
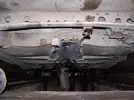
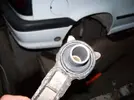
Rear suspension was revised, new rubber mounts were installed, the petrol tank was cleaned and new pump for multipoint injection was mounted.
[Break=Some More Progress]
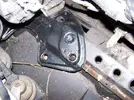
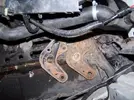
The adapter brackets for the front calipers were finally done, so there were no more reasons front brakes to not be installed
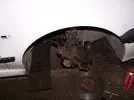
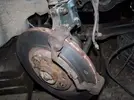
As I mentioned before the disks are 285mm from R21 TXI, the piston diameter is 54mm instead of original R19's 48mm
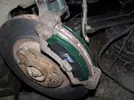
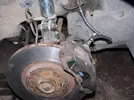
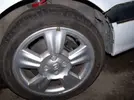
Accessory's belt were fixed - no problems with it although the AC compressor is from Megane 2.0 16v
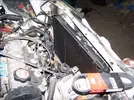
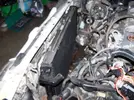
Started preparation for installing the water radiator and the AC condenser
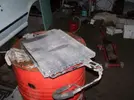
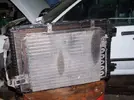
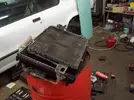
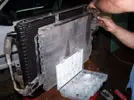
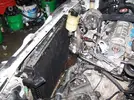
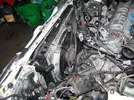
So far - so good
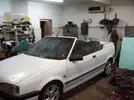
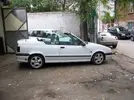
[Break=Few Aspects of the Headlights - Part II]
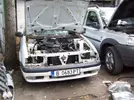
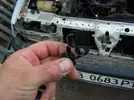
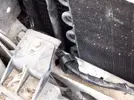
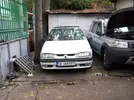
The Chop Shop had some free time to install the "new" dual section headlight, I've sent them earlier.
[Break=Rear brakes and Exhaust System]
Swap from drum to disc was one of the items in the To-Do list, so people of the Chop Shop stared with it completion
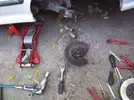
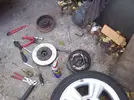
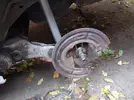

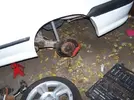
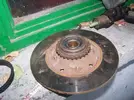
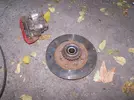
Additionally to that job the guys started the check of the installation, although I didn't expect any surprises there - the engines (1.8 MPI and 2.0MPI are pretty identical).
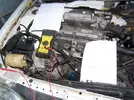
The brake regulator is used one (will buy new one later) but the mounting bracket is brand new from Renault (5 Eu only)
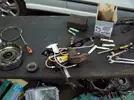
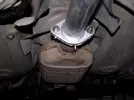
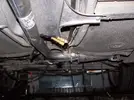
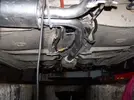
Exhaust system is from Walker (lately I regret about it)
CAT will remain - it still works, and this was confirmed on MOT.
[Break=Engine has started for a first time]
(no pics)
After a big break from the work to the project, few not successful tries (not killed imo and defective fuse) on 8-th of January 2013 the engine has fired


[Break re-commissioning jobs]
Pre-commissioning jobs took place in the begging of the new 2013
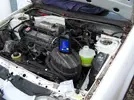
I bought new blue cap (1.6 bars opening for the cooling system)
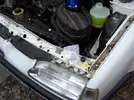
Some fails and repairs regarding the rear brakes
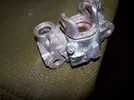
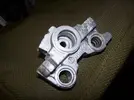
Air leaks in the brake servo caused its replace.
The ABS is not working, although the Chop Shop said the have connected everything properly and double check it. ABS warning light is ON permanently. Obviously I will deal with it once the car is at home.
The good news anyway was that the Cabby is wired for ABS - we found the connectors between the ABS module and dashboard as they were shown in Renault manuals
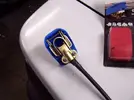
New clamps for the battery terminals
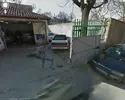
Google street view revealed that the White Swan is shifting periodically from let to right and opposite


[Break=Last Day in the Chop Shop]
14.03.2013 - the last day in the Chop Shop, me and a friend of mine got there to pick up the project and to continue it at home with our own power
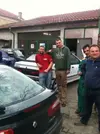
Guys, many many thanks for job done, and time shared with my project
[Break=Home Sweet Home - El.installations - Part I]
So finally the cabby was at home. I started easy easy to prepare things for the rest of the project. I re-check what I've bought till now for the project purposes - 2 engine bay installations (one from 19 16 with A/C and one from Laguna 1 2.0 8v), and 2 dash board installation (one from 19 16 with A/C, and one from 1.8 MPI with A/C, ABS Bosch and trip computer). Electrical job that had to be completed was two re-arrange the headlight control for the new dual section headlights, to modify the dash board installation for the A/C and to get wired for the trip computer, and also to add some wires for future installation of alarm system to the car.
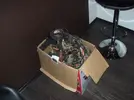
As it still cold outside I took that job at home

 hoping my wife to not kick me out with the cables


Wires for the trip computer I extracted from the 1.8 MPI installation, for further fit into my cabby's dashboard installation.
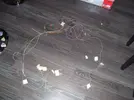
It's easier when you have helper
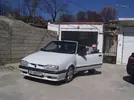
So, first of all I did an investigation on the current status of the cabby's electrical installation.
The good news that the car is wired for ABS was confirmed, although it was still not working. Two connector near to the battery.
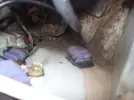
I've checked the diagrams for both ABS system for R19, it seemed that Bendix type and Bosch type have the same connections between the dash board installation and the ABS installation. So I checked the connectivity between all the pins and found out the there was missing signal from the stop switch (on the brake pedal) to the ABS computer. 10 minutes job to make a test connection and .... SUCCESS - ABS has started to function properly - after you put ignition ON the ABS warning lamp lights on for 3 seconds and then goes off. We did immediately a road test - everything works perfect on the ABS - I was really very happy, I have started to lose faith that after so many months in cartoon boxes this one will start to work again. So - one more task was completed.
More investigations on the electrical system revealed one more happy fact - dashboard installation is pretty wired for having A/C. In fact the connectors are the same for the control panel on the dash, and outside - either it fits to the fan motor (no A/C version) or the A/C control unit (A/C version), but in case of no A/C some of the pins on the connectors are not wired. At my cabby all the pins were wired - so, lucky me, one more of the tasks seemed to be almost done.
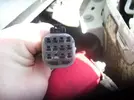
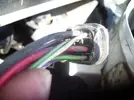
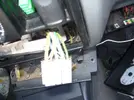
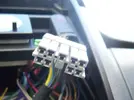
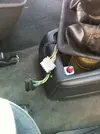
During the investigation I found connector for electrical heated seat just behind the speed lever. So, have to think about this also
[Break=Extras, More Extras - Part I]
The full wiring for A/C gave me impulse to continue with the preparation for the A/C installation.
Fan motor, recycling flap, control A/C unit and control panel on dash board were bought long time ago, so now I had only to clean them good.
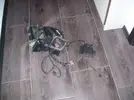
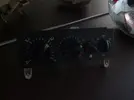
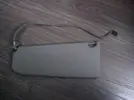
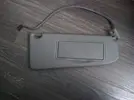
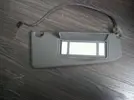
I've collected from a scraped car one more very rare extra - sunshades with integrated light in it I checked the wirings - all it seemed that I need is +12V and earth - both of them were available in the location up at the courtesy light.
Put some efforts also to the dual section headlight control - I've did such conversion too before, I've modified the system by adding an additional relay, but it was 5 years ago. This time was much more easier - I got an information that some vehicle are pre-wired for dual section headlights - they have a socket for additional relay but in this socket they have a jumper. If you want to install dual sections, just have to take out the jumper and to replace it with relay, so did I - checked that really have such a jumper and replaced it with relay - everything worked perfect and original!
[Break=Let's Clean (the Body)]
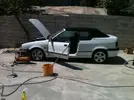
As the day temperatures started to be good I cleaned exterior areas and some more details.
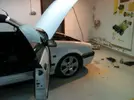
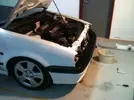
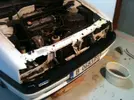
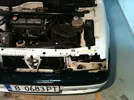
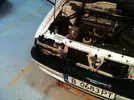
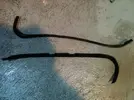
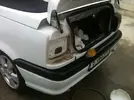
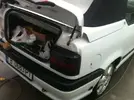
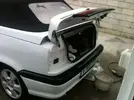
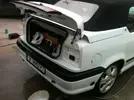
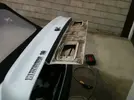
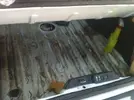
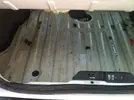
Also tried to clean the evaporator for the A/C - no chance - inside was too dirty with some kind of resin - even the oil remover did not help. Will have to find and buy another one.
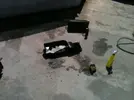
All the equipment was out
[Break=Let's Clean (the Engine)]
Before I clean the engine I had to re-arrange all the mess there - the brake pipes were traced above the A/C pipes restricting them from any moving to position. Cable lines were put in every possible hole, but the right hole. So this pokey job took about two days.
Before:
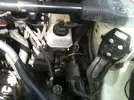
After:
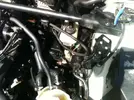
Before:
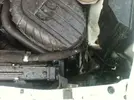
After:
I fixed the cable lines as they were originally - hardest part was the ABS cable line - for its fitment had to disconnect and up the whole ABS module
Few more improvement were done, like fitting and original suction pipe before the air filter, holder for the plug cables, some supports for the cables, etc.
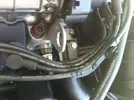
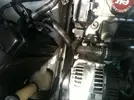
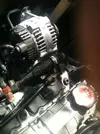
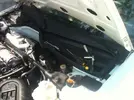
After these things were done I cleaned a little bit the engine and the bay.
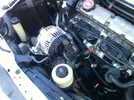
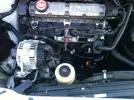
Also used the time to check and pre-install the fan, flap and the A/C evaporator.
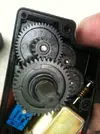
All 19's, also Megane 1 suffer from breakdowns in the gear for the recycling flap. So did mine, but I was lucky to find a local scraped car with perfect gear.
[Break ash - Out]
So from electrical point of view remain only to add the wires for the trip computer, as all other planned things were solved (ABS and A/C wiring).
So one lovely day (and the night after) I removed the dashboard and dropped it dead on the floor (of the garage )
)
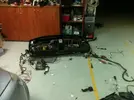
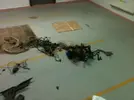
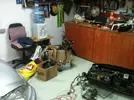
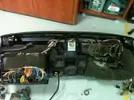
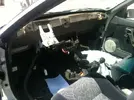
For my big surprise, when I started to install the 2 wires for the outdoor temperature sensor (located in the left mirror), there we no free pins in the connector for the left door. Pins intended to be for the sensor were already occupied. Very strange. I took them out and installed the wires for the sensor. Later, after putting the dashboard back I realized were the hint was - that two wires I've disconnect were for the window raiser - like no other 19's cabby has a separate relay for each movement of each window ...
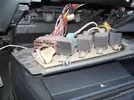
Then I realized why I have never seen before cabby with a trip computer.
So decision was very quick - I put back the original 2 pins and moved the line for the temperature sensor to the right mirror. In the connector of the right door there were at least 4-5 empty pin positions.
So, after fitting the required wires for the trip computer and some pre-wiring for alarm I put back the dashboard in place. Didn't believe that will do that without any help, but I did it.
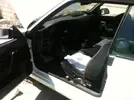
The green connector is for the trip computer
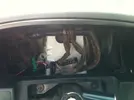
The bad news ... trip computer is not working - stacks the data and the display is shit
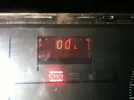
Have to buy another one.
Here is the place to mention that if you install trip computer you have to provide fuel consumption from ECU, have to replace the level gauge in the tank (as the version with trip computer has different readings), and to have speed sensor on the speed cable from the gear box to the speedometer. Also to install external temperature sensor.
[Break=More Progress]
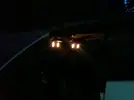
Finally had a time to install the new sunshades.
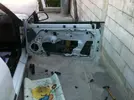
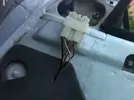
Also put wires for the external temperature sensor in the right door.
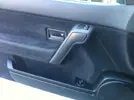
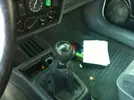
Few details in the interior happened - gear knob and door handle cover from 16v.
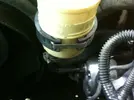
Got a locking plate for the hydraulic reservoir holder
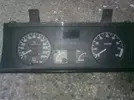
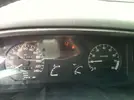
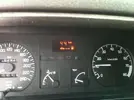
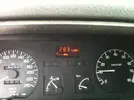
And finally - working dashboard with trip computer from 16v (for only 10 Eu)
Also strainer for the windscreen washer reservoir
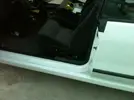
Some plastics from the interior were painted in black
[Break=Suspension Drama]
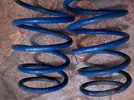
First impressions from the coil over suspension I bought from RaceLand was that I've made a mistake - too hard for the Cabby. The idea was to be able to accurate adjust the height, and the reviews from other users were that is not extremely hard - but it was Totally out of my concept for easy riding of the Cab. So - I decided to replace it with stock suspension of the 8 valves versions and to lower it a little bit. Bought coil springs Eibach.
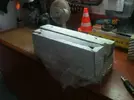
I ordered front and rear shock absorbers from Renault. Been honest - only the front shock absorbers were for 8 valves R19. For rear shock absorbers I ordered thne part number for R19 16v, as originally 16v is lower than the regular R19, and I intend to lower the car a little bit. Many aftermarket suppliers give same part number for 16v and 8v with 4 bars torsion, but in Dialogys they have different part numbers.
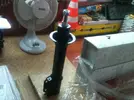
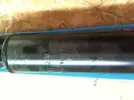
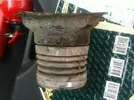
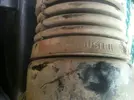
Luckily I was keeping some parts of the original Cabby's suspension, especially the shock tampons, which were some Kleber aftermarket idea, reinforced compared to the original one
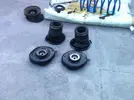
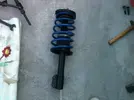
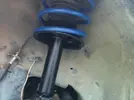
And the result .... lower than desired

 The drama has started ...
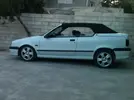
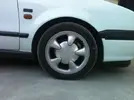
Tried two more pairs of springs - higher and much higher than what it should be
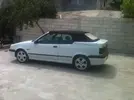
And what I'm aiming is the height of my previous R19 (as shown below)
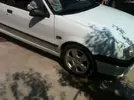
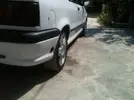
So now hunting and hunting for the proper springs - still no any success. So at the moment the car looks like that
Meanwhile I went to a friend of mine to try and decide what thickness of distance flanges I need for that alloys, as the ET now is 44, compared to the original ET 36 of the 19's.
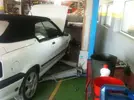
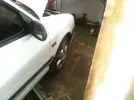
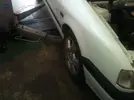
So we decided that front should be max 20 mm, and rear - max 28-30 mm.
The right (long) drive shaft is for scraps. I took it from the ABS donor as it had a ABS ring. Fed up from scraps I ordered new one for a car with ABS. The ABS ring on it was with 48 teeth for Bendix, so I found out new one with 26 teeth for Bosch (same for some Clio II and Kangoo) and kept my old one for spares.
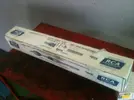
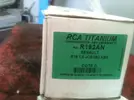
We replaced the right hub bearing also as it was too too noisy.
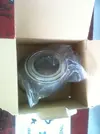
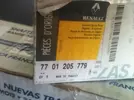
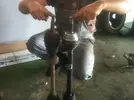
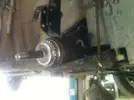
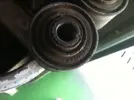
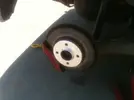
During start of moving of the car and start of stopping there were a nasty noise, a kind of creak. The diagnose - cracked silent sleeves (only after 600 km running ). Terrible. Don't know the reason - fake ones or improper tightening.
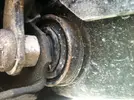
Afraid from fake goods again I got used but in mint condition original Kleber's from 16v to solve that issue.
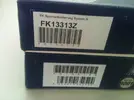
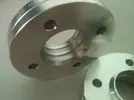
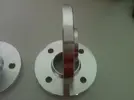
Few days later I got a present from my sister for the project - discounted flanges from FK. 2x13mm in front and 2x15mm in rear. Front side looks OK, but at rear need some less offset, so I asked a friend of mine to prepare a set of 28mm flange using the FK's as a template. In fact it was my mistake as what I got from the FK online shop was flanges at 26mm and 30mm, so I asked them if there are 2 flanges in the set and they replied - yes. I didn't know that they calculate 2x13 and offer it as 26mm distance flanges. Anyway - will manage that too. I asked my sister to write down them in German, and that's why she decided to directly order them for me
[Break=Finishing the A/C]
Never mind that the summer already finished, I decided to finish the A/C installation and to put it in order condition.
First of all I got another evaporator, as the old one was too dirty for cleaning. The one I got was in perfect condition, but from R12 system, so got to clean it well by thinner and then by compressed air.
Next step was to cut a proper hole for the recycling.
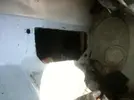
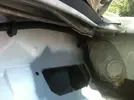
Fixed the ABS cable line that passes in that area on its way to the dashboard connectors
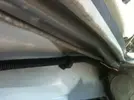
Placed also the drainage line from the evaporator.
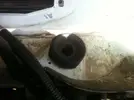
Then fixed the recycling flap, fan and the evaporator and found out that I forgot to replace the recycling motor with the good one Can not describe how poor was I after 3-4 hours nasty job to find out that it was for nothing. Got very angry, so waited few days the anger to go away and started the job again
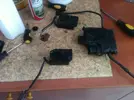
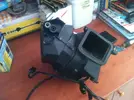
Also cleaned the area below the battery, sprayed it with zinc spray.
So finally all seemed OK.
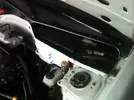
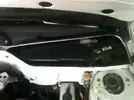
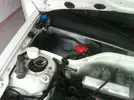
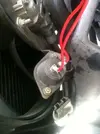
Next step was to test the electrical installation. Dashboard installation was already wired for A/C. The engine installation was from 1.8 MPI with A/C so I didn't expect any problems, but anyway should check it before filling the system with R134. In fact there are some small differences between the mono and full injection version, and may dashboard installation is from mono, and the engine is from MPI, but anyway - they matched perfectly.
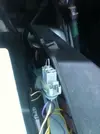
I put an jumper on the pressure switch socket to imitate there is a pressure in the system, and tried with a lamp if +12v are going to the A/C compressor clutch.
Put the A/C knob ON
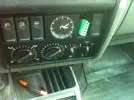
... and the lamp light
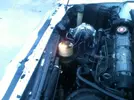
Of course, not everything ran smooth - the engine fan didn't start at low speed with A/C on - the problem was the resistor for the low speed - replaced it.
Used the time to replace the front grille with an one for vehicle with A/C. You can see the difference.
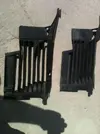
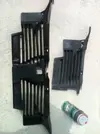
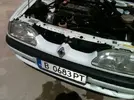
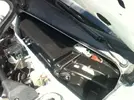
So on the next day I went to a workshop for A/C repairs to test the whole system for leaks. A was really doubting about the passing of the test, as there were parts in that system from 4 different cars - but old school worked out - no any leaks, so they charged the system.
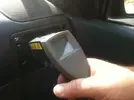
System was working very fine. That time I saw the result of using A/C compressor from megane with variable displacement - very good readings on the thermometer on the air outlets
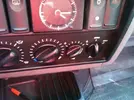
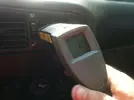
[Break=Some More Issues on the Car]
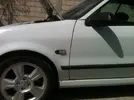
Bought from Renault clear side indicators - in fact they are originally installed on Dacia.
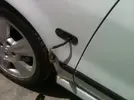
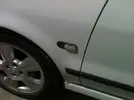
Baccara badge can be seen too
From the very begging I had a problem with the idle rpms of the engine - not stable at all. I blamed the idle regulating valve, but unfortunately it was not it. I replaced it with the one of my Megane and no change. So I test the car with Clip - the readings there showed me that ECU is not getting information for throttle pedal has been released. It means faulty TPS or problem on the wiring between the TPS and ECU.
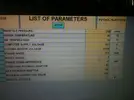
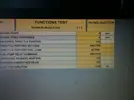
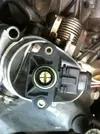
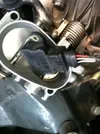
Have to fix this soon (I hope)
Got some gaskets from Renault for the throttle but will not fix them until the idle speed problem is solved.
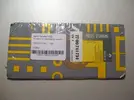
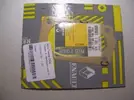
Holders for the clutch cable
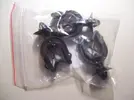
Paint in black the wipers levers
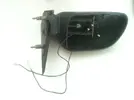
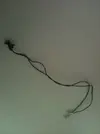
Also got and external temperature sensor from a broken mirror and install it in my right mirror in order to run outdoor temperature readings on the trip computer.
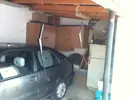
Also cleaned the dust under the some external details. I'm planning to keep the car in underground garage for the winter so to prevent that areas of moister collecting.
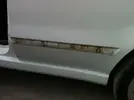
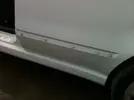
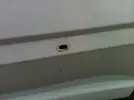
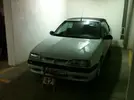
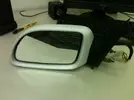
Also got white rear electrical mirrors, but will install them later.
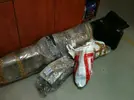
I had one muffler from Megane 2.0 16v, and it fits perfectly to the vision of the cab
[Break=Interior Updates (last for now)]
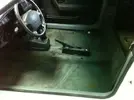
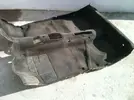
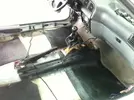
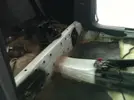
Yesterday I had a special delivery for my project - long time hunted black mat for the floor. Don't know why they originally furnished the car with gray mat, gray dashboard, gray seatbelts and gray plastic details if the seat and door trim is black. So stupid ...
So I got a black mat from cabby (it differs in the rear part from saloon and hatch versions) and replace the original one. In fact it was in terrible condition.
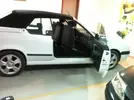
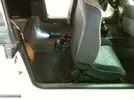
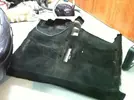
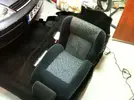
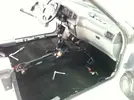
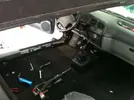
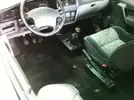
Some more parts also came, especially the originally black plastics.
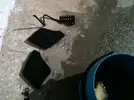
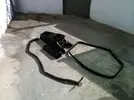
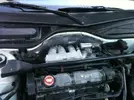
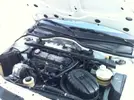
A thermo shield from 16v.
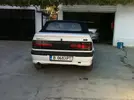
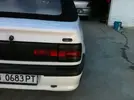
I replaced the trunk door too, as mine was drilled for rear spoiler and I didn't like it.
The new one is not perfect, but it's better than mine and has a place for installing a Baccara badge
So far - so good
Next things for sorting out are leather seats for my cab, solving the TPS problem, getting the right height coil springs for my front suspension and accordingly adjusting the rear height, tyres 205x45x16, black dashboard and finally - new paint. Next summer should be on the road
I had before one lovely R19 coupe in very good condition I planned to start a project with it, but anyway it failed and I sold it - it was really nice - white one "S-Sprint" modification - black interior, black dash, black carpet, "recaro" style seats with engine 1.8 single point injection 90 h.p. - I added to it many "extras" like - central locking, el.windows and el.mirrors, a/c, trip computer, dual head lamps ... was lovely ...but finally I sold it last summer as there were nobody to drive it and was only resting.


So this was the predecessor of my presrent project.
The very next day I sold that coupe I realized that doesn't have even one R19 is not a good idea for me, so I checked the second hand car online sites and found that one - R19 cabby (white!) 1994, 1.8 SPI and immediately decided to have it - it took me only 2 min to take the decision, so ... this was the project ONE


What I took real care was the body to be as much as possible "rust free" and in good condition - all the other I didn't care as was planned all other to be renewed.


I think the condition is ok as for 17 years old car, so I bought it ...
[Break=To-Do List]
(this page does not contain pictures :lol
As I already got the car here comes my "To-Do" list for it:
(As I was planning to make a project since a long time ago, many of the tasks were already crystal clear in my head for a long time)
- to swap to new engine - my wish was for 2.0 8v or 16v - after many reasons counted final decision was to gain 2.0 8v from laguna/megane/scenic
- to improve the R19's brakes, well-known as not so great
- to install a/c
- to install trip computer
- to install dual head lights
- to arrange new "lower" suspension
- to arrange a leather interior from cabby - black!
- to install ABS Bosch
- sound-proof the cab
- etc.
Here are some details about each item:
- enginie - everybody will prefer 2.0 16v from megane, but for the cabby was a big deal to install it together with and a/c, as megane engine bay is larger than R19s, so there will be a lot of troubles with the a/c compressor and hydr.steering pump installation, with the radiator mounting and air filter box, finally el.harness installation will require a lot of work and will not look like "original" after all, so I prefered 2.0 8v from laguna/megane/scenic - the power is 115 h.p. which I believe with a remap can goes to 120-122 h.p. Torque is not so bad at all - initial torque power is 168 Nm, after remap I believe can obtain about 175 Nm (compared to 185 Nm from 2.0 16v), but the great advantage for 2.0 8v is that this torque I can have it at lower rpm's so will be much more practical for cabby, as the idea of the cabby for me is not the speed, but the look
- brakes - for front brakes idea is seen in this lovely site - to upgrade them to 285mm discs from R21 TXI, and the rear brakes - just to install 238mm disc kit from R19 1.8 16v. Front calipers for 288mm discs have a piston diameter of 54mm compared to 48mm presently. Also have an idea to change the master brake cylinder with one from laguna 2.0 where the piston diameter is 23,81mm compared to 21mm presently. I believe all this will be enough good to achieve braking similar to my megane 2.0 16v which I find to be very good.
- a/c - many ppl think that cabby doesn't need a/c, but I think on opposite, so an a/c will be installed. The biggest challenge here is that I don't want to install the original a/c compressor from R19, which is Sanden 7H15, but I would like to fit the one from megane 2.0 16v - Sanden 7V16 which has a variable displacement and much more efficiency running on low rpms. For that reason compressor installing will follow the laguna type - compressor will be at the lowest postion, above it - the steering hydr.pump and above them - the alternator. Originally on R19's lowest postition is from the steering hydr.pump and a/c compressor is above it. So laguna alternator bracket should be obtained for the project. Also keeping in mind that 2.0 at laguna has an upper suspension on the belt side, but R19 has lower suspension below the hydr.pupm, so modification on the alternator bracket from laguna and the original engine suspension bracket should be made to accomodate both of them
- trip computer - it's just a matter of putting as mush as possible original "extras" to my project. The trip computer and board should be from R19 16v - the idea is to use the built-in oil pressure gauge - for that purpose would obtain and oil pressure sensor from R19 16v
- as the previous item - dual head lights should be arranged - I like to be with el.regulating leveling so to be "full extra"
- "lower suspension" for the cabby - no need to explain it. The problem is just to decide what to use - the original 1.8 16v one or to buy coil overs for my project
- leather black interior for cabby - this is the hardest item, especially if I want to find interior in mint condition
- ABS Bosch - I really preffer the cabby to be equipped with ABS, but hate the Bendix one, the really good one is the Bosch type, but unfortunately it's very rare, as is installed after 11/94 and not on all version, so this is also hard to complete item
- sound-proof - I think no need to explain it, it's just better to have it
- etc. - all the rest not mentioned till now :lol:
[BREAK=New Engine 01]
As I'm not currently at home the project started remotely - I'm searching and locating all the parts I need from internet and a friend of mine is receiving and collecting them in Bulgaria, preparing everything for the project. This great friend of mine will take care for engine renewing and replacing, for the brakes changes, and for the new suspension. I will do the rest. (A little secret - this friend of mine has also a project - R5 GTE 2.0 8v with a lot of extras, el.steering, a/c e.t.c.)
As I keep always an eye on Bulgarian's Renault forum I know all the time where I can find the parts I need, at best prices, and all the time can relay on friends from that forum to check locally for each part I intend to buy.
So a friend from the forum working in car's scrap yard for Renault breaking cars recommended me a good engine 2.0 8v from laguna (they had 4 pcs, so he assured me that one was the best one of all four). So I sent my great friend and project supporter No.1 to go and buy it.


New engine was moved to his garage (I call it "chop shop" and when he has a free time he will start with the engine rebuild
[BREAK=Front Brakes 01]
I succeeded to find from internet front brakes from R21 TXI 285mm, so we bought them. Calippers went for recycling (I hope there will be repair kit for those old Bosch-Bendix ones). Discs will not be replaces for now, only will be machined, after all the system is completed and I'm sure it works fine will buy new discs. Adapter brakes will be produced following the dimensional drawing I found in internet for that upgrade to 285mm.


Adapters were ready soon after that:


Discs were machined, so only remained to see the result of the calipper's recycling

[BREAK=New Engine 02]
My friend and his "chop shop" started the new engine re-biuld.
Cylinder head first was cleaned good and fully dismantled, after that went for face flatness check and control machining. Valves and valve seats will be machined too. New valve stems will be fitted. As "chop shop" reported new valve guides will be required.


Off course all seals and gaskets will be changed - I prefered Elring - most of the Renault engines from that years (94-96) come out from the factory with Elring:

Cylinder head was overhauled and mounted back, valves clearances were adjusted:


[BREAK=Cooling 01]
No need to mention how important is cooling - my idea was everything in this system to be new. The original 1.8 radiator will be replaced by radiator from 1.8 16v for model with a/c. So we bought one brend new:


Most of you probably know that on R19 1.8 16v version with a/c radiator and a/c condenser have a little strange (weird) installation:

So, had to find out also the support brackets from 1.8 16v:


Should be de-rusted and painted again, but this will postponed, because initially I think to run the car with the original radiator, as a/c installation will be earliest next summer.
We bought a 2-speed cooling fan from 1.8 16v in not so bad condtion - shaped for a low-mounted a/c compressor - perfect for the project:

(good washing required)
Also supplied a/c condenser - 2 pcs - one copper and one aluminium

Plan is to arrange and to buy brand new thermostat and cooling system hoses.
[BREAK=Various Parts 01]
Meanwhile in the background I continued to hunt for parts required for my project - some of them - brand new and some - second hand
The Big Hit was that I succeeded to find out engine harness from R19 1.8 MPI Baccara - great advantage is that it fits perfect the new 2.0 engine (all sensors, tps, injectors, battery .. everything is on the right place), also fits perfect for the a/c 2-speed cooling fan and the freon pressostat ... just the perfect solution for the project:

Needs only a minor modification - alternator connection, extending the a/c compressor "+" line and to check the injector supply as on R19 1.8 are full group , and on Laguna 2.0 are 2x2.
Luckily from same car I bought el.harness for dual head lights with el.regulating leveling. I said luckily, because that car was scrapped in 2004 but the owner kept some parts from it till now.

I bought also engine el.harness from R19 1.8 16 with a/c - just to modificate my el.harness to be close to perfect - from that one will take the cable for the oil pressure sensor, also can adjust the radiator switch for the cooling fan, as the position is different on 1.8 8v and 16v with a/c

Arranged also panel for cabin heating for model with a/c

Also an a/c compressor Sanden 7V16 from Megane 2.0 16v were bought again via internet:

Some parts were supplied meanwhile from Renault, and other were ordered for later supply:


In that time the ONE is just sleeping 400km away from the "chop shop" not guessing what will happen soon (I believe)

[BREAK=Transmission 01]
New clutch kit were supplied for the project - LUK on 200mm as the original one we took off from the engine:


The flywheel was machined with 1.5mm to obtain perfect flatness for the new clutch:

Later all will be installed on the engine
[BREAK=New Engine 03]
After the cylinder head overhaul the work on the engine re-build continued with the crankcase investigation. What "chop whop" discovered was not so bad for an Italian maintained engine:


Leaks from the crankcase cover and the last bearing cover were discovered.
Last main bearing were opened for inspection and was found in OK condition, so I decided to not replace the bearings and the piston rings - some may say this is a mistake, but prefer the original ones if they are OK instead of after market ones.

Oil seals were replaces, crankcase was closed and clutch was installed:


So everything was ready for "closing" the engine:


Here can be seen also the oil pressure sensor we supplied from R19 1.8 16v. Will install it after the replacment of the engines - it has position on the back side of the cylinder block - presently blinded by bolt (near the driving shaft for the oil pump)

[BREAK=Suspension 01]
There were two ideas for the suspension - original one from R19 16v or after market - coil overs most probably. Finally I decided to be after market. For that purpose I bought (again via internet) a pair of megane 2.0 16v front suspension strut mounts - they are same as R19 1.8 16v, but unlikely the ones for R19 do not have split problems. I bought used ones but in very good conditions - new ones would havily break the budget :roll:


Plates covers for the shock absorbers were supplied (not very good condition, but after some de-rusting and painting will be like new ones

Also new strut bearing were bought (as can be seen meanwhile dashboard from 1.8 16v with trip computer were supplied, remains now to obtain a level gauge for fuel tank from a car with trip computer)

So, here came the key moment for the suspension

So now this item is almost done - remains only inspection of the torsion bars and lowering the rear suspension.
[BREAK=Rear Brakes 01]
From other project (that bankrupted) bought rear brake discs and pads and calipers - calipers are in very good condition and no need revising, the discs are less than 2000 km, so I think it was a good deal:


Have to buy a brake load distributor and to revise it, also braking wires for the hand brake
[BREAK=Various Parts 02]
The parts from Renault ordered a month ago arrived (unfotunately not all
I ordered struts for the wheel , fuel hoses In and Out of the fuel ramp, water cooling hoses, air supply and recirculation hoses, support for the rear brakes load distributor, some accessories ...


[BREAK=Winter marches on]
First week of the New Year the "White swan" was moved to the Chop shop

And then came the rain (snow) ... :lol:

The result was 4 weeks no work on the project and ... roof dameged from the temperatures (-25 for a week). Good looking one was bought from Austrian scrapyard.
[BREAK=14 months hunting ended with success - ABS Bosch was found!!!]
After so long searching (from November 2010 for the previous R19) car for breaking with ABS Bosch was finally found ... 1996 1.8MPI 110 h.p. Very rare one indeed - this ABS Bosch which replaced ABS Bendix is installed after 11/1994 and not to all models - models DT and 1.8 16v with A/C which require electrical power steering have been continued to be produced with Bendix. So the Chop shop crew travelled 320 km to the donor and back


The donor was perfectly equiped with A/C, so the evaparator, fan and flap all harnes and control module were taken too


The original back pannel and fore lights were replaced with the darkest ones from the donor too

[BREAK
Soo, nearly month ago ...D-Day came :roll: The cabrio entered into the Chop shop


They lowered it down down down
Then started the taking the engine out of the bay


The engine mountings were o.o.o. (out of order), even worse


Just painted and with new bushes Kleber

Steering rack was inspected - the original one was leaking so I found out another second hand one in good condition, but with problem in the hose connection, so from two was made one good

Gear box was washed, later overhauled, and the sealing for the selector fork was changed as it was leaking

The engine bay was washed and looked like brand new


Hope more to come soon. In fact Bulgarian Renault Fest this year is on 9-th of June, so this is the aim ...
[BREAK=More preparations]
What about the breaks :arrow: .... front brakes soon has to be reconditioned (staying 5 months at a recondition shop) and I bought break master cylinder from Laguna 2.0 8v without ABS and break servo from R19 16v, so:
- front brakes cylinder - 54mm
- master cylinder 23.88mm
- brake servo - 11 inches
My original idea was to put break servo from Megane 2.0 16v - but unfortunately will be in collision with the hydraulic pump unit of the ABS, so will have to accept the one from R19 16v, but I believe it will be enough for significially improment of the braking.
For the rear braking there are no surprises:
- brake pressure distributor and rear disc brakes from R19 16v
Also progress on the A/C part was achieved - was arranged the mountig space for the evaporater, fan and recycling flap.


Engine and the gearbox were coupled together.


and one more hit for the project - we succeed to find out the exact model wheels I've always imagined the project

Lyra 16 inched, 6.5J, ET35, tyres will be 195x50x16 :idea:
[Break=Engine - In]
Long time no reporting from me. The bracket for the AC compressor was cut a little bit, the plate for the lower engine mounting was modified too, as can be seen from the pic.


So, engine was lowered in the bay finally ...


Front calipers came back from recondition meanwhile, and hydraulic hoses were modified accordingly to fit the 19's system with the Laguna's configuration and location.


[Break=Few Aspects of the Headlights - Part I]
I've collected few headlights - all of them dual sections light, but not all of them with electrical level regulation, so dismantled all of them and prepared two pieces from the best parts I had at the time


Had the idea to send the reflectors for new coating, but didn't done it (yet).
[Break=ABS Installation - Part I]
The Chop Shop started the preparation for the ABS installing. They've prepared the hydro-module bracket installation carefully.


There was a little fighting from a 400 km distance why they didn't clean the module before they install it. Finally I cleaned it few months later and forgive them about it
The suction manifold were branded by the Chop Shop and fixed in the engine


The brake servo we installed was from R19 16v. Unfortunately it had a leak at the test later and was replaced with another one, which came with the ABS set.
Main brake pump is from Laguna 1 2.0 engine with diameter of the plunger 23.8mm instead of the original R19 20.9mm plunger.

For two of the brake lines we needed and adapters

[Break=Rear Suspension Revision]
Rear suspension was revised, new rubber mounts were installed, the petrol tank was cleaned and new pump for multipoint injection was mounted.


[Break=Some More Progress]
The adapter brackets for the front calipers were finally done, so there were no more reasons front brakes to not be installed


As I mentioned before the disks are 285mm from R21 TXI, the piston diameter is 54mm instead of original R19's 48mm


Accessory's belt were fixed - no problems with it although the AC compressor is from Megane 2.0 16v
Started preparation for installing the water radiator and the AC condenser


So far - so good


[Break=Few Aspects of the Headlights - Part II]
The Chop Shop had some free time to install the "new" dual section headlight, I've sent them earlier.


[Break=Rear brakes and Exhaust System]
Swap from drum to disc was one of the items in the To-Do list, so people of the Chop Shop stared with it completion


Additionally to that job the guys started the check of the installation, although I didn't expect any surprises there - the engines (1.8 MPI and 2.0MPI are pretty identical).

The brake regulator is used one (will buy new one later) but the mounting bracket is brand new from Renault (5 Eu only)

Exhaust system is from Walker (lately I regret about it)
CAT will remain - it still works, and this was confirmed on MOT.


[Break=Engine has started for a first time]
(no pics)
After a big break from the work to the project, few not successful tries (not killed imo and defective fuse) on 8-th of January 2013 the engine has fired
[Break
Pre-commissioning jobs took place in the begging of the new 2013

I bought new blue cap (1.6 bars opening for the cooling system)

Some fails and repairs regarding the rear brakes


Air leaks in the brake servo caused its replace.
The ABS is not working, although the Chop Shop said the have connected everything properly and double check it. ABS warning light is ON permanently. Obviously I will deal with it once the car is at home.
The good news anyway was that the Cabby is wired for ABS - we found the connectors between the ABS module and dashboard as they were shown in Renault manuals

New clamps for the battery terminals

Google street view revealed that the White Swan is shifting periodically from let to right and opposite

[Break=Last Day in the Chop Shop]
14.03.2013 - the last day in the Chop Shop, me and a friend of mine got there to pick up the project and to continue it at home with our own power

Guys, many many thanks for job done, and time shared with my project
[Break=Home Sweet Home - El.installations - Part I]
So finally the cabby was at home. I started easy easy to prepare things for the rest of the project. I re-check what I've bought till now for the project purposes - 2 engine bay installations (one from 19 16 with A/C and one from Laguna 1 2.0 8v), and 2 dash board installation (one from 19 16 with A/C, and one from 1.8 MPI with A/C, ABS Bosch and trip computer). Electrical job that had to be completed was two re-arrange the headlight control for the new dual section headlights, to modify the dash board installation for the A/C and to get wired for the trip computer, and also to add some wires for future installation of alarm system to the car.

As it still cold outside I took that job at home
Wires for the trip computer I extracted from the 1.8 MPI installation, for further fit into my cabby's dashboard installation.

It's easier when you have helper

So, first of all I did an investigation on the current status of the cabby's electrical installation.
The good news that the car is wired for ABS was confirmed, although it was still not working. Two connector near to the battery.

I've checked the diagrams for both ABS system for R19, it seemed that Bendix type and Bosch type have the same connections between the dash board installation and the ABS installation. So I checked the connectivity between all the pins and found out the there was missing signal from the stop switch (on the brake pedal) to the ABS computer. 10 minutes job to make a test connection and .... SUCCESS - ABS has started to function properly - after you put ignition ON the ABS warning lamp lights on for 3 seconds and then goes off. We did immediately a road test - everything works perfect on the ABS - I was really very happy, I have started to lose faith that after so many months in cartoon boxes this one will start to work again. So - one more task was completed.
More investigations on the electrical system revealed one more happy fact - dashboard installation is pretty wired for having A/C. In fact the connectors are the same for the control panel on the dash, and outside - either it fits to the fan motor (no A/C version) or the A/C control unit (A/C version), but in case of no A/C some of the pins on the connectors are not wired. At my cabby all the pins were wired - so, lucky me, one more of the tasks seemed to be almost done.


During the investigation I found connector for electrical heated seat just behind the speed lever. So, have to think about this also

[Break=Extras, More Extras - Part I]
The full wiring for A/C gave me impulse to continue with the preparation for the A/C installation.
Fan motor, recycling flap, control A/C unit and control panel on dash board were bought long time ago, so now I had only to clean them good.


I've collected from a scraped car one more very rare extra - sunshades with integrated light in it


Put some efforts also to the dual section headlight control - I've did such conversion too before, I've modified the system by adding an additional relay, but it was 5 years ago. This time was much more easier - I got an information that some vehicle are pre-wired for dual section headlights - they have a socket for additional relay but in this socket they have a jumper. If you want to install dual sections, just have to take out the jumper and to replace it with relay, so did I - checked that really have such a jumper and replaced it with relay - everything worked perfect and original!
[Break=Let's Clean (the Body)]
As the day temperatures started to be good I cleaned exterior areas and some more details.


Also tried to clean the evaporator for the A/C - no chance - inside was too dirty with some kind of resin - even the oil remover did not help. Will have to find and buy another one.


All the equipment was out

[Break=Let's Clean (the Engine)]
Before I clean the engine I had to re-arrange all the mess there - the brake pipes were traced above the A/C pipes restricting them from any moving to position. Cable lines were put in every possible hole, but the right hole. So this pokey job took about two days.
Before:

After:

Before:

After:

I fixed the cable lines as they were originally - hardest part was the ABS cable line - for its fitment had to disconnect and up the whole ABS module
Few more improvement were done, like fitting and original suction pipe before the air filter, holder for the plug cables, some supports for the cables, etc.


After these things were done I cleaned a little bit the engine and the bay.


Also used the time to check and pre-install the fan, flap and the A/C evaporator.
All 19's, also Megane 1 suffer from breakdowns in the gear for the recycling flap. So did mine, but I was lucky to find a local scraped car with perfect gear.

[Break
So from electrical point of view remain only to add the wires for the trip computer, as all other planned things were solved (ABS and A/C wiring).
So one lovely day (and the night after) I removed the dashboard and dropped it dead on the floor (of the garage


For my big surprise, when I started to install the 2 wires for the outdoor temperature sensor (located in the left mirror), there we no free pins in the connector for the left door. Pins intended to be for the sensor were already occupied. Very strange. I took them out and installed the wires for the sensor. Later, after putting the dashboard back I realized were the hint was - that two wires I've disconnect were for the window raiser - like no other 19's cabby has a separate relay for each movement of each window ...

Then I realized why I have never seen before cabby with a trip computer.
So decision was very quick - I put back the original 2 pins and moved the line for the temperature sensor to the right mirror. In the connector of the right door there were at least 4-5 empty pin positions.
So, after fitting the required wires for the trip computer and some pre-wiring for alarm I put back the dashboard in place. Didn't believe that will do that without any help, but I did it.

The green connector is for the trip computer

The bad news ... trip computer is not working - stacks the data and the display is shit

Have to buy another one.
Here is the place to mention that if you install trip computer you have to provide fuel consumption from ECU, have to replace the level gauge in the tank (as the version with trip computer has different readings), and to have speed sensor on the speed cable from the gear box to the speedometer. Also to install external temperature sensor.
[Break=More Progress]
Finally had a time to install the new sunshades.

Also put wires for the external temperature sensor in the right door.


Few details in the interior happened - gear knob and door handle cover from 16v.


Got a locking plate for the hydraulic reservoir holder

And finally - working dashboard with trip computer from 16v (for only 10 Eu)


Also strainer for the windscreen washer reservoir

Some plastics from the interior were painted in black


[Break=Suspension Drama]
First impressions from the coil over suspension I bought from RaceLand was that I've made a mistake - too hard for the Cabby. The idea was to be able to accurate adjust the height, and the reviews from other users were that is not extremely hard - but it was

I ordered front and rear shock absorbers from Renault. Been honest - only the front shock absorbers were for 8 valves R19. For rear shock absorbers I ordered thne part number for R19 16v, as originally 16v is lower than the regular R19, and I intend to lower the car a little bit. Many aftermarket suppliers give same part number for 16v and 8v with 4 bars torsion, but in Dialogys they have different part numbers.


Luckily I was keeping some parts of the original Cabby's suspension, especially the shock tampons, which were some Kleber aftermarket idea, reinforced compared to the original one


And the result .... lower than desired

Tried two more pairs of springs - higher and much higher than what it should be
And what I'm aiming is the height of my previous R19 (as shown below)

So now hunting and hunting for the proper springs - still no any success. So at the moment the car looks like that

Meanwhile I went to a friend of mine to try and decide what thickness of distance flanges I need for that alloys, as the ET now is 44, compared to the original ET 36 of the 19's.


So we decided that front should be max 20 mm, and rear - max 28-30 mm.
The right (long) drive shaft is for scraps. I took it from the ABS donor as it had a ABS ring. Fed up from scraps I ordered new one for a car with ABS. The ABS ring on it was with 48 teeth for Bendix, so I found out new one with 26 teeth for Bosch (same for some Clio II and Kangoo) and kept my old one for spares.


We replaced the right hub bearing also as it was too too noisy.


During start of moving of the car and start of stopping there were a nasty noise, a kind of creak. The diagnose - cracked silent sleeves (only after 600 km running ). Terrible. Don't know the reason - fake ones or improper tightening.

Afraid from fake goods again I got used but in mint condition original Kleber's from 16v to solve that issue.

Few days later I got a present from my sister for the project - discounted flanges from FK. 2x13mm in front and 2x15mm in rear. Front side looks OK, but at rear need some less offset, so I asked a friend of mine to prepare a set of 28mm flange using the FK's as a template. In fact it was my mistake as what I got from the FK online shop was flanges at 26mm and 30mm, so I asked them if there are 2 flanges in the set and they replied - yes. I didn't know that they calculate 2x13 and offer it as 26mm distance flanges. Anyway - will manage that too. I asked my sister to write down them in German, and that's why she decided to directly order them for me


[Break=Finishing the A/C]
Never mind that the summer already finished, I decided to finish the A/C installation and to put it in order condition.
First of all I got another evaporator, as the old one was too dirty for cleaning. The one I got was in perfect condition, but from R12 system, so got to clean it well by thinner and then by compressed air.
Next step was to cut a proper hole for the recycling.


Fixed the ABS cable line that passes in that area on its way to the dashboard connectors

Placed also the drainage line from the evaporator.

Then fixed the recycling flap, fan and the evaporator and found out that I forgot to replace the recycling motor with the good one


Also cleaned the area below the battery, sprayed it with zinc spray.

So finally all seemed OK.


Next step was to test the electrical installation. Dashboard installation was already wired for A/C. The engine installation was from 1.8 MPI with A/C so I didn't expect any problems, but anyway should check it before filling the system with R134. In fact there are some small differences between the mono and full injection version, and may dashboard installation is from mono, and the engine is from MPI, but anyway - they matched perfectly.

I put an jumper on the pressure switch socket to imitate there is a pressure in the system, and tried with a lamp if +12v are going to the A/C compressor clutch.

Put the A/C knob ON

... and the lamp light

Of course, not everything ran smooth - the engine fan didn't start at low speed with A/C on - the problem was the resistor for the low speed - replaced it.

Used the time to replace the front grille with an one for vehicle with A/C. You can see the difference.


So on the next day I went to a workshop for A/C repairs to test the whole system for leaks. A was really doubting about the passing of the test, as there were parts in that system from 4 different cars - but old school worked out - no any leaks, so they charged the system.
System was working very fine. That time I saw the result of using A/C compressor from megane with variable displacement - very good readings on the thermometer on the air outlets


[Break=Some More Issues on the Car]
Bought from Renault clear side indicators - in fact they are originally installed on Dacia.


Baccara badge can be seen too

From the very begging I had a problem with the idle rpms of the engine - not stable at all. I blamed the idle regulating valve, but unfortunately it was not it. I replaced it with the one of my Megane and no change. So I test the car with Clip - the readings there showed me that ECU is not getting information for throttle pedal has been released. It means faulty TPS or problem on the wiring between the TPS and ECU.


Have to fix this soon (I hope)
Got some gaskets from Renault for the throttle but will not fix them until the idle speed problem is solved.


Holders for the clutch cable

Paint in black the wipers levers

Also got and external temperature sensor from a broken mirror and install it in my right mirror in order to run outdoor temperature readings on the trip computer.


Also cleaned the dust under the some external details. I'm planning to keep the car in underground garage for the winter so to prevent that areas of moister collecting.


Also got white rear electrical mirrors, but will install them later.


I had one muffler from Megane 2.0 16v, and it fits perfectly to the vision of the cab

[Break=Interior Updates (last for now)]
Yesterday I had a special delivery for my project - long time hunted black mat for the floor. Don't know why they originally furnished the car with gray mat, gray dashboard, gray seatbelts and gray plastic details if the seat and door trim is black. So stupid ...
So I got a black mat from cabby (it differs in the rear part from saloon and hatch versions) and replace the original one. In fact it was in terrible condition.


Some more parts also came, especially the originally black plastics.


A thermo shield from 16v.


I replaced the trunk door too, as mine was drilled for rear spoiler and I didn't like it.
The new one is not perfect, but it's better than mine and has a place for installing a Baccara badge


So far - so good

Next things for sorting out are leather seats for my cab, solving the TPS problem, getting the right height coil springs for my front suspension and accordingly adjusting the rear height, tyres 205x45x16, black dashboard and finally - new paint. Next summer should be on the road
Last edited by a moderator:

