Replacing Rear Brake Pads
What's Required
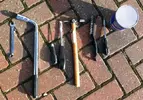
 Left to right:
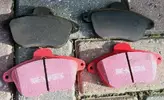
New pads – in my case, EBC Redstuff DP31526C (£52.40 from Camskill):
"OEM" Options:
"Uprated" Options:
Guide:
Step 1
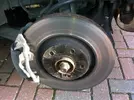
 First, jack up the car and remove the wheel. Crack the bolts, raise the car, and then remove the wheel. If the wheel is stuck to the hub, use a soft mallet around the inner rim to break the bond. Keep a couple of bolts loosely engaged to prevent the wheel from coming off suddenly.
Step 2
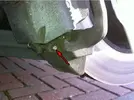
 With access to the rear calipers, you'll see the pin at the bottom. Remove this pin to allow the caliper to swing outwards and upwards.
Step 3
 Here, you can see the pin and the clip that keeps it in place. To remove it, use needle nose pliers or a small torx bit to hook the clip out. It shouldn't be too difficult. Here's a close-up of the clip...
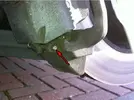 And here it is after being removed...

Step 4
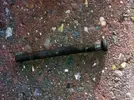 Next, tap the pin out using a small punch or screwdriver and a small pin hammer. It can be difficult to remove because it tends to get corroded with brake dust and grime.
 Here’s the pin once removed – note that it can only go in one way, as the holes in the caliper are different sizes.

Step 5
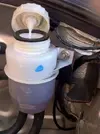 With the pin removed, the caliper is free to swing upwards. It might require a little effort, so leverage the caliper against the static part of the assembly to help release it, like this...
 This is the motion as the caliper swings up...

Step 6
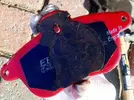
 The old pads can now be removed. It's easy to see how they’re held in place. You’ll need to hold the caliper up to give enough room to pull them out. You may find anti-rattle shims on the back of the inner pad. Remove and clean these with a wire brush before transferring them to the new pads.
Apply copper grease to both sides of the shims, then bend the tabs to hold the shim tightly in place on the new pad.
- Author: BenCredits: k1ano, Monkey, BenDate: 18/01/2012 - amalgamated all info into 1 articleAssociated Forum Post URLs:LINKPictorial guide
What's Required
 Left to right:
- Lever tool (in my case, a 13mm spanner)Wheel Bolt WrenchSmall diameter allen key/screwdriver/punch (2.5mm in my case)Caliper rewind tool (something just under 10mm in width, I used a chisel)Small hammerWire brushTool to pull out the pin retainer clip (I used a small torx head socket)Copper Slip
New pads – in my case, EBC Redstuff DP31526C (£52.40 from Camskill):

"OEM" Options:
- Ferodo - FDB472Mintex - MDB1526
"Uprated" Options:
- EBC Redstuff - DP31526CEBC Yellowstuff - DP41526
Guide:
Step 1
 First, jack up the car and remove the wheel. Crack the bolts, raise the car, and then remove the wheel. If the wheel is stuck to the hub, use a soft mallet around the inner rim to break the bond. Keep a couple of bolts loosely engaged to prevent the wheel from coming off suddenly.
Step 2
 With access to the rear calipers, you'll see the pin at the bottom. Remove this pin to allow the caliper to swing outwards and upwards.
Step 3

 And here it is after being removed...
Step 4
 Next, tap the pin out using a small punch or screwdriver and a small pin hammer. It can be difficult to remove because it tends to get corroded with brake dust and grime.

Step 5
 With the pin removed, the caliper is free to swing upwards. It might require a little effort, so leverage the caliper against the static part of the assembly to help release it, like this...

Step 6
 The old pads can now be removed. It's easy to see how they’re held in place. You’ll need to hold the caliper up to give enough room to pull them out. You may find anti-rattle shims on the back of the inner pad. Remove and clean these with a wire brush before transferring them to the new pads.
Apply copper grease to both sides of the shims, then bend the tabs to hold the shim tightly in place on the new pad.

Last edited:

