There is more to life with TurboRenault.co.uk
You are using an out of date browser. It may not display this or other websites correctly.
You should upgrade or use an alternative browser.
You should upgrade or use an alternative browser.
preRS Clio Renault Clio 16v MK1 - The Underdog
- Thread starter linkus
- Start date
-
- Tags
- clio clio 16v renault renault clio
Mark_L
Well-Known Member
Not a fan of L brackets in any form on seat belts but I have seen people use them.
Personally I'd have changed the seats, I'd never fit a tubed (frame) seat into a Track car. But you've gone to the trouble of getting them in.
If you can mount the belt onto the side of the tunnel with a mounting plate behind, you can buy these plates to go under the floor. Probably your safest option.
linkus
Member
Not a fan of L brackets in any form on seat belts but I have seen people use them.
Personally I'd have changed the seats, I'd never fit a tubed (frame) seat into a Track car. But you've gone to the trouble of getting them in.
If you can mount the belt onto the side of the tunnel with a mounting plate behind, you can buy these plates to go under the floor. Probably your safest option.
Yeah I kinda regret that i actually got these seat but now they are in, okok i'll try to somehow mount it vertically instead.
linkus
Member
Update time! 
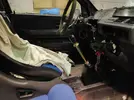
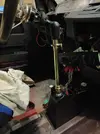
I have been working behind the curtains a bit, bought some new toys a PMS-Shifter because i really like the rattles xD
I have not adjusted it yet an i need a centering spring.

I also made a new brakeline for the front left since that had been cut.

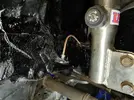
and the BIG news! The flippin engine started! I have no clue why the Tacho jumps up to 6k RMP when cranking, I have to look in to that. Had to replace the terminal for the exciter wire since the first time around the starter wouldent even push out the piniongear.
After the startup i did som wires, bought a BMW battery junktion box from a friend, i hope the Clio wont push the BMW part away or something haha, looks kinda neat tho!
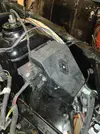
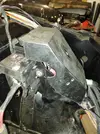
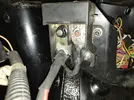
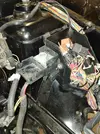
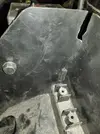
I routed the batt + cable through the left side grommet and zip-tied it up, should be good enough! Need to make a new battery hold down in th rear however. That is for another day.
Ran some new enginebay fuelhoses and kinda neated it all up
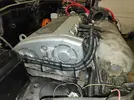
I have been working behind the curtains a bit, bought some new toys a PMS-Shifter because i really like the rattles xD
I have not adjusted it yet an i need a centering spring.


I also made a new brakeline for the front left since that had been cut.


and the BIG news! The flippin engine started!
After the startup i did som wires, bought a BMW battery junktion box from a friend, i hope the Clio wont push the BMW part away or something haha, looks kinda neat tho!


I routed the batt + cable through the left side grommet and zip-tied it up, should be good enough! Need to make a new battery hold down in th rear however. That is for another day.
Ran some new enginebay fuelhoses and kinda neated it all up

linkus
Member
Did some more stuff the past days,
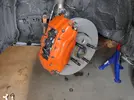
Finally managed to refurb and paint the calipers, unfortunetly the caliperpaint i choose where a PAIN to work with, some kind of 2-part spraycan paint, absolutely atrocious clogged the nozzle constantly but hey they have some colour now.
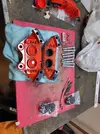
I also added some new undercoat to the wheelwells and mounted the calipers, however i need to fix some 3mm washers/spacers to space the caliper out, the washers I have now is 2,6-2,8mm and they are not quite as centered over the disc as I want. I also got some new M12 1,25 40mm bolts to acomodate the meatier caliper + washer.
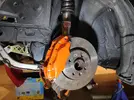
However i really need spacers to clear the calipers unfortunetly, so i orderd some 15mm hubcentric ones,but the rims looks really nice with the meaty Toyo R888
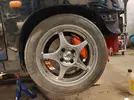
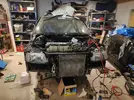
I also added the shaggy old radiator and reconnected the fuelpump so its controlled by the ECU again and not a permanent switch.
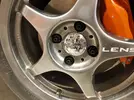
Lastly i installed some wheelstuds thats about it, yeah....wheelstuds.... because racecar?

Finally managed to refurb and paint the calipers, unfortunetly the caliperpaint i choose where a PAIN to work with, some kind of 2-part spraycan paint, absolutely atrocious clogged the nozzle constantly but hey they have some colour now.

I also added some new undercoat to the wheelwells and mounted the calipers, however i need to fix some 3mm washers/spacers to space the caliper out, the washers I have now is 2,6-2,8mm and they are not quite as centered over the disc as I want. I also got some new M12 1,25 40mm bolts to acomodate the meatier caliper + washer.

However i really need spacers to clear the calipers unfortunetly, so i orderd some 15mm hubcentric ones,but the rims looks really nice with the meaty Toyo R888

I also added the shaggy old radiator and reconnected the fuelpump so its controlled by the ECU again and not a permanent switch.

Lastly i installed some wheelstuds thats about it, yeah....wheelstuds.... because racecar?

linkus
Member
Hahaha I have 0 faith in that one but i really want to start that sucker up and take it for a spin flush the coolant system and hopefully it wont leak, before i get a new one!You have a lot of faith in that radiator!
If you know a good place in EU sorry UK
Henry Isoppo
New Member
Found the blue Clio through your 2019 posts on speeduino.com.
Thought it was an abandoned project, but a friend of mine found these posts of yours over here and I've just read through all of them.
Very nice projects, man. The red Clio looks awesome.
Congratulations on all that hard work!
Thought it was an abandoned project, but a friend of mine found these posts of yours over here and I've just read through all of them.
Very nice projects, man. The red Clio looks awesome.
Congratulations on all that hard work!
linkus
Member
Hey! I have totally forgot about the thread there! Maybe i should update it there aswell, however not that much of a speeduino car yetFound the blue Clio through your 2019 posts on speeduino.com.
Thought it was an abandoned project, but a friend of mine found these posts of yours over here and I've just read through all of them.
Very nice projects, man. The red Clio looks awesome.
Congratulations on all that hard work!
Yeah the red one is really nice, almost to nice.
Thanks alot!
linkus
Member
I have had some crunshtime so that's why the updates has been lacking but i have snaped som pictures of my progress since last 
I started of with some fitting issues with my Lenso rims, the ET where way of so needed to run spacers to clear the caliper, 15mm hubcentric spacers where fitted to clear, but effin hell its stills tight but it clears (What ET does people run that have med the Pug 406 Brembo conversion?)
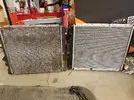
I also fell for the pressure and bought a new Nissen rad. haha its quite the difference
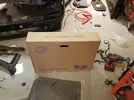
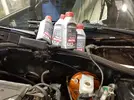
I also filled and bleed the brakes, i have had these RBF 600 on the shelf for a couple of years (never opened) finally they got to be used!
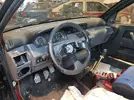
I also refitted the stock steeringwheel since MOT in Sweden does not like Snap Off wheels
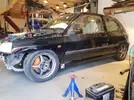
I took him down on the ground just to visualise how he sits, he needs to be a bit higher in the front so it clears the arches, it's a bit tight now haha, but hey he does look good in my opinion!
Up on jackstands again tried to somewhat attach the brakehoses, jerryrigging it is
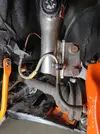
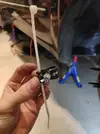
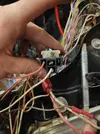
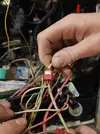
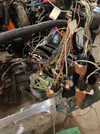
And I ran the car until the thermostat opened, but no coolingfan kicked in... effin hell so i started ruffeling through the electricalsystem... that was a "disaster" it had been cut and spliced and reconnected in a whay that the fan would only kick in when the thermoswitch on the thermostathousing triggerd, and if im correct that also drives the Warninglight in the dash... in the meantime while trying to figure ot all this a ripped out som unused cables and repaired i think atleast 7 wires that the insulation was chewed thru on... all of the cables that have Wagos on it where damaged (I attached the wagos just to test the circuits they have now been replaced with solder and glue filled heatshrink)
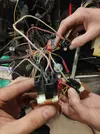
I also tested the rad fan switch in some boiling water with good sucsess i have no picture of this unfortunetly but it triggerd around 85-90c and released around 70 so im happy with that, also look at the colour difference between ONE run to thermostatic opening and fresh coolant O.O i really need to flush this system a couple of times.
Ran the battery cable back to the trunk and mounted teh battery, it's not at perfect placement but hey it can allways be moved later.
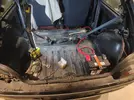
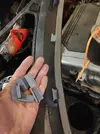
I somehow did not have any brackets for the is it called cowl-cover? We are callig it the aquarium or tub in Sweden hehe, so the 3D-printer to the rescue! Only printed in PLA so it might deform with heat (I did not have any other filament so meh, it will work for a while)
AND FINALLY! I took him on his FIRST drive in MAAANY years
 its vibrating everywhere, the alignement is non excisting and reverse is a bit of a bi*ch to get into gear, but HEY he drives!
I started of with some fitting issues with my Lenso rims, the ET where way of so needed to run spacers to clear the caliper, 15mm hubcentric spacers where fitted to clear, but effin hell its stills tight but it clears

I also fell for the pressure and bought a new Nissen rad. haha its quite the difference


I also filled and bleed the brakes, i have had these RBF 600 on the shelf for a couple of years (never opened) finally they got to be used!

I also refitted the stock steeringwheel since MOT in Sweden does not like Snap Off wheels

I took him down on the ground just to visualise how he sits, he needs to be a bit higher in the front so it clears the arches, it's a bit tight now haha, but hey he does look good in my opinion!

Up on jackstands again tried to somewhat attach the brakehoses, jerryrigging it is


And I ran the car until the thermostat opened, but no coolingfan kicked in... effin hell so i started ruffeling through the electricalsystem... that was a "disaster" it had been cut and spliced and reconnected in a whay that the fan would only kick in when the thermoswitch on the thermostathousing triggerd, and if im correct that also drives the Warninglight in the dash... in the meantime while trying to figure ot all this a ripped out som unused cables and repaired i think atleast 7 wires that the insulation was chewed thru on... all of the cables that have Wagos on it where damaged (I attached the wagos just to test the circuits they have now been replaced with solder and glue filled heatshrink)


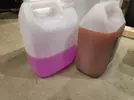
I also tested the rad fan switch in some boiling water with good sucsess i have no picture of this unfortunetly but it triggerd around 85-90c and released around 70 so im happy with that, also look at the colour difference between ONE run to thermostatic opening and fresh coolant O.O i really need to flush this system a couple of times.

Ran the battery cable back to the trunk and mounted teh battery, it's not at perfect placement but hey it can allways be moved later.

I somehow did not have any brackets for the is it called cowl-cover? We are callig it the aquarium or tub in Sweden hehe, so the 3D-printer to the rescue! Only printed in PLA so it might deform with heat (I did not have any other filament so meh, it will work for a while)

AND FINALLY! I took him on his FIRST drive in MAAANY years
Last edited:
linkus
Member
Thanks! Yeap i just need it to pass MOT/Inspection first hahaCongrats, if it drives thats great! You can start refining the car and fixing the issues as you go
linkus
Member
So... well... i last left you guys with the car atleast running by its own power, just trying to pass MOT. But first before MOT we need some tidying up and some more adjustments of the gearlever, that took some fiddeling and adjustments but now i can say that the PMS shift is a flippin godsend, holy crap that just transform the whole driving experience!
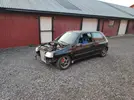
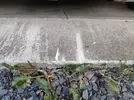
Here you have som pictures of the poor thing just days before MOT, note the red (Hazzard triangle?) yeah thats just before MOT and note the scrape marks on the garage floor, yeah he's quite low and the exhaust dings it a bit
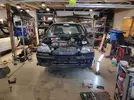
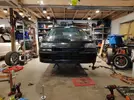
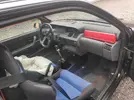
However the MOT did not work to my 100% favour, i NEEDED rear seats, rear seatbelts and tilting front seats... this was a totall bummer since i have MOT'd all kinds of diffrent cars with the exact same setup as i ran with my clio and no issues at all... well atleast i had 1 month to find some seats and a roadtrip to Gotland for two trackdays just the day after MOT!
Luckily the trackday was a HUGE sucsess, the car ran atleast 1000km + two trackdays just days after MOT, no over heating no damages nothing but a slightly warped front brake rotor and a loose brake caliper (yes that could have been a disaster but hey im still here!)
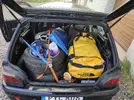
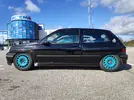
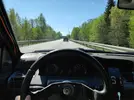
Before the ferry ride over to Gotland we stoped by a good friend of mine who happend to have a XR25 so i asked if we could try to read som faultcodes of the car and as i suspected my O2 sensor was bad, nothing to du but drive anyway!
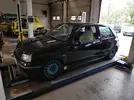
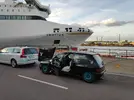

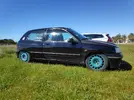
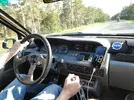
And as a HAPPY frekking surprise, my FIRST blue clio that you saw in the beginning was also there, i had no idea that he was coming aswell with it, it was really fun to see my old car again!
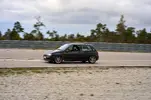
Here is one and tha only picture of my car on the track unfortunetly but hey its better than nothing!
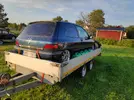
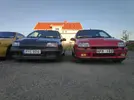
Well finally home i parked the sucker next to my red one and yeapp hes lower!
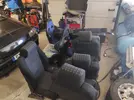
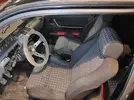
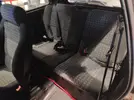
I also some week later managed to get a hold of a complete set of PH1 seats now i also have some spares (if anyone wants to buy my right hand side seats please send me a message i dont want to throw them away, they are in really good condition since thats the passangerside in Sweden)
I also bought new front Hella/Pagid rotors that has ventholes from the inside of the hub, perfect for when im gonna install brake ducts. Nice to not have the whole care shake it's self to bits when im brakeing
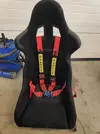
I also when i bought the PH1 seats bought a diffrent bucketseat which is narrower since the previous i had was to wide for me, i though it would be OK but when i actually was out on the track i could just as well have used the stock seats.
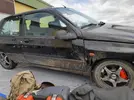
Later in the summer i was on a i think you guys call i superstage(?)/autocross? with some friends of mine, managed to well... push my car a bit to much with cold tires after that my car got a new nickname Tondeuse (lawnmover) in french
And i also got a Garmin GLO 2 GPS so i could try some timing with Harrys Laptimer and GOPRO this was my fastest time for that day.
Now the car has just been sitting and ocationally been driving and getting warmed up, next up is to take out the engine again and start with fitting the blue ITB engine and the Speeduino ECU
Here you have som pictures of the poor thing just days before MOT, note the red (Hazzard triangle?) yeah thats just before MOT


However the MOT did not work to my 100% favour, i NEEDED rear seats, rear seatbelts and tilting front seats... this was a totall bummer since i have MOT'd all kinds of diffrent cars with the exact same setup as i ran with my clio and no issues at all... well atleast i had 1 month to find some seats and a roadtrip to Gotland for two trackdays just the day after MOT!
Luckily the trackday was a HUGE sucsess, the car ran atleast 1000km + two trackdays just days after MOT, no over heating no damages nothing but a slightly warped front brake rotor and a loose brake caliper (yes that could have been a disaster but hey im still here!)


Before the ferry ride over to Gotland we stoped by a good friend of mine who happend to have a XR25 so i asked if we could try to read som faultcodes of the car and as i suspected my O2 sensor was bad, nothing to du but drive anyway!


And as a HAPPY frekking surprise, my FIRST blue clio that you saw in the beginning was also there, i had no idea that he was coming aswell with it, it was really fun to see my old car again!

Here is one and tha only picture of my car on the track unfortunetly but hey its better than nothing!

Well finally home i parked the sucker next to my red one and yeapp hes lower!

I also some week later managed to get a hold of a complete set of PH1 seats now i also have some spares (if anyone wants to buy my right hand side seats please send me a message i dont want to throw them away, they are in really good condition since thats the passangerside in Sweden)


I also bought new front Hella/Pagid rotors that has ventholes from the inside of the hub, perfect for when im gonna install brake ducts. Nice to not have the whole care shake it's self to bits when im brakeing

I also when i bought the PH1 seats bought a diffrent bucketseat which is narrower since the previous i had was to wide for me, i though it would be OK but when i actually was out on the track i could just as well have used the stock seats.

Later in the summer i was on a i think you guys call i superstage(?)/autocross? with some friends of mine, managed to well... push my car a bit to much with cold tires after that my car got a new nickname Tondeuse (lawnmover) in french


And i also got a Garmin GLO 2 GPS so i could try some timing with Harrys Laptimer and GOPRO
Now the car has just been sitting and ocationally been driving and getting warmed up, next up is to take out the engine again and start with fitting the blue ITB engine and the Speeduino ECU
linkus
Member
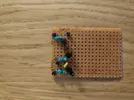
I have also tinkered some with a electric waterpump for the blue engine, its a CWA400 (Pierburg from a BMW) and i was thinking that it should be controlled by a arduino with a temperature probe. The pump takes 12v and a 12v PWM signal, so i had to go in the EEVBLOG forum to get some help on boosting the PWM-signal from the arduino, but now atleast i can controll the speed of the pump via a twist-pot!  Great success!



linkus
Member
Okey okey okey.... so alot have happend since last time, a bit good, a bit bad (read alot) but hang on tight this is one of the regular large updates that happens from time to time in this thread (luckily i take pictures of stuff haha  )
)
So since i last updated i have done actually quite alot but in this order, so it's gonna start off slow.
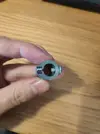
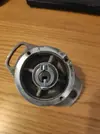
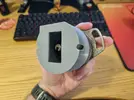
I have made some more progress on my cam axle sensor, i have no clue if it's gonna work or not but its a small neodymium magnet in a 3d-printed sleeve that fits over the dizzy-cap's rotor shaft, I also redid the housing so it actually accepted the screws the where mounted on an angle.
I parked my black clio outside during a snowstorm and somehow managed to dig it out AND drive it with 888's in snow up the slope to my garage, insane!
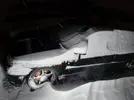
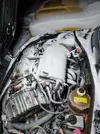
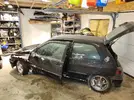
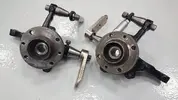
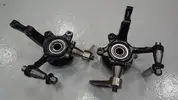
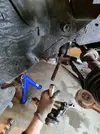
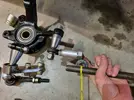
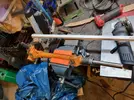
Some days later i started to install my "new" hub's with rollcenter correction, however the steering rods where incorrect so i had to dissasemble my steering rack and buy some new ends the fit my shiny hubs
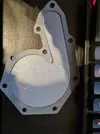
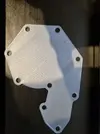
I have also started to mock up a plate in 3D for a blankingplate to take the waterpumps place, so all my water will be "driven" pumped by the electric pump.
I also started the cleanup of the engineharness and testfitted my new reliable combined oil pressure and temperature probe on the back of the block, a Bosch 0261230340 with a M14 X 1.5 / M10 X 1 adapter, fits like a glove! It's gonna be nice to have reliable preassure and temp monitoring, instead of the guesswork you have with the stock gauges
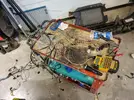
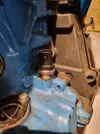
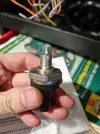
Later on i did som mockups on where to mount the waterpump and made some kind of crude bracket/mountingsollution for it just to realize later that you actually can clock the outlet... gosch darnit... i also ditched the diy sollusion for driving the waterpump and got a premade controller.
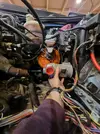
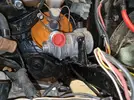
I took out the stock engine because it was time to mount the ITB-engine, LUCKILY I took a look at the timingbelt, that could have gone REAL bad... it has been loose (i can only blame myself for not mounting it correctly) and chewed itself into the alu casting
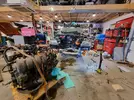
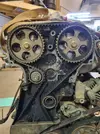
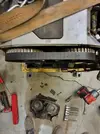
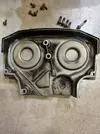
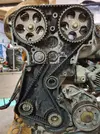
I also finally mounted my new sinterpads to my clutch and mounted the hubs
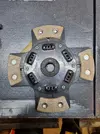
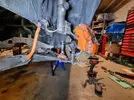
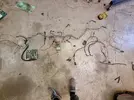
Traced some more wires and removed stuff that wasent needed and started to build a tiny engine electrical subpanel
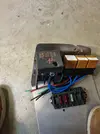
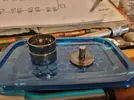
Later on was one of the most dreaded task i had with this engine... meassuring the valve lash with home made solid lifters that where all different hights... after ALOT and i mean ALOT off meassuring and math i finally was quite happy with all it's positions and lash. Unfortunetly i dont remember exctly what lash i put but i think it was somewhere around 0,15mm-0,25mm.

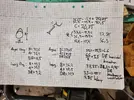

After that debacle I tackled the flywheel/clutch/gearbox,
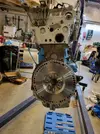
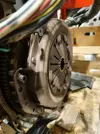
Not long after I mounted the engine in the car I realised that the clutchfork was ALOT mor sloppy that expected, compared the (fingers?) of the preassureplate of the one on my sinterd clutch and on my stock engine, they are quite diffrent amount of springensproingen on them.... this resulted in me stealing a megane preassureplate from a friend and called it a day...
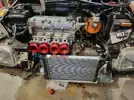

You know you have to have a alternator in the car to make it go wroom right? Well since everything in this car is special special ofc the alternator would not fit under the ITB's without some grinding a new alot shorter belt and a alomost wish to collide with itself over the waterpump pulley. I also got some new bronze bolts for the exhaust manifold, because blingbling/racecar
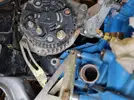
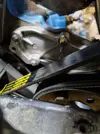
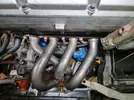
Then it was time to start making the actuall enginehasness, note that this is my first harness i have probably made alot of "why did you do it like that, you should have done it like this" stuff wrong regarding the allmighty Motorsport Wiring Groups, but this was what i had on hand and it's a starting point. I have not decided where to place my ECU yet tho (Speeduino Drop Bear) but atleast it should be inside the car.
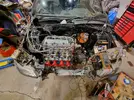
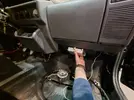
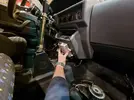
After all this things started to go south... like real south...
So since i last updated i have done actually quite alot but in this order, so it's gonna start off slow.
I have made some more progress on my cam axle sensor, i have no clue if it's gonna work or not but its a small neodymium magnet in a 3d-printed sleeve that fits over the dizzy-cap's rotor shaft, I also redid the housing so it actually accepted the screws the where mounted on an angle.


I parked my black clio outside during a snowstorm and somehow managed to dig it out AND drive it with 888's in snow up the slope to my garage, insane!


Some days later i started to install my "new" hub's with rollcenter correction, however the steering rods where incorrect so i had to dissasemble my steering rack and buy some new ends the fit my shiny hubs


I have also started to mock up a plate in 3D for a blankingplate to take the waterpumps place, so all my water will be "driven" pumped by the electric pump.


I also started the cleanup of the engineharness and testfitted my new reliable combined oil pressure and temperature probe on the back of the block, a Bosch 0261230340 with a M14 X 1.5 / M10 X 1 adapter, fits like a glove! It's gonna be nice to have reliable preassure and temp monitoring, instead of the guesswork you have with the stock gauges


Later on i did som mockups on where to mount the waterpump and made some kind of crude bracket/mountingsollution for it just to realize later that you actually can clock the outlet... gosch darnit... i also ditched the diy sollusion for driving the waterpump and got a premade controller.


I took out the stock engine because it was time to mount the ITB-engine, LUCKILY I took a look at the timingbelt, that could have gone REAL bad... it has been loose (i can only blame myself for not mounting it correctly) and chewed itself into the alu casting


I also finally mounted my new sinterpads to my clutch and mounted the hubs


Traced some more wires and removed stuff that wasent needed and started to build a tiny engine electrical subpanel


Later on was one of the most dreaded task i had with this engine... meassuring the valve lash with home made solid lifters that where all different hights... after ALOT and i mean ALOT off meassuring and math i finally was quite happy with all it's positions and lash. Unfortunetly i dont remember exctly what lash i put but i think it was somewhere around 0,15mm-0,25mm.


After that debacle I tackled the flywheel/clutch/gearbox,

Not long after I mounted the engine in the car I realised that the clutchfork was ALOT mor sloppy that expected, compared the (fingers?) of the preassureplate of the one on my sinterd clutch and on my stock engine, they are quite diffrent amount of springensproingen on them.... this resulted in me stealing a megane preassureplate from a friend and called it a day...


You know you have to have a alternator in the car to make it go wroom right? Well since everything in this car is special special ofc the alternator would not fit under the ITB's without some grinding a new alot shorter belt and a alomost wish to collide with itself over the waterpump pulley. I also got some new bronze bolts for the exhaust manifold, because blingbling/racecar


Then it was time to start making the actuall enginehasness, note that this is my first harness i have probably made alot of "why did you do it like that, you should have done it like this" stuff wrong regarding the allmighty Motorsport Wiring Groups, but this was what i had on hand and it's a starting point. I have not decided where to place my ECU yet tho (Speeduino Drop Bear) but atleast it should be inside the car.


After all this things started to go south... like real south...
linkus
Member
I decided that i didnt have time to make the black car ready for the track to much stress and i just wanted to have a good time and not be tired and stressed. Started packing my red car polished it real nice and come trackday, I waterplaned real bad sent it into the gravel and cooked it up bad 
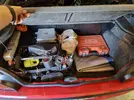

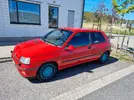
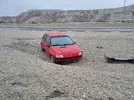
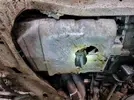
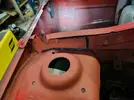
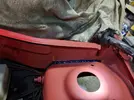
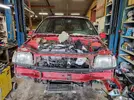
Oilpan fucked, subframe fucked, struttowers delaminated from the firewall aka fucked, mounting hole for strut fucked...
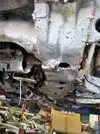
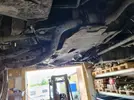
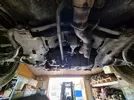
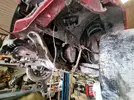
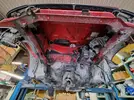
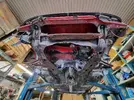
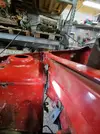
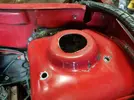
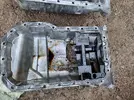
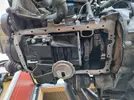
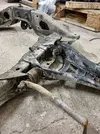
Luckily a friend of mine have a hoist and is alot better at welding than I am so we managed to push back the struttowers and weld them back to the firewall (they where only spotwelded from factory), managed to straighten up the hole for the strut and added some bodysealant + primer.
And luckily i'm almost as a hamster for clio parts so i had almost all the parts needed to repair the front end, like subframe, wishbones, oilpan (not with the nice large baffles tho). The subfram luckily bolted straight on to the car so it's not TO bent out of shape but it sure as hell is not as straight and level as it was before, the doors close better now tho somehow... I only need to get a new left side hub with ABS since that also got bent out of shape...
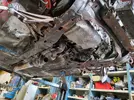


Oilpan fucked, subframe fucked, struttowers delaminated from the firewall aka fucked, mounting hole for strut fucked...


Luckily a friend of mine have a hoist and is alot better at welding than I am so we managed to push back the struttowers and weld them back to the firewall (they where only spotwelded from factory), managed to straighten up the hole for the strut and added some bodysealant + primer.


And luckily i'm almost as a hamster for clio parts so i had almost all the parts needed to repair the front end, like subframe, wishbones, oilpan (not with the nice large baffles tho). The subfram luckily bolted straight on to the car so it's not TO bent out of shape but it sure as hell is not as straight and level as it was before, the doors close better now tho somehow... I only need to get a new left side hub with ABS since that also got bent out of shape...


linkus
Member
I didn't take alot of pictures when repairing him since it wasnt in my garage and i just wanted to have it done so i could atleast drive it home to my garage, and that is just what you are going to witness down below, one really happy and lightend(?) Linus.
And the frist drive out! Big moment for me this was 18 days after the accident, so you have some kind of timeframe.
Finally i drove him home
Now he just sits, sad and with mismatched panels since thoes where also trashed in the wreck.
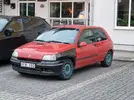
However i noticed some days later that the rear axel also took a beating since my rear wheels have quite different toe now... thats not good, so now i need to refurb my other rear axel aswell for this...
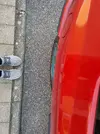
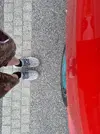
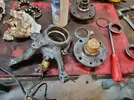
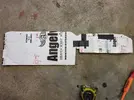
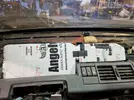
Some time later, as you might have guessed my motivation to wrench tanked with this since the red car was in such nice condition (dont take cars out on the track that you really really care about) i learned the hard way. But i got some new hubs and have sandblasted the left side atleast, and started some small things to get my motivation back like made a template for a "MAXI Style" dashboard.
And the frist drive out! Big moment for me this was 18 days after the accident, so you have some kind of timeframe.
Finally i drove him home
Now he just sits, sad and with mismatched panels since thoes where also trashed in the wreck.

However i noticed some days later that the rear axel also took a beating since my rear wheels have quite different toe now... thats not good, so now i need to refurb my other rear axel aswell for this...


Some time later, as you might have guessed my motivation to wrench tanked with this since the red car was in such nice condition (dont take cars out on the track that you really really care about) i learned the hard way. But i got some new hubs and have sandblasted the left side atleast, and started some small things to get my motivation back like made a template for a "MAXI Style" dashboard.


Similar threads
- Question
preRS Clio
MK1 Clio seat subframes
- Replies
- 0
- Views
- 50
- Question
preRS Clio
MK1 Clio boss kit help
- Replies
- 3
- Views
- 118
- Replies
- 6
- Views
- 133

