There is more to life with TurboRenault.co.uk

Register a free account today to become a member! Once signed in, you'll be able to participate on this site by adding your own topics and posts, as well as connect with other members through your own private inbox!

19 Project Turbo Shed - sponsored by Bosch PWS850-125

Finally got my tank fitted and connected up.

www.renault_turbo.com_neal_J568JBK_Tank_100_7450.webp

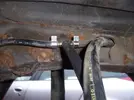
For the vent system, I put a T piece in so the vent line comes from the rollover valve on the top of the tank sender and connects to the release valve on the filler neck as well as going off to the front of the car to the evaporative emissions system.

www.renault_turbo.com_neal_J568JBK_Tank_100_7445.webp

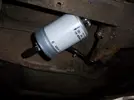
Also fitted a new fuel filter (the original carb setup didn't have one at all) and need to make a bracket to hold it as it's just dangling at the moment.

www.renault_turbo.com_neal_J568JBK_Tank_100_7451.webp

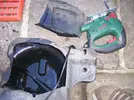
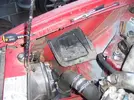
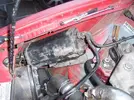
Then up the front I wanted to fit the full evap system including the carbon canister from the megane. Yeah I know I could just delete it and vent to atmosphere but I'm a good boy and love polar bears and all that so I thought I may as well fit it. On the megane the carbon canister has a sort of wedge moulded into in which clips into a recess on the bottom of the fuel tank. To make mounting it easier I cut the relevant bit out of the tank and just screwed it to the inner wing.

www.renault_turbo.com_neal_J568JBK_Tank_100_7454.webp
www.renault_turbo.com_neal_J568JBK_Tank_100_7456.webp
www.renault_turbo.com_neal_J568JBK_Tank_100_7468.webp
www.renault_turbo.com_neal_J568JBK_Tank_100_7469.webp

Managed to connect it all up by chopping up the original rigid plastic pipes from the megane. I did have this spot earmarked for the brake fluid reservoir, 5GTT style but I'll probably have to find somewhere else for it now. The washer bottle also originally lived in the front corner of the engine bay there so that will need a new home too.
 
Time for some rear suspension and brake action!

R19s had two different types of rear suspension axle fitted to them - most lower models got an enclosed 2 torsion bar beam, while the 16Vs and a couple of other variants got an open 4 torsion bar beam, the extra 2 bars being anti roll bars. Obviously from a handling point of view the 16V beam is much,much better. Also the 16V has 238mm rear discs and most non-16v types have drums.

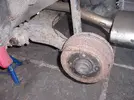
This particular car would have had the 2 bar beam originally but has had its beam replaced at some point and they have fitted the 4 bar type beam, which is good. However it now has drum brakes on it. Not so good.

I want rear discs so I have 2 options:

1 - Find and fit some standard 238mm 16V discs and calipers. Same as clio 172/182 and various other things so that’s dead easy. But I’d also need to find the caliper brackets that bolt to the radius arms. Not so easy. Could make some, but to be honest the 16V calipers are shit and if I’m going to be making brackets, might as well make brackets for something better.

2 - Fit discs from something else.

Once again the scenic gives up some goodies. All (I think) mk1 phase 2 scenics were fitted with rear disc brakes, but they are 274mm discs and the calipers are the same design as the megane 225 ph2, but with smaller (34mm v 38mm) pistons. These calipers are also fitted to mk2 scenics and meganes and all manner of other things so pretty ubiquitous.

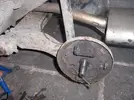
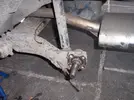
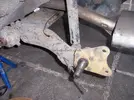
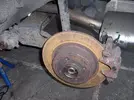
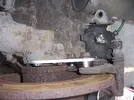
Relatively simple… removed the drum brakes and measured up both the 19 trailing arm/stub configuration

100_7509.webp
100_7510.webp
100_7511.webp

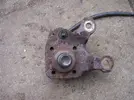
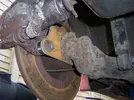
and the Scenic stub configuration

100_7530.webp
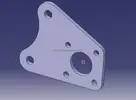
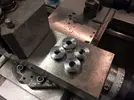
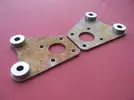
Then sketched up some adapter brackets in CAD, then hopped on the waterjet and lathe.

bracket.webp
spacers.webp

Then whacked it together

100_7512.webp
100_7518.webp
100_7517.webp
100_7523.webp
100_7529.webp
Just need to tack weld the spacers on and get them powdercoated. Scenic handbrake cables should fit stright up the 19's lever mech, make some new brake lines and job's a good 'un.
 
Last edited:
I thought you would be able to bolt-on-bolt-off a disc conversion but thats a different setup to what I expected. On the 21 (and a few others) the hub carrier is bolted to the trailing arm with the 4 bolts from the back. You can change in and out the full stub.

i17.photobucket.com_albums_b79_DaveL485_DSCF1416Medium.webp
Yeah the stub is pressed into the radius arm itself and not replaceable. Well, not without taking the beam off the car and using some pretty heavy duty gear to press it out. Can't get replacement stubs anyway. I think the 19 and mk1 clio were probably the last models to use this arrangement, the mk1 meganes and mk2 Clios went to the same setup as your photo, replaceable stub and brake mount.

It's a stupid design really, if you have a small bump that bends the stub, you have to replace the entire beam, no ifs or buts.

Sent from my XT1039 using Tapatalk
 
You can usually knock the stub axles out pretty easy and mod clio 172/182 rear stub axles to fit pretty easy if you bent one. No need to do it though as your current setup looks decent
 
Alright alright!

So recently I've dropped the engine out again as I need to fit a brake hydraulic system.

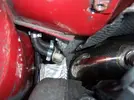
A reminder of the clearance between the master cylinder and the downpipe:
100_7161.webp

Not very much! That's actually the scenic RX4 M/C fitted which I was thinking of using, but it only has 2 ports as I guess the ABS on that vehicle sorts out the split circuit and force distribution etc. Issue is the ports are exiting the wrong direction. The original 19 one has all 4 ports and of course no ABS. Each port straight to a caliper.

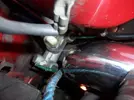
So anyway What I needed was a M/C with 2 ports, pointed away from the downpipe instead of towards it. Pug 406 V6 one fits the requirements. 23.8mm diameter, so slightly bigger than the 23mm one that the scenic uses. Should be OK.

I lopped off the unused casting stubs where ports would be on another variant to give me a bit more clearance.
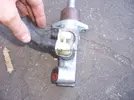
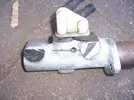
100_7583.webp

100_7582.webp

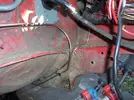
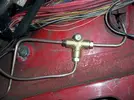
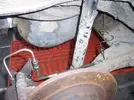
Then just mounted it and made up some lines. Becasue I have no ABS to sort out the split etc, each port goes to a T piece mounted on each inner wing. From there it obviously branches to one front and the opposite rear caliper. I hate making brake pipes!
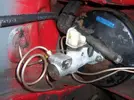
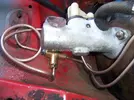
100_7584.webp 100_7585.webp 100_7575.webp
100_7586.webp 100_7572.webp
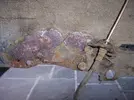
Yeah, so there's a bit of a corrosion issue there.

I chopped loads of it out and welded on a new plate:
100_7577.webp
100_7581.webp

No photos of the finished job as to be perfectly honest I'm ashamed of it. It should be strong at least, and I covered my tracks by slathering round it with seam sealer and spraying with underseal :bf:

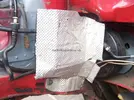
Then I figured my brake setup would need a decent amount of heatshielding so as not to get cooked by the downpipe. Luckily I picked up a couple of bits of that nimbus type stuff from the verge of the motorway roundabout near where I live recently that obviously fell off a car. Looks like they came off a Ford.
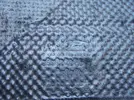
100_7591.webp

So chopped em up and made a little double layered shield that bolts to the chassis rail.
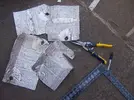
100_7590.webp
100_7592.webp

Then started butchering the original meg225 bulkhead heatshield to fit next to it.
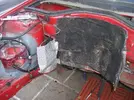
100_7593.webp
Yeah, reckon that will work alright. Now need to make some more shielding for the gearshift box and cables...
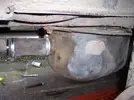
 
PLEASE make sure you fit a load compensator to the rear brakes, or you're going to be enveloped in a big fiery ball of death exploding through a hedge/bridge/tree backwards.

It will be a glorious death which we would applaud, but, rather you were here making Renault projects with bits of old Ford you found on the side of the road :D
 
Piped up the back end of the car this weekend. Proper pain in the arse, had to drop the beam to get a spanner on the two unions to the flexis under the car.

All done now though and bled through, nice firm pedal. Need to fit handbrake cables and that's about it.

No proportioning valve for now (sorry Dave!) as I just want to get it moving and stopping. Adding the valve later is an easy job, just sits between the hard pipe and flexi under the car.

100_7597.webp
 
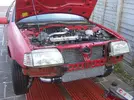
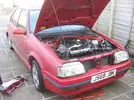
Put the engine back in yesterday, coolant circuit connected, loom connected, shafts in.

100_7601.webp
100_7604.webp
100_7605.webp

Really really tight down by the master cylinder! I had to trim and fold my Ford m/c heatshield a bit more to clear.

100_7603.webp

Next I need to modify the front pipe a little bit, the flexi section needs to be moved to further back as it hits on the ARB. Once that's done I can try starting and stopping :)

Also need to slot the lower holes in the struts to allow camber adjustment as I can't quite get enough to stand the wheels completely upright using just eccentric bolts.
 
Last edited:
Yeah, so would I. There's no way for me to get it though - I used the tightest radius mandrel bend I could find. Also, it's mm from touching the manifold on the other side. Only way to increase clearance would be to reduce diameter.

Heatshielding and more heatshielding is the approach now.
 
Back
Top