There is more to life with TurboRenault.co.uk
You are using an out of date browser. It may not display this or other websites correctly.
You should upgrade or use an alternative browser.
You should upgrade or use an alternative browser.
19 Project Turbo Shed - sponsored by Bosch PWS850-125
Neal R19
Well-Known Member
Legendary.
Pah, ceilings, if you've got nice ceilings, you need nice lights, if you've got nice lights you can see the rest of the shit bits.
Right. I agree, sadly that won't wash with my wife.
Last edited:
Neal R19
Well-Known Member
Few more bits and bobs done today in the sunshine...
The original radiator from the 1.4 engine would obviously not be adequate for a 2.0T. Haven't got a photo of the original rad, binned it ages ago. Take my word for it, it was piddling (and 25 years old). The megane 225 radiator is both too wide to fit between the subframe rails and too tall to fit under the bonnet. And the stubs are awkwardly placed.
So I picked up a new pattern radiator for a mk1 scenic for a few quid off ebay instead. Not much smaller than the 225 one but enough to allow it to fit in the 19. Not sure what variant it's from but it fits nicely. Just needed to make some new retaining brackets
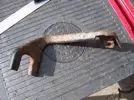
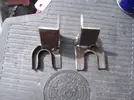
One of the originals:
Handily these little captive nut holes are nearby next to headlights. God know what they're there for but I'm using them.
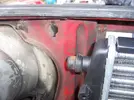
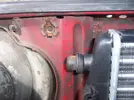
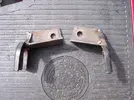
Chopped up the original brackets and used some angle channel to make some new ones.
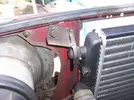
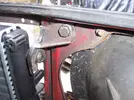
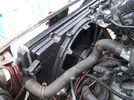
So that's the rad mounted and piped up and scenic fan mounted.
On the megane the header tank sits in the offside wing and connects directly to the top and bottom of the radiator end tank. Can't do that here so I'll probably use a clio header tank and connect to the thermostat housing and bottom hose unless anyone has any better ideas?
The original radiator from the 1.4 engine would obviously not be adequate for a 2.0T. Haven't got a photo of the original rad, binned it ages ago. Take my word for it, it was piddling (and 25 years old). The megane 225 radiator is both too wide to fit between the subframe rails and too tall to fit under the bonnet. And the stubs are awkwardly placed.
So I picked up a new pattern radiator for a mk1 scenic for a few quid off ebay instead. Not much smaller than the 225 one but enough to allow it to fit in the 19. Not sure what variant it's from but it fits nicely. Just needed to make some new retaining brackets
One of the originals:

Handily these little captive nut holes are nearby next to headlights. God know what they're there for but I'm using them.


Chopped up the original brackets and used some angle channel to make some new ones.


So that's the rad mounted and piped up and scenic fan mounted.
On the megane the header tank sits in the offside wing and connects directly to the top and bottom of the radiator end tank. Can't do that here so I'll probably use a clio header tank and connect to the thermostat housing and bottom hose unless anyone has any better ideas?
Neal R19
Well-Known Member
The 225 intercooler wont fit either 
I want to completely conceal the intercooler and pipework behind the bumper, not have it or the hoses poking out the front/side of the bumper so I’ve gone for a smaller one than I’d ideally like - the usual 50 quid shitty chinese universal one..
So anyway, I’ve knocked up this hanging bracket from some more angle channel to bolt to the back of the front cross member through some existing holes.
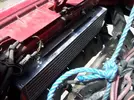
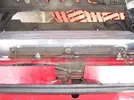
Trimmed the tabs off the bottom of the crossmember so it doesnt mask any of the intercooler
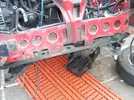
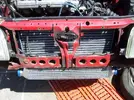
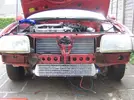
Just need to make some bracing strips to go from the bottom of the intercooler to maybe the subframe cross memeber.
Once I’m up and running and know how much space I have to play with, I might see if I can shift the radiator back and put a big taller intercooler in front of it although in fairness, the ph1 19 doesnt really have an upper grille to speak of so any extra height above the cross member will not really be in much airflow I guess.
I want to completely conceal the intercooler and pipework behind the bumper, not have it or the hoses poking out the front/side of the bumper so I’ve gone for a smaller one than I’d ideally like - the usual 50 quid shitty chinese universal one..
So anyway, I’ve knocked up this hanging bracket from some more angle channel to bolt to the back of the front cross member through some existing holes.


Trimmed the tabs off the bottom of the crossmember so it doesnt mask any of the intercooler


Just need to make some bracing strips to go from the bottom of the intercooler to maybe the subframe cross memeber.
Once I’m up and running and know how much space I have to play with, I might see if I can shift the radiator back and put a big taller intercooler in front of it although in fairness, the ph1 19 doesnt really have an upper grille to speak of so any extra height above the cross member will not really be in much airflow I guess.
Last edited:
Neal R19
Well-Known Member
Because the top hose "just fits" like that, you jammy bleeder! is the header tank a flow-through or just a gravity top up?
Not sure what you mean? On the 19 it has 3 stubs and there's a constant flow in from the top one, can't remember where the bottom 2 stubs are connected to.
On the clio 172 the bottle has only 2 stubs, the top one goes to the thermostat housing, the lower one T's into the bottom rad hose. Not sure of there's a flow through there or not. I'm thinking to replicate the clio setup.
Neal R19
Well-Known Member
Been on with a few more bits and bobs recently. Main thing has been making a start on... making it start.
As I mentioned, I want to run the thing on the OE management to begin with. So I've transplanted the entire megane 225 wiring loom and most of the things that it connects to that could conceivably be involved in engine management or immobiliser functions.
So that's dash cluster, EPAS column, steering lock, door handles, stalk assembly and a dozen other little things.
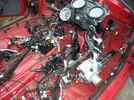

Next thing was to alter the engine bay wiring to take power from the battery in the normal R19 battery location in the driver's side of the scuttle rather than from the front left of the engine bay as in the Megane.
Welded on some earth studs (I had the uncharacteristic foresight to cut loads of these off the megane shell before it went) to the chassis rail and gathered up all the earths. Need to weld a few more on inside the cabin as well.
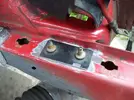
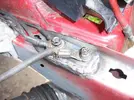
Stripped back a lot of the loom and freed out the main positive feeds. Extended the alternator one and took them to a junction box mounted on the bulkhead.
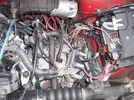
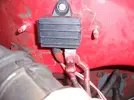
Then ran a really chunky 240amp cable from there through a hole in the bulkhead over to the main fuse thing on the battery in its new home. Also extended the 3 smaller cables that run to this fuse block. Also sorted out various chunky earth cables going here there and everywhere.
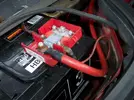
Moment of truth:
video!
Happy days!
Probably worth mentioning that it has no exhaust and more importantly, no fuel tank. So it was never going to start or anything. Point is it cranks. I had some trepidation over whether I was going to run into immobiliser faults or whatever. Renewed my enthusiasm for pressing on with the other remaining tasks.
As I mentioned, I want to run the thing on the OE management to begin with. So I've transplanted the entire megane 225 wiring loom and most of the things that it connects to that could conceivably be involved in engine management or immobiliser functions.
So that's dash cluster, EPAS column, steering lock, door handles, stalk assembly and a dozen other little things.


Next thing was to alter the engine bay wiring to take power from the battery in the normal R19 battery location in the driver's side of the scuttle rather than from the front left of the engine bay as in the Megane.
Welded on some earth studs (I had the uncharacteristic foresight to cut loads of these off the megane shell before it went) to the chassis rail and gathered up all the earths. Need to weld a few more on inside the cabin as well.


Stripped back a lot of the loom and freed out the main positive feeds. Extended the alternator one and took them to a junction box mounted on the bulkhead.


Then ran a really chunky 240amp cable from there through a hole in the bulkhead over to the main fuse thing on the battery in its new home. Also extended the 3 smaller cables that run to this fuse block. Also sorted out various chunky earth cables going here there and everywhere.

Moment of truth:
video!
Happy days!
Probably worth mentioning that it has no exhaust and more importantly, no fuel tank. So it was never going to start or anything. Point is it cranks. I had some trepidation over whether I was going to run into immobiliser faults or whatever. Renewed my enthusiasm for pressing on with the other remaining tasks.
Last edited:
DaveL485
Staff member
BATTERY CABLE / LEAD 12v / 24v Power junction box for cables up to 25 mm²ebay - sorry, forgot to skimlink
Fucking tenner that thing cost!
Skimlink! Nice
The 225 intercooler wont fit either
Assume not a standard cooler ? The standard one is gash !
Neal R19
Well-Known Member
Assume not a standard cooler ? The standard one is gash !
Yeah the donor had the standard intercooler. It wont fit, at least not without modification.
What's so bad about it? The universal one I'm using at the moment is quite a bit smaller.
Yeah the donor had the standard intercooler. It wont fit, at least not without modification.
What's so bad about it? The universal one I'm using at the moment is quite a bit smaller.
The charge temps go through the roof after a few pulls.
Simon08328
New Member
This is truly genius, I should give you my 19 16v to bring back to life..
DaveL485
Staff member
Damn you, I was hoping for a new update, but alas, nothing! Gah....This is truly genius, I should give you my 19 16v to bring back to life..
minichapperz
Active Member
Jesus Neal i didnt realise you had been up to quite so much fettling !!! Top notch and keep it up! Mines spat its starter motor so ive decided to put it away for a year or so!
Neal R19
Well-Known Member
Quick update then. Still no kitchen ceiling BUT I do now have a nice (but rather short) box hedge around the front of the house.
Anyway… been working on my downpipe/exhaust recently and I'm back as far as the centre of the car.
Since the standard cat/downpipe (2.25” bore) sits in the the same place as the brake master cylinder, and in any case is broken at the turbo flange, I needed to modify/make something to replace it with. For this purpose I bought a secondhand 3” bore stainless decat with the intention of cutting and rewelding it to suit.
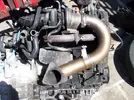
Main problem here is that on a RHD 19, the brake master cylinder is sitting where the downpipe/decat needs to go. Due to the position of the turbo outlet on the standard manifold, options are limited here. The downpipe needs to thread between 3 things:
The corner/edge of the scuttle panel
The manifold
The master cylinder (fucking RHD!)
It’s just too big to fit down past the master cylinder and even if it did, it would need so much chopping and so much welding that it made no sense to do it that way rather than just starting from scratch.
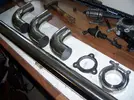
So making up a custom downpipe using 2.5” stainless mandrel bends and the turbo flange (which handily is also stainless) from the original cat converter is the order of the day. Bits:
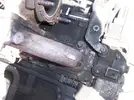
Ground back this little lug thing on the manifold for a bit of extra clearance
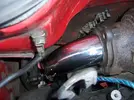
Clearance on the scuttle and master cylinder, just. Gonna need some heatshields here!
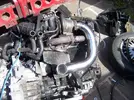
Mocked up with the engine out of the car to get approximate shape and position.
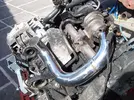
Then some (read: a lot of) crawling around under the car fettling and adjustment with the engine in.
I’ve tried to think ahead a bit here. I’m using a manual steering rack now but want to keep my options open for fitting power steering in the future. The PAS rack is obviously bulkier and has various pipes coming out of it. With this in mind, while mocking up the link pipe, I’ve fitted the megane PAS rack mounts and the little heatshield that they carry. If I keep my link pipe in the remaining space available then I should hopefully be future proofed.
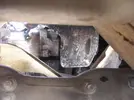
Rather than have the downpipe to mid pipe join with a flange in the usual place I decided to put a V-band joint in the lower leg of the downpipe as it travels across before it turns to run backwards through the gap between the floor and subframe.
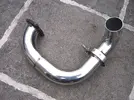
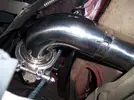
This is for 2 reasons:
1 - There’s not a lot of room down there in that gap to fit any kind of joint (either v-band or normal flange joint)
2 - This way allows the mid pipe to rotate up and down on the v-band joint before clamping up which makes alignment through that gap a bit easier.
Immediately after the V band joint the mid pipe turns 90 degrees then down 45 degrees and back, via a flexi pipe which is realistically as close to the engine as it can go. Then it’s straight back to… not sure yet.
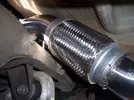
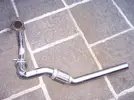
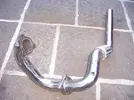
I’m yet to make some bracketry to brace to the OE cat mounting point on the manifold (had to drill out and retap to M6 the remains of the original bolt - being unsupported was probably why the original cat broke off in the first place) and the rubber damped one in the bottom corner. Will probably get all this finally TIGed up before doing that in situ on the engine.
I’m trying to make a decent-ish job of all this as it's such a pain in the arse that it takes so much time and effort even to bodge it so might as well spend the extra time to try and get it right in the first place and hopefully not have to touch it again. That's the plan anyway.
For the rear section though I just need to get something in place so I can start the engine, finish the rest of the work and drive it somewhere to get an MOT etc. I had a go last weekend at making a temporary back section from the original megane system chopped up and a clio 172 back box. Didn't work out very well. Just so hard to thread it round the rear beam and tank etc. using a hotch potch collection of random bent pipe bits. So I gave up.
Other possible solutions are:
1: Cut a suitable flange to mate to the 2” stainless system I could borrow from my 16V. Again just to get the thing running/drivable.
2: A quick and dirty sidey just in front of the passenger side rear wheel. That would be relatively easy to knock up.
I had planned to get a bit more done yesterday (bank holiday) but my heart just wasn’t in it, I’ve had enough of crawling around on the floor, grinding and getting covered in shite for now so I went and sat in the garden with a pack of beers instead. I regret nothing.
Anyway… been working on my downpipe/exhaust recently and I'm back as far as the centre of the car.
Since the standard cat/downpipe (2.25” bore) sits in the the same place as the brake master cylinder, and in any case is broken at the turbo flange, I needed to modify/make something to replace it with. For this purpose I bought a secondhand 3” bore stainless decat with the intention of cutting and rewelding it to suit.

Main problem here is that on a RHD 19, the brake master cylinder is sitting where the downpipe/decat needs to go. Due to the position of the turbo outlet on the standard manifold, options are limited here. The downpipe needs to thread between 3 things:
The corner/edge of the scuttle panel
The manifold
The master cylinder (fucking RHD!)
It’s just too big to fit down past the master cylinder and even if it did, it would need so much chopping and so much welding that it made no sense to do it that way rather than just starting from scratch.
So making up a custom downpipe using 2.5” stainless mandrel bends and the turbo flange (which handily is also stainless) from the original cat converter is the order of the day. Bits:

Ground back this little lug thing on the manifold for a bit of extra clearance

Clearance on the scuttle and master cylinder, just. Gonna need some heatshields here!

Mocked up with the engine out of the car to get approximate shape and position.


Then some (read: a lot of) crawling around under the car fettling and adjustment with the engine in.
I’ve tried to think ahead a bit here. I’m using a manual steering rack now but want to keep my options open for fitting power steering in the future. The PAS rack is obviously bulkier and has various pipes coming out of it. With this in mind, while mocking up the link pipe, I’ve fitted the megane PAS rack mounts and the little heatshield that they carry. If I keep my link pipe in the remaining space available then I should hopefully be future proofed.

Rather than have the downpipe to mid pipe join with a flange in the usual place I decided to put a V-band joint in the lower leg of the downpipe as it travels across before it turns to run backwards through the gap between the floor and subframe.


This is for 2 reasons:
1 - There’s not a lot of room down there in that gap to fit any kind of joint (either v-band or normal flange joint)
2 - This way allows the mid pipe to rotate up and down on the v-band joint before clamping up which makes alignment through that gap a bit easier.
Immediately after the V band joint the mid pipe turns 90 degrees then down 45 degrees and back, via a flexi pipe which is realistically as close to the engine as it can go. Then it’s straight back to… not sure yet.


I’m yet to make some bracketry to brace to the OE cat mounting point on the manifold (had to drill out and retap to M6 the remains of the original bolt - being unsupported was probably why the original cat broke off in the first place) and the rubber damped one in the bottom corner. Will probably get all this finally TIGed up before doing that in situ on the engine.
I’m trying to make a decent-ish job of all this as it's such a pain in the arse that it takes so much time and effort even to bodge it so might as well spend the extra time to try and get it right in the first place and hopefully not have to touch it again. That's the plan anyway.
For the rear section though I just need to get something in place so I can start the engine, finish the rest of the work and drive it somewhere to get an MOT etc. I had a go last weekend at making a temporary back section from the original megane system chopped up and a clio 172 back box. Didn't work out very well. Just so hard to thread it round the rear beam and tank etc. using a hotch potch collection of random bent pipe bits. So I gave up.
Other possible solutions are:
1: Cut a suitable flange to mate to the 2” stainless system I could borrow from my 16V. Again just to get the thing running/drivable.
2: A quick and dirty sidey just in front of the passenger side rear wheel. That would be relatively easy to knock up.
I had planned to get a bit more done yesterday (bank holiday) but my heart just wasn’t in it, I’ve had enough of crawling around on the floor, grinding and getting covered in shite for now so I went and sat in the garden with a pack of beers instead. I regret nothing.
Last edited:
Similar threads
- Question
5 GT Turbo
Silver phase 1 Turbo - Bodykit colour ??
- Replies
- 12
- Views
- 132
- Featured
- Replies
- 84
- Views
- 2K
- Replies
- 0
- Views
- 48
- Replies
- 0
- Views
- 39
