Gentle Ben
Vee-Man
“SILVER STREAK”
Grandfather affectionately mocks Grandsons’ much loved Retro-Renault
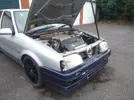
Silver Streak is my first car which my Dad and I have owned since 1998 – 18 years now and counting!
This beast of a car came into my family when I was about 14-15 years old. My Dad bought her from my secondary school Chemistry teachers’ mother, to be used as a cheap second vehicle to run rubbish to the tip, and eventually for me to learn to drive in.
At first I couldn’t think of a car I would want to drive around in any less; indeed the car of my dreams at that time was a Vauxhall Nova SR… perish the thought! Gradually though, as I started driving her, the first car love affair began, to the point that my late Grandfather coined the name ‘Silver Streak’ as a comical, if somewhat sarcastic description for the car.
My love for this car is what has to date cost me countless thousands of pounds in maintaining, running and modifying her; endless frustration at the fact that car hasn’t moved its own power in over 5 years, all on account of my own wild plans, which you will see if you care to read on.
This report starts with a brief look at how the car changed between 2002-2005, when I was a student, and the car was on the road, and being used as a daily driver.
The majority of this report goes on to document from Autumn 2005 to the present – and sees my original decision to take the car off the road for a ‘small amount’ of TLC quickly spiral into a much bigger undertaking - to create my ultimate Renault 19, which has seen the 19 getting stripped to its bare bones, converted to run a much more modern and powerful engine, and complemented with a few other very tasty upgrades along the way.
[BREAK=The Early Years]
2002 – 2006:
THE GOOD OLD DAYS
Skint student flies flag for reliable French motoring on mean streets of Manchester
Silver Streak started life as a 1990 Renault 19 GTS. A Phase 1, 5-door version, fitted with a carburetor-fuelled 1.4 Energy engine and a whopping great 80bhp on board! Well, I thought it was pretty respectable at the time.
The decision to start modifying her came because it was the ‘in’ thing to do in sixth form. Friends of mine had various first motors, consisting of the usual fare; a Nova, a Corsa, a 205, a Fiesta… one lucky sod even had a Honda CRX – all cars which lent themselves to a touch of modification. Unfortunately I didn’t have the means to purchase a more modification-friendly motor, so the 19 had to do.
One of the first things I saved up and purchased was alloy wheels – 15” TSW Furys to be precise! A decent Pioneer headunit and sound system were added, and not long after that a Max Power universal induction cone and universal Rage Jap-style exhaust backbox to complement that tarmac-shredding 80-brake.
After a while, sixth form ended and I ended up moving to Manchester for 3 years of Uni. Somehow despite having only a relatively meagre income from a weekend job plus a small amount of student loan on drip-feed, the modification continued.
The 15” became 17” ones as a birthday present (thanks Mum), the front end was lowered a few mil on short springs, and the laughable Max Power cone filter was exchanged for a more subtle-looking, if ridiculously over-priced Powertec stainless mesh offering. What came next was what many of the old heads on here would say was probably my worst mod – a set of RGM eyebrows. At some point in 2005 the internal heater vents were colour-coded, having seen Trev from Fast Car magazine do it to his Phase 2 Cabriolet.
As I was often warned, a modified car makes a good target for thieves. So after experiencing two break-ins, the installation of a decent alarm system with ultrasonics, was an expensive but worthwhile addition to the mod list.
Towards the end of my booze-fuelled University adventure, the car saw a few more goodies added; some rather fancy looking interior treats in the form of racing pedals, a handbrake handle and a gearknob, all in silver to match the colour theme and all courtesy of the Ripspeed section in Halfords!
Once I had exhausted the after-market, I began to look to other Renaults for the next improvements. A full leather interior and steering wheel from a 19 16v were brought in to restore a bit of credibility. Both items were eBay purchases, and provided the perfect excuse for me and the old man to have a day trip down to Enfield and back.
By the time I had finished Uni and graduated, this is what she looked like, give or take:
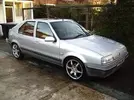
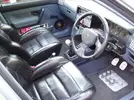
Shortly after moving back home to Nottinghamshire, the car continued to be my daily driver to my new job as an electrical apprentice in Melton Mowbray. Whilst back at home, the brakes were upgraded to 19 16v specification, after Neal kindly donated me some spare 16v calipers. This was one of the last modifications made to the car before I took the decision to send the 19 on its’ long sabbatical, the final spec as follows:
ENGINE
E6J Energy - 1.4 8V
Powertec stainless induction cone
Rage 4" Jap-style backbox
BRAKES
19 16v discs and calipers
WHEELS
7" x 17" TSW Ribs (Special Chrome finish)
205/40 Toyo T1-S Proxes
SUSPENSION
Front: Lowered 30mm using Avo Springs
Rear: Standard
EXTERIOR
Colour-coded Door Handles
Colour-coded Mirrors
Debadged bootlid
Ford Focus LED side indicaors
Headlight eyebrows
Renault 19 16V Phase 1 smoked rear clusters
Renault Clio bonnet badge
INTERIOR
Renault 19 16V leather interior
Renault 19 16V steering wheel
Ripspeed silver gearknob, handbrake lever, cigarette lighter, pedals and floor mats
ICE
Pioneer DEH-P6500R CD/MP3 Headunit
Pioneer TS-Range 5.25" speakers in doors
Pioneer TS-Range 6.5" speakers in parcel shelf
Pioneer TS-Range 6" x 9" speakers in parcel shelf
Pioneer VCCS 12" subwoofers x 2 in boot
Legacy LA890 4-channel x 300W amplifier
SECURITY
Gemini ultrasonic alarm
[BREAK=Making Plans]
C1J? F7P? Turbo? F7R? E7J? L7X?
Jury considers verdict as Engine-gate suspect admits ‘I have a Vee in my bonnet’
Looking back I feel embarrassed to say that despite a plethora of modifications, the only maintenance the 19 received was that necessary to get it through an MOT.
Despite this neglect, the 19 had wanted for nothing, doing something in the order of 60,000 miles trekking back and forth between Manchester and Newark on Trent twice a month - in all weathers - for three years solid – without so much as a drop of fresh oil.
When I moved back home permanently, the engine was understandably a bit tired, oil was weeping from the head gasket and she generally seemed a little bit worse for wear. Add to this my parents’ wish for me not to spend any more money on a car of such an age and in such state and their wish for me to think about getting rid of her.
I agreed with them on the subject of getting a new car. But not in getting rid of the 19!
I felt the 19 deserved some form of reward for its’ years of tireless service. Thus, she would come home and be taken off the road in order to have:
• Anything broken fixed
• Anything worn renewed
• Anything imperfect made perfect
In addition to this, it would give me a chance to improve my own mechanical skills which up to this point had been woefully inadequate.
With a clean canvas to work on, I could crown the car with it’s piéce de resistance - a new engine of some form was to be fitted, with all auxiliary components such as brakes and suspension suitably upgraded or improved to suit.
I had mulled over the usual options – Valver F7P, Clio Williams and Megane Coupe F7R’s, the Renault 5/11 C1J Turbo and various permutations thereof including throttle bodies, forced induction – I even briefly fell in love with the idea of turbo-charging the 1.4 Energy.
In the end though, I had a bee in my bonnet to do something never done before. So on one particularly boozy ale-induced brainstorming session (sat in Lloyds Bar opposite Sainsburys’ in Fallowfield FYI) - I remember it well - I decided I would attempt to install a great big V6 under the bonnet.
Enchanted by the idea, I departed said drinking establishment, and shortly thereafter was on eBay browsing for ‘Renault V6 engines’. A few clicks quickly led me to what at the time seemed a good buy – an early Laguna 3.0 V6 on a Buy it now for £150.
The next day I phoned my old man and asked him to clear a space in the garage and would he mind taking delivery of a V6 seeing as I was ‘in absentia’. Words along the line of ‘pillock’ and ‘you’re not real, son’ quickly emanated in ear, but my Dad being my Dad – understanding – and somewhat of a hypocrite – duly obliged. A few weeks later I returned home to assess my latest purchase.
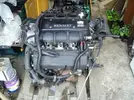
My delight at owning a great big engine destined for my beloved 19 soon turned to disappointment, as further investigation revealed that the engine had not been removed in the kindest fashion; there was damage to the flywheel, various components had been levered, marked or otherwise ruined, and various parts of the wiring had been cut to facilitate an easier removal.
Further to this internet research soon revealed the engine was also an auto, and that the auto gearboxes for this particular engine were notoriously unreliable. Not to mention the engine itself being painfully shy on the power front
So I decided to get shot of this engine and start again. I relisted the engine on eBay, and it eventually went for somewhere in the region of about £30, to a bloke wanting to build a RWD V6 Megane Coupe. I consider myself lucky to have got thirty quid for it; it would have been less had it not been for some bidding ‘assistance’ from Chris H…
It was fellow forum member in MicKPM who alerted me to the availability of a 3.0 V6 engine and gearbox from a Peugeot 406 sitting in a salvage yard in Heanor, Derbyshire.
This time I did my homework. The www revealed this engine carried 197bhp as standard, which meant even with the added weight from a V-engine, there was enough to see the car punching well above its weight. The only issue now, was whether this modern engine would lend itself to being mated to a much older car in the 19.
Having seen the engine successfully installed in some other early 90’s hatchbacks – Pug 205’s, 306’s and even a Citroen ZX, I was happy to take another punt. A few calls were made to arrange the borrowing of a Transit van and some pairs of hands, and not long thereafter, engine number two took pride of place in the garage.
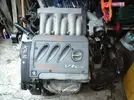
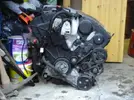
On getting the lump back I knew I had made a much better purchase. All the wiring harness was there and intact, there was no obvious damage to any components, and I even got the gearbox with it. For £450 though you could arguably have expected to get the gearbox!
Soon after the excitement had worn off, the size of the task at hand was obvious. This project was going to be a mammoth undertaking. Especially for someone whose only previous mechanical experience involved a failed attempt at fitting a Max Power air filter…
[BREAK=Replacement Transport]
“A MOST UNRELIABLE CAR”
Shock as neglected 15 year old motor struggles with 400-mile weekly commute
Before work on stripping the car down could begin, I had to sort out a new car to ferry me about.
I stupidly thought the answer to trouble-free mile-munching motoring lay in this Mk1 Clio 16v.

I was originally bidding on the car on eBay, but lost in the dying seconds of the auction. At the time it was a heap, but a heap was all I could afford, and as it was in Beith in Scotland – not too far from Chris H – it was in the ideal place to collect the car and leave it to the big man to weave his magic and hopefully fashion into something that was mechanically half-decent (and reliable!)
The Clio remained in Chris’care for a several months until I had an opportunity to come and collect it, an opportunity which arose when we this fine forum held the first ‘Big Scottish Meet’. A young member of these forums, Dan, was coming to the meet from Devon, and very kindly took a massive detour to pick me up en route, so that I could drive then drive my newly MOT’d Clio back at the end of the trip.
Sadly, for all of Chris’s hard work, the Clio proved to be a nightmare to own. It could barely manage 2 weeks on the road before something else packed up, it went through countless clutch cables, and in the end I couldn’t risk taking the 19 off the road as it was needed as back-up transport on several occasions.
The Clio was put back on eBay, and I had an interested buyer come see the car, and despite the state it was in, he was smitten with it and at £600, he opened the bidding at far higher a price than I was expecting. Still, considering he was expecting to haggle I negotiated a little more and eventually we shook at £780 – it was such a good deal I actually made money on the car, even after the cost of the repairs Chris did.
The Clio is documented at the following link - Clio 16v
So the search was back on for new wheels. In the end I decided I couldn’t go far wrong with another 19 1.4 Energy – it didn’t take one for long to come up on eBay, and after a drive down to Walthamstow and parting with £112, I came back with Silver Streaks’ identical twin (see Project Double Vision)
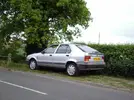
The new 19 needed MOT’ing, needing only a leaky wheel cylinder replacing on the back to get it through. Shortly after that my uncle offered me £300 which I couldn’t honestly bring myself to turn down.
So the search was back on. A friend of mine had just invested in a new car, and was getting grief from his folks to sell his previous car, a Vectra Supertouring V6 saloon. Not long after, it ended up in the hands of yours truly, and despite the connotations of it being thirsty thrashed Vauxhall, it actually did me a decent turn and proved to itself to be a reliable motor, to the point where I could finally take the 19 off-road and begin to start the work I had planned for it.

There is a project report for the Vectra in the Non-Renault section - Project Griffin.
[BREAK=Stripping Begins]
“TEA AND A HOB NOB PLEASE, MAM”
Project Report readers in uproar as Day 1’s first important decisions take biscuit
By the time I had finally sorted out some reliable transportation, it was October 2006. After having enjoyed a period of earning some decent money and having a fairly luxurious motor to swank around in, it was time to get down to some hard work on the 19.
The first job I decided to tackle was a mechanical strip-down – engine, brakes and suspension. None of this could come off without the car being lifted off the ground, so the wheels came off and, corner by corner, the car was lifted onto axle stands.
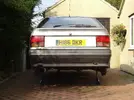
Fluids were drained off, the battery disconnected and removed and then finally the engine could start to come apart.
A few people had approached me about having parts from the engine – a long-time friend through RSC was building a throttle-bodied 1.6 Energy Clio for his partner, and asked if he could have the straight-port cylinder head from my 1.4. So rather than take the whole engine out, I took out components one by one, until all that was left in the bay was the bottom end and gearbox.
A loan of an engine hoist from MicKPM helped see the last bits of the engine removed – the first time I had ever taken an engine out. All in all took me about 10 hours total in 2 hour stints here and there - impressive by my standards - but not a patch on the half hour it took Chris H when he changed the clutch on it in 2005!
I could probably get that time down if I hadn’t made the mistake of needlessly removing parts such as the intake and exhaust manifolds with the engine in situ.
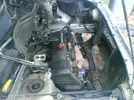
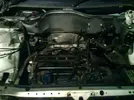
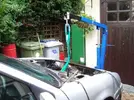
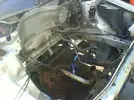
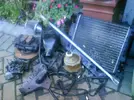
With the engine out, the driveshafts, hubs and suspension could be withdrawn from the wheelarches, and the exhaust system dropped from underneath.
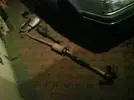
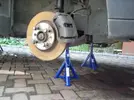
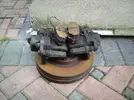
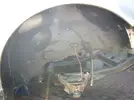
Now that the car was engine-less, it gave me the first opportunity to offer up the new V6 engine to see whether it would even fit, and if it did, what modifications were needed.
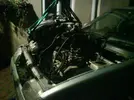
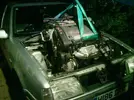
The first problems were obvious – the alternator fouled the slam panel at the front and the stock brake master cylinder and reservoir assembly were in the way at the back.
Either way it was obvious some expert help would be needed, so in mid-November I arranged for Chris H to travel down with a few bits and pieces I was having from him for the 19 and stay for a few days so he could cast his eye over proceedings.
[BREAK=The Big Man Visits]
IT’S “DEED”
The ‘H’ gives his verdict… and it isn’t good news
Chris and I started as soon as he got here, the big man eyeing up the engine and its intended new home. Very quickly the concensus view was that the lump wasn’t going to go anywhere near where it would need to be in order for driveshafts to align etc. without cutting out big chunks of the subframe – the engines’ crank pulley and the majority of the ML5T gearbox wanted to live where the wishbones mount.
In turn this would mean custom-built suspension and brakes – in other words, short of throwing £10K at it, the project – for now at least - was all but dead and buried. Not the most heartening of news, not helped by the fact that stood next to the V6 lump was a Megane F7R given to me by MicKPM (originally the buggered engine from Peter T’s old Megane Coupe) – and it looked positively matchbox-sized by comparison to the big V6.
Nonetheless, the parts which Chris had bought down from Scotland with him (a complete set of locks and central locking motors) were fitted, which was another little job done.
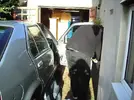
I had no grounds on which to disagree with Chris, as much as I wanted to. But as much as I could see for myself it probably would never fit, I never gave up on the idea of doing the V6 – at least not without investigating the options….
[BREAK=Soldiering On]
SPIRITS NOT DAMPENED
The restoration continues
Despite the revelation that a V6-powered R19 at this point in time was a no-goer - at least not without parting with serious money - work continued on stripping the car down and renovating it. After all, the car was getting a new engine one way or another, and I would still want the car in the same renewed and improved state regardless of what engine eventually ends up in there.
One improvement I had wanted to make was to bin the drum brake setup at the rear, and replace them with 16v discs. In order to do that, I would need to come by a disc axle. At the end of November I got wind of a chap breaking a 16v Chamade just outside a place called Alveston near Bristol. So one Sunday, with my best mate tagging along for company, and an Astra van loaned from work, the trip was made. The cost to me for the axle was just £5 – making it easily one of the biggest bargains of the entire project to date.
Before it went anywhere near the car, however, it was subjected to the usual treatment new acquisitions for the 19 get – a thorough seeing-to with the wire brush and abrasive paper to eradicate as much of the accumulated rust as possible. Even the old got busy with the rotary brush attachment! I think it was his preferred choice out of helping me and weeding the garden in the rainy outdoors!
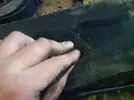
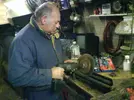
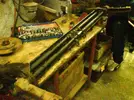
Once that was done, I had some black Hammerite ‘direct to rust’ to apply to it, I think the results are rather good!
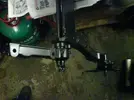
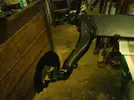
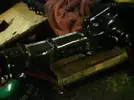
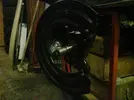
Before the new axle could go on, I had Mick (MicKPM) pay me a visit in early December. He’d been wanting to pay me a visit and see how things were going, and encouraged me to have another crack at getting the V6 in the bay, just to prove once and for all whether there was any life left in doing it. After all – the only time the engine has been anywhere near the bay its just been me doing it, and at the time I probably lacked a little bit of the confidence and experience you sometimes need to see a way round a problem.
To give the engine the best chance of going in, we stripped off the exhaust manifolds from the Vee, re-routed the not inconsiderable mass of engine loom and removed anything protruding that could have given us problems.
We also found that introducing the engine in to the bay at a slight angle, with the gearbox pointing in the direction of terra firma, also helped get the lump in the bay, we could see the engine could go a bit more, and my Dad turned up at the crucial moment armed with a pick-axe handle in his hand and crudely levered the lump home as far as it would go.
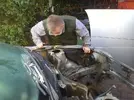
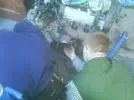
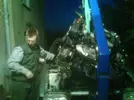
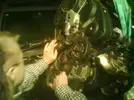
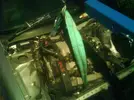
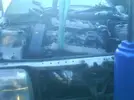
So, Take 2 was more successful than Take 1, when I tried this by myself, but the fit was still not ideal. There were several ancilliaries fouling the front cross-member on the subframe – the air conditioning pump, the oil filter housing and the front exhaust manifold.
The air con pump can at least be removed (and sold) and the engine fitted with a non-A/C auxiliary belt, the oil filter can be relocated to a remote position and the front exhaust manifold, well… there’s sure to be some solution to that eh?
Despite these problems, I feel galvanized that at least the engine will fit in between the chassis rails at least, even though it is looking like one of either the bonnet or the subframe will have to be sacrificed to give the engine a good home.
One idea floated by Mick was to trying offering the engine up to the car from underneath, as opposed to ‘going in the top’. For that though I would have to strip the car down even further, removing the subframe and steering assembly.
[BREAK= New Year, Fresh Hope]
2007 ARRIVES
Hopes of building fire-breathing Renault given boost
Removing the subframe proved to be a much easier job than expected – four bolts holding the frame to the chassis, and a pinch-bolt to release to separate the steering column from the rack.

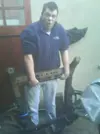
With the subframe off I could sit the V6 engine on the subframe outside of the car to get a better view of the obstructions that we found when Mick was here.
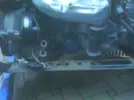
Yep, issues with A/C pump, oil filter and exhaust manifold.
First one was easy to remedy – remove the pump.
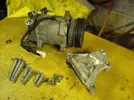
Something to sell on at least! (Apparently these Delphi units are a pretty penny to come by new or reconditioned, so there may be some decent money to be made on this.)
That was all I could do for now, I need to investigate the options regarding the oil filter and the exhaust, something must be possible given all the highly modified cars that grace the pages of the glossy magazines, some of which are much wilder undertakings than this.
Towards the end of January, I finally got round to exchanging the drum axle on the car for the smart disc axle I bought and refurbished late last year.
A no-nonsense approach to getting the old beam off was taken. Lines and cables were butchered through (I was renewing them after all) and the rear shocks removed. Finally, all that was holding the beam to the car were four 19mm nuts – 2 each side of the chassis. These slackened off surprisingly easily considering they hadn’t seen a socket since they rolled off the production line, and the tired drum axle finally dropped off.
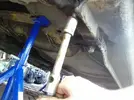
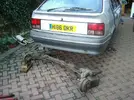
The new axle was then brought out and offered up, this was quite a cumbersome task to do on one’s own, but the help of blocks off wood to pain-stakingly raise each side of the beam on to the studs squarely soon paid off, and the new disc axle was soon in place with the nuts re-fitted after some wire brush treatment!
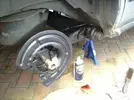
I had a pair of rear discs, so these were fitted – calipers still needed to be sourced.
I was also going to get the rear shocks bolted on, but as they too are being uprated at some point is there any point wasting time putting old ones on? No, I didn’t think so either!
Mick had been back in touch to say he was going to need his engine crane back to assist with a new car he was acquiring – Tim Harvey’s old Renault 19 Chamade BTCC car! Motorsport aside – it meant I didn’t have long to trial fit the V6 from beneath, so I had to get cracking.
One night on a cold frosty February day, the task began – on my own as always!
First of all I hitched the engine crane to the front end of the 19 and raised it up just enough for the V6 engine to be ‘walked’ on it’s sump beneath the engine bay.
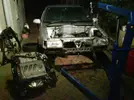
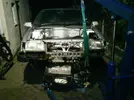
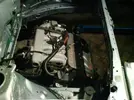
I don’t know how I managed it at the time; it would have been a mad undertaking by anyone on their own at any time of year, much less in the dark with a frost forming.
Once the engine was in roughly the correct position, the car was gently lowered back on to its axle stands; I could then hitch the hoist to the engine and crank her up into place from below…
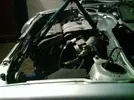
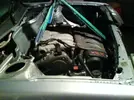
Bingo! It looks right at home in that bay and raising it from below is definitely the way forward. However I physically can’t check what problems there would be if I tried to put the subframe back on from underneath. I think that for one person would be asking a tad too much.
The start of 2007 led to amassing a huge stockpile of parts, some stock Renault, some aftermarket – all of which would find their way on to the car at various stages of the rebuild.
One such parts gathering mission took place in mid-February, when I accompanied Mick to Albert Looms, an absolutely massive breakers yard in Spondon, just outside Derby. Mick himself was trekking over to get hold of a cam cover for his Omega V6, while I was hoping there might be a 19 to raid some bits from – namely a pair of front hubs, as I had made the mistake of leaving the driveshafts attached to my original hubs.
As it turned out there were two 19’s – a sky blue Phase 1 19 GTS and an Iceberg Silver Phase 2 19 RT TD. The Phase 2 was in the nicer position than the GTS and so we set about stripping the hubs off. The first one was a bastard, but the second one was a delight to remove.
With mere minutes to spare before the yard shut, I spied that the Phase 2 had colour-coded mirrors.
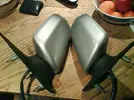
Anyone who knows my home-brew mods will know I have tried to colour-code my mirrors many times, and while my last attempt was not a particularly bad job, they weren’t particularly good either, so to find a factory colour-coded set was a bonus. And they were electric as well to boot!
[BREAK=The Arrival of Spring(s)]
BOING! BOING!
Car is sole beneficiary after unorthodox Renault-enthusiasts’ ‘ménage-a-trois’
Remember how I said that Mick needed his engine crane back to take delivery of Tim Harvey’s old BTCC Renault 19?
Well the chap that Mick purchased said car from is a chap named Ewart.
Shortly after Ewart bought the BTCC Renault 19, he purchased some coilovers from a Renault 19 16v on eBay, thinking they would be of use on his BTCC car. As it happens, someone else was also bidding on said coilovers – me. But unknown to me at the time, I was sniped by Ewart in the dying seconds of the auction.
Ultimately, the coilovers were of no use to him on the BTCC 19, and Ewart had taken the opportunity to own another BTCC Renault – this time a Laguna. The Tim Harvey 19 ended up being advertised for sale on various Renault forums, which is how Mick heard about it and eventually came to own the car. When Ewart came to drop the car off to Mick – where incidentally I had gone on the day to lend a hand – conversations quickly exposed Ewart as my eBay sniper!
As Ewart had cut his losses with the BTCC 19, I enquired was happening with the coilovers. He said that if they were no use to him on the Laguna then he would sell them to me with pleasure.
To no great surprise, a call came the following week that the coilovers were no good, and so that weekend I took a ride over to Ewart’s base in Willenhall in the West Midlands to collect the struts and cast my eye over Ewart’s Laguna.
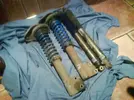
All in all the complete front and rear struts set me back £150, which incidentally had been my maximum bid in the original auction. “All’s well” as the saying goes eh?
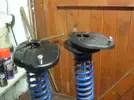
Needless to say they had the ‘Gentle Ben’ treatment once back at home – a bit of a rub down with the wire brush on the metal work and bracketry, and some hot soapy water to get all the gunk off the springs and show up the funky blue!
The strut tops were then masked off, and the mounts sprayed satin black:
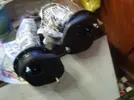
As the coilovers were the last major piece of the braking and suspension puzzle, I could now think about getting the car rolling again, in anticipation of sending the car away to have the engine grafted in.
[BREAK repping for Surgery]
FLACCID DIGESTIVE YOU SAY?
Track by American band proves inspiration to get this Retro-Renault ‘Rollin’
In the middle of June ’07 I attended the Performance Vauxhall Show, or ‘PVS’ for short. I had done a fair bit to the Vectra ST, and fancied taking it to the show, and had it on the stand with the VVOC. My visit to PVS also had another motive – there was a chap going running a Corsa V6 with whom my old man was familiar through work. My Dad mentioned that the place who built said Corsa V6 was pretty local, but beyond that he didn’t know anything more.
So late in the afternoon, at Santa Pod raceway, I approached a red Corsa, sounding very much like a V6, and introduced myself. The chap told me the place who did his conversion was a place called Power Crazy Motorsport in Lincoln – about 16 miles from me – and Paul, the bloke running the outfit, was happy to turn his attention (and his angle grinder) to just about any project you can think of.
I paid a visit to Paul, and he said he would have no problem taking on my project, and that the only issue was that he had several people waiting for his services. The best thing would be to ring him up once in a while to see when he could fit me in. He said one way he could get to work on it sooner was if I were to rent one of the forty-odd privately-rented garages out to the rear of his premises - he could then pull the car out to work on it at his convenience.
Before I could do that though, I had to get the car rolling.
Mad Pierre (AKA Peter T) had kindly donated a pair of 16v rear calipers to go on the new rear axle.
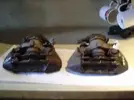
These received the usual treatment of a good clean and rub down, and in my temporary painting station (consisting off the top of the wheelie bins) they got the Hammerite satin black treatment;
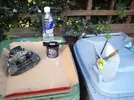
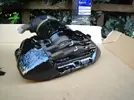
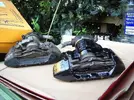
I also made the decision to have a go at installing new rear brake lines, to make the job easier I removed the beam from the car. A trip down the factors saw investment made in a pipe flaring kit, a handful of new unions, a length of copper brake pipe, and a set of 19 16v rear brake pads.
Under the instruction of the old man, the two runs of pipe from the centre of the beam to each caliper were quickly fashioned into shape and flared off at each end.
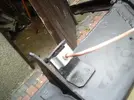
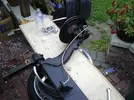
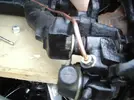
All that remained was to fit the discs back on with the newly acquired and painted calipers, the new pads, and then screw the unions up. Back at the car, the new beam was manoeuvred back into position on the car, and the new rear suspension fitted:
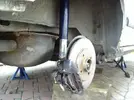
Quite an improvement on what was filling that same wheel arch not too long ago! ‘Before’ picture:
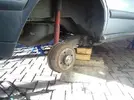
The next task was do the same on the front wheels. The hubs I had raided from that Phase 2 19 at Looms scrapyard were next to receive a good helping of Hammerite. New hub fixings were assembled with the hub once the paint was dry.
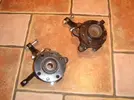
The new fixings were sourced after seeing Andy Lovell (AKA Snowman) do a similar overhaul of his front hubs on his Clio. (Thanks for the link Andy!)
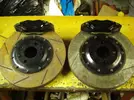
Brakes were one thing I had acquired early on; when I cut a deal with Chet – founder and proprietor of this fine forum, no less – to purchase a set of Hi-Spec 325mm grooved and vented discs together with a set of Billet 4-piston calipers.
He wanted £450 for them - to buy these new would have set me back about £1000 at the time, so on reflection they were advertised for a fair price. I went to look at them when he and Hanna, his other half, were visiting family in Peterborough but there was just one problem - I didn’t have £450 to hand. Thankfully, Chet was a gent about it and after taking £50 as a deposit, kindly agreed to let me pay him in installment each month until they were paid for – cheers Chet.
With the hubs newly renovated, suspension acquired, and brakes in hand, the front wheel arches could be rebuilt. First, the subframe went back on. Then the arch itself and inside the suspension turret got a thorough de-greasing and cleaning:
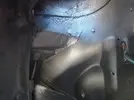
Then on went the coilover, newly renovated hub, and the brakes;
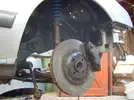
And then finally the wheel.
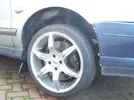
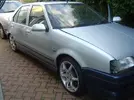
The above was repeated on the other side, and the car was returned to Mother Earth on it’s own wheels for the first time in a very long time:
There was still no real prospect of the car being able to have the V6 installed anytime soon, so my focus turned to the cars’ interior.
[BREAK=Inside Job]
AN INTERIOR AFFAIR
Dealings between forum members see car graced with new interior
While the car was waiting to go for it’s V6 engine surgery, I decided in the meantime to see about sorting the interior of the car out, bringing it up to the same standard as the mechanicals.
I already had the 16v leather interior, but I fancied a change of front seat. I have long been an admirer of Recaro’s offerings, the only obstacle was price. Decent new Recaro seats start at around £500 each, far too much than I could afford to lay out. So that left the second hand market – seats from old Ford RS Turbos and Cossies – usually all in a sorry state but still highly sought after by the Ford boys.
Then one day I had a brainwave and decided to exclude the word ‘Recaro’ in the eBay search. Whether it was fate I have no idea, but on the first page of search results was a pair of sports seats – clearly Recaros in the picture - from someone new to eBay, with the somewhat novice auction title: “A lovely pair of sports seats”.
My thinking that the sellers’ omission of the word “Recaro” in the listing title would put a dent in the number of viewers was vindicated – and in the end yours truly won the seats for a bargain £117.
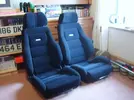
Another bonus with the seats was that I didn’t have too far to go to collect them – Doncaster, to be precise. The seats aren’t actually a true ‘pair’ – one came as a standard fit in the sellers’ 1983 Opel Rekord apparently, and the second was purchased some years later for his wife who had back trouble. As it happens, the newer seat never made it into the car so is essentially in ‘as new’ condition.
One obvious difference between the two seats was the headrests – a hunt on eBay soon turned up a better looking replacement.
It then occurred that I would need base frames for the seats to mount them in the 19. Not only were frames for 19’s thin on the ground, the only place I managed to find them wanted £145 for each frame, plus delivery and the dreaded VAT – a cost I couldn’t afford.
So I decided to see about a DIY solution, and out came a sheet of MDF, a pencil and a jigsaw!
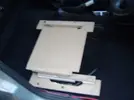
This very crude assembly gave me a pattern, and a fabrication workshop on the industrial estate where I used to work in my old job at the time knocked me frames up for both seats in 3mm steel for the princely sum of £15.
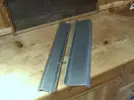
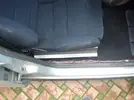
My original MDF creation was used to mark up the holes on the new metal frames and after fixing them to the seats it was time to offer them up to the sliding seat rails in the car.
A member of RSC had made the move from a mildly modified Clio Baccarat to a Clio 16v. The Baccarat had chrome-effect interior door handles which I thought looked quite smart, and so when he decided to break the car, I made sure I got my hands on the handles….
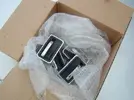
These went into the interior parts pile. The next and key part I was looking to acquire was a 16v dash and the interior plastics to replace the funky blue GTS interior the 19 had as standard. As I had a 5dr hatch and not a 3dr, I was on the lookout for someone specifically breaking a 16v Chamade, and ideally a Phase 2 as in my opinion, some of the switchgear looks a bit smarter than the Phase 1 stuff.
A suitable match came in the form of another RSC and Retro-Renault member, Oly Mills (AKA “Sirrell”). He had taken the opportunity to emigrate from his current base in Mansfield to Australia (wise man) and before he left, he agreed to sell me the interior of his Phase 2 16v Chamade – dashboard, interior plastics and the main wiring harness to get it all to work.
So one Sunday afternoon, I popped round to give Oly a hand stripping the interior out and returned with it and promptly added it to the parts pile for the big interior makeover! The only parts I didn’t get from Oly’s Chamade were a 16v shelf (because Chamades don’t have a parcel shelf) and 16v door cards.
Shortly after the dash was acquired, I traded my old hubs with Mad Pierre/Peter T for a black Stealth Shelf.
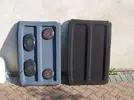
Mick came to my rescue once again with a set of door cards, electric window regulators, central locking motors and door wiring looms.
While swapping the dash, it also occurred to me that it would be the ideal time to convert my manual steering column with a power-assisted counterpart. I remembered that such an item was already in my possession after I agreed early on in the project to buy a few parts from a member - either TIB or Tom_16v on here. So that was fished out and added to the pile.
So it was time for the big interior swap – one weekend to gut the interior – rip out the old blue dashboard, interior plastics, carpet, door cards and wiring looms and swap them for their 16v equivalents.
To ease myself in I started with the door cards – a job I had done before when doing my speakers. Old blue door card:
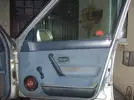
And after, with the electric window assembly and 16v door card fitted:
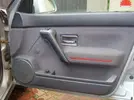
Then it was time to take a deep breath and tackle the dash. I had no idea what sort of job this would be, and I had put it off for as long as I could. But I was growing impatient, and with no offers of help coming in, I just had to roll up my sleeves and take the plunge.
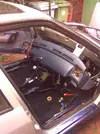
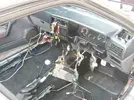
Actually, it was a far easier job than I expected, and took me around 9 hours to swap in total, including swapping the column and the carpet, and dressing in the replacement wiring harnesses.
Here are some before and after pictures. First, the old blue GTS interior:
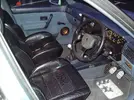
And after the swap:
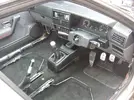
All it needed now was the seats! I had decided to use a place called TEK Seating on the estate at work to re-upholster my Recaro seats in black leather. TEK happened to be an agent for Recaro anyway, and repairs and re-upholstery were second nature. I booked the seats in with them to be re-covered. Three weeks passed by before the phone call I wanted finally came that they were done….
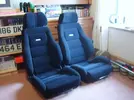
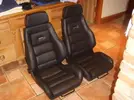
Fantastic job in my opinion – and looking much better with that replacement headrest I managed to source.
While the seats were being re-trimmed, I decided to send my custom-made mounting rails for the seats off to be powder-coated in black…
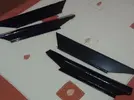
I sourced some new seat-rail fixings to make it all look new…
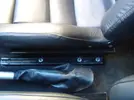
And with the seats at home, it was time to enjoy the results of my hard work…
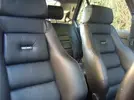
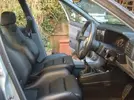
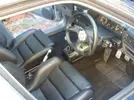
For me, that is my ultimate R19 interior.
You may also notice a new steering wheel. This I acquired from Andrew Lowe on RSC, and picked it up from him in Walsall en route to see my beloved Nottingham Forest play Swindon Town away. (It was a poor result – we scored all 3 goals and lost 2-1!)
[BREAK=Odd Jobs]
BITTIN' AND BOBBIN'
Pain-staking wait for surgery date sees hoarding car parts taken to new level
Having been in routine contact with Paul at Power Crazy about getting the 19 booked in to have the V6 grafted in, it was obvious that it was not going to be seeing an angle grinder anytime soon.
While I waited for the news that it could finally go in, I passed the time with odd jobs on the 19 and by adding to the collection of parts that would be needed after the engine had gone in.
I decided to have a go at de-greasing and re-spraying the engine bay. After all, what better way could there be to welcome a new engine into it’s new home? The bay was stripped of any remaining parts and components, leafs and dirt removed from the bonnet shuts, scuttle and any little nooks and crannies. The majority of the rust was killed off with Kurust, with any remainder sanded away before a coat of primer and top-coat.
The aforementioned removed parts were cleaned down, and sprayed up in satin black where appropriate. Some pictures of the finished job:
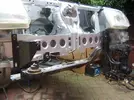
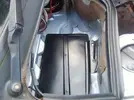
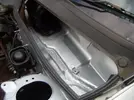
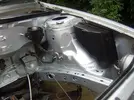
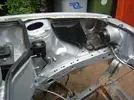
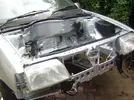
That was more or less the last job that could be done. The parts pile soon started to grow again…. such items that found their way into my custody were:
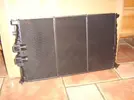
Peugeot 406 V6 radiator. RRP £160, cost to me £26 (thanks eBay!)
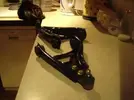
New 16v wishbones complete with new balljoints, £20 from BuyPartsBy.com

Ford V6 badges – always liked the type-face of these, installed straight away!
Phase 1 Morette headlights also found their way into Silver Streak towers from a Retro member based in Cheshire, and whilst making the trip to collect those I also arranged to pick up these:
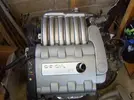
Clio V6 intake manifolds and engine cover, offered to me by a chap on one of the Clio V6 Owners Club forums. £100 the cost for the job lot, and if they could be made to fit, it should represent a small gain in power and a brilliant aesthetical improvement too.
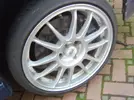
Then one of my favourite buys. I have always loved the OZ Superleggera wheel, even back when I was 17 looking for bits to stick on the 19 these would have been my wheels of choice if money was no object. But at the time 17” versions were £1K+ a set new, so they had to wait. Thankfully, prayers were answered when a chap with a Clio 182 was selling these rims to put standard rims back on.
I acquired the full set of OZ wheels for £180 minus tyres. They weren’t in the best nick but I would have wanted them re-furbished anyhow.
Anyway, with the car now more or less ready for surgery, it was time to see about getting the car relocated to Lincoln, where she could lie in wait for Paul at Power Crazy to weave his magic on her.
[BREAK=Emigrating]
A JOURNEY TO THE CENTRE OF….. LINCOLN
Vehicle leaves home on journey of self-discovery
I had been over to Lincoln to sign up to rent one of the many garages to the rear of Power Crazy Motorsport – the firm I had arranged to have a go at putting the V6 into the 19. The plan was to bring the car here, that way Paul could bring the car out of the car and into the workshop as and when.
So with the contract signed and the keys in hand, it was time for the 19 to make its big move. A well known member of RSC, Craig Adams (also known as Evismaniac to many) had in his possession a towing dolly and an old Toyota Hi-Lux 4x4. So one morning, he very kindly agreed to tow the 19 to Lincoln for me. Before he arrived, I got the socket set out one last time and made sure all the wheels were on tight, all the subframe bolts were nipped up, and any loose parts or components were made secure.
Ole’ Silver Streak was then hauled aboard and we duly made our departure.


40 minutes later, we arrived at Power Crazy, and the 19 was duly rolled into her new home.
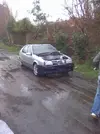
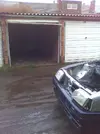
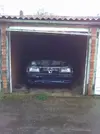
Whilst the car waited for D-day to come, I decided I could at least get the newly acquired OZ alloys booked in to be refurbished with Weldspec, a one-man band based in Bilsthorpe that overhauled the rims I had on the Vectra ST. He’d done a cracking job on them, so I knew I could count on him to make a decent job on the Superleggeras.
The brief was simple – all the bends and buckles ironed out if any, scratches and kerb-marks filled in, and repainted. My colour of choice was satin black. So the wheels were left in his capable for a fortnight, and when the call came, I was straight round for my newly licked wheels…
Before –

After –
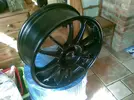
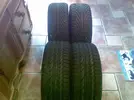
All that was needed were tyres. I had bought a new pair of Event 205/40/17 tyres on eBay, I quite liked them as a tyre and one of these online tyre sellers was offering a promotion to shift his last pair on, I came by these for around £70.
Two more tyres were needed. A member on RSC was trying to move on some Ace alloy
wheels with tyres.
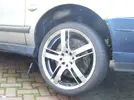
I had no interest in the wheels, but the tyres were reasonable, the two best were a pair of Cooper Xeons, again 205/40’s. A trip down my friendly tyre fitting centre saw the rubber fitted for a few beer tokens.
All the wheels needed were some centre caps. A quick look on the net revealed I could buy a set of black Oz centre caps for £52 – no thanks. So I wondered if I could use the tatty caps that came with the wheels and re-sticker them?
I tracked down some circular self-adhesive stickers in black with the Renault emblem - in just the right size - and handed them over to my man at Weldspec. All he needed to do was flatten the caps from their convex shape so the stickers would anneal nicely…
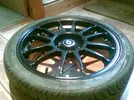
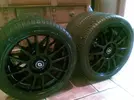
And in my impatience, I just had to take a trip over to Lincoln to let the 19 try on her new shoes!
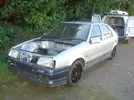
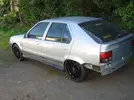
[BREAK=Finding Retro Power]
TWO YEARS ON
You’re joking, right?
In mid-2009 it dawned on me that the car had been living in Lincoln for almost two years. Although I had been in fairly regular contact with Paul at Power Crazy, he had got himself into a situation where he (supposedly) was owed around £15K for a twin-V6 Vauxhall Corsa that he had built, and had then gone on to make custom throttle-bodies and manifolds etc.
Now, quite why you would allow someone to run up a £15K slate is beyond me. But nonetheless, the inevitable conversation came where Paul announced he was taking on no more long-term works on until Mr Corsa paid his bill… and that said Corsa was staying on his ramps until he did.
So after putting up around a £1K for two years’ rent to store the car, faithfully waiting my turn in the queue, I was back to square one again. Two years had amounted to complete bugger all. Arse.
One night the following week, I locked myself away at the computer and resolved not to come away until I had found someone – or somewhere – able and willing (and local) to undertake my V6 transplant Despite the popularity of car modification, finding anybody brave enough to use an angle grinder and a welder on a car proved more difficult than I anticipated, but in the end proverbial gold was struck when I clicked onto the website of a firm based near Nuneaton in Leicestershire – a place called Retro Power.

The outfit was founded and run by two brothers – Nathaniel and Callum Seviour, both of whom had engineering backgrounds and seemingly able to turn their hands to just about any aspect of restoration, repair or fabrication. Their website was impressive, with online project reports detailing the various Retro cars they had on their books. Most were in for full nut and bolt restoration, some were in for motorsport prep, and a few were in for all of the above, plus a new engine. The motorsport-prepped Pug 205 with a rear-mounted Vauxhall XE lump made me begin to think that perhaps these guys might be the ones to take on the R19.
A call was put in in November of 2009. The conversation was only brief, possibly no longer than 10 minutes, but those 10 minutes were enough to arrange the date of May 3rd 2010 as the day the car would be collected from me and whisked to the bowels of Leicestershire to undergo ‘the change’.
May 3rd couldn’t come quickly enough. Nathaniel (Nat) had kindly arranged to drive the company 4x4 and car trailer from Nuneaton to me in Newark. The V6 lump was hauled into the back of the 4x4, and then we headed to Lincoln to get the 19.
The car was awakened from its slumber in Garage 31 and hauled out into the fresh air.
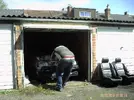
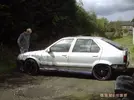
Nat then had chance to have a quick look and get a rough idea of how difficult (or easy) mounting the lump was going to be.
The trailer was then reversed up…
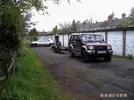
And the 19 was hauled aboard….
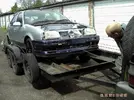

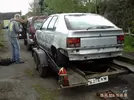
Despite the fact May 3rd ended up being a Bank Holiday, the cost to have them make a round trip of about 120 miles to collect both engine and car was £80.
Work on the car began in earnest in mid-July, the only part the guys needed from me was the top engine mount bracketry which had been removed when Mick was here to help trial-fit the engine. Thankfully I was able to dig the part out, and I got the opportunity to drop it off when work sent me on a job in nearby Leicester.
At the end of July, I received a call from the boys to tell me that the engine was finally in!
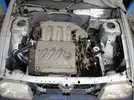
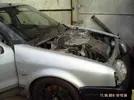
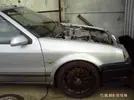
The chassis rail on the nearside has been cut out to allow the engine to mount on its standard Peugeot mounting positions, with fixings fabricated and welded into/onto the engine bay and subframe where required. The bulkhead has also been re-modelled to allow the engine to be installed much more easily. The big plus point for me was that the stock Renault subframe had been kept in, which meant the brakes and suspension – which I had spent decent money on upgrading – could be retained.
I still had the bonnet at home, and the guys thought that as the car was outside and exposed to the elements that it would be a good idea to come and fit it. I had always thought that if the V6 found it’s way into the engine bay it would come at the cost of either the subframe or the bonnet, there was no conceivable way whatsoever that I could have my cake and eat it, in this respect.
However, I was pleasantly surprised when the bonnet clicked home without need to force it whatsoever!
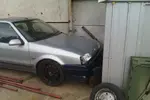
So, the big milestone has finally been reached!
[BREAK resent Day]
WHAT ABOUT NOW? WHAT ABOUT TODAY?
Westlife lyrics provide apt newspaper-style headline to Project Report entry
Right now - April 5, 2012 as a write this – nothing significant has happened with the 19 since July 2010 when the engine was grafted in.
Retro-Power still have the car, and it remains my hope that Nat and Callum will carry out all of the tasks which require an amount of fabrication, as I do not have the facilities or the skill to fabricate.
On that basis that includes them doing the following:
• Fabricating and installing driveshafts
• Fabricating exhaust manifolds to mate up to the stock R19 exhaust system
• Fabricating or sourcing an efficient compact radiator and mounting it
• Installing the Peugeot 406 gearshifter and link cables
Plus no doubt countless other tasks! The idea is then to take the car back from them and finish off putting the car back together and hopefully get it to a few shows – a task not helped by some chancer burgling the garage in Lincoln where I had a huge haul of parts stashed for the big re-build – the radiator, wishbones, Morette headlights, Clio V6 intake manifolds and engine cover, plus a rake of other bits of no particular value to anyone outside Renault 19 circles i.e. exhaust manifold heatshields, arch liners, headlights – all gone. Even the old 16v leather interior complete with rips was taken. Alas, none of it ever showed up again despite watchful eyes being kept out on eBay etc. I’m not bitter about it… much!
The main hold-ups with work continuing at the moment are both a) cashflow and b) Retro Powers’ diary! Since fitting the engine, Nat and Callum have taken on a couple of blokes to oversee the bodywork and painting side of their operation and let them focus on the mechanicals. This means that they need a constant flow of cars in for mechanical work followed by paintwork, in order for everyone to be occupied and earning their keep. As the work on mine is purely mechanical, it means it only gets a look in when things are quiet generally.
As I write this though I am just about to fire off an e-mail to see if there are any plans for work to begin again anytime soon. Last month I acquired a gearshifter unit and the linkage cables so I’m just waiting for a chance to drop that off and hopefully that may be the next job to get done on the car.
Updates to come when something meaningful happens!
[BREAK=From Hinckley with Shove]
FROM HINCKLEY WITH SHOVE
Iconic spy franchise provides far-fetched answer to thread author's difficulty in creating title for chapter in knackered cars' progress thread
Well bairns, I invested in a laptop today and my first port of call was this very fine web page. I then remembered having a project thread, and noted that it had not been updated for several years. I then remember the pace of this project, and considered that even after four years the thread might still be 'up to date'!
However, I'm pleased to report a fair bit of progress - the vital fabrication work, requiring skills in design, engineering, fabrication, welding and cat-skinning is all complete, and the car returned home in the early to mid-part of 2015 (about a year ago as I write this).
That's the nut-shell version. For the sadists among you, a more thorough update is provided below....
At the end of the last page, the car was still in the hands of Nat and Callum Seviour, brothers and joint-owners of a (then) newly-established multi-faceted vehicle restoration outfit called Retro Power, based near the town of Hinckley in Leicestershire.
The two of them had done the impossible and managed to graft in the Peugeot 406 V6 engine into the 19's engine bay, in a way that allowed the original obstructive Renault subframe (and with it, the stock brakes, suspension and geometry) to be preserved.
I had also had some luck in that the engine was compact enough to allow the original bonnet to be re-fitted without modification - originally it was thought that I would have to make a choice between having a custom subframe and suspension set up or having to modify the bonnet and lose the sexy lines that makes a 19 a 19 - thankfully I was fortunate enough that I didn't had to compromise with either.
While the V6 being installed was a milestone, another more significant milestone had also been reached about the same time - when my first child Lawrence was born.
Understandably, finances were very tight, and plans to commit to further progress on the 19 were abandoned in light of this. Retropower had no problem with this - their work was being noticed and their order book was filling up with customers wanting their full nut and bolt restorations carried out, and they had no issue with the car remaining with them until I was in a position to afford the next tranche of work to be carried out.
After my other half returned to work from maternity leave, I as able to start thinking about having more work carried out on the 19. Unfortunately, during the 'down time', Retropower had snowballed into a much bigger operation - the payroll had doubled, with two painters and bodyshop technicians recruited to leave Nat and Callum with the restoration / mechanical side of things. It was explained to me that because the 19 was only having mechanical work done to it, it would have to fit in around the full resto jobs as working on mine would result in downtime for the bodyshop - something no small business can afford to stand.
The 19 stood out on Retro Powers' yard for 2-3 years after the engine was first fitted. Despite everyone's best intentions, the 19 never felt the warmth of the Retro Power angle grinder again, and in a strong echo of the situation I was in when the car was stabled at Power Crazy Motorsport, it dawned on me that it was perhaps time to find someone else to carry on the story.
The answer to my conundrum did not take as much solving as it did last time - I was now an avid reader and subscriber of PPC magazine, and had noted in each issue in the advertising section the advert of a engineering workshop trading as 'Wisbech Engineering', with the strap-line "custom fabrication on any vehicle"- perfect.
The call was put in to Mark Gibbs, the owner and MD of Wisbech Engineering (hereon referred to as 'WE') and a plan of action agreed. All that had to be sorted out was the debrief with Retro Power, and transportation of the 19 from Hinckley to it's new digs in Terrington St Clement in Cambridgeshire.
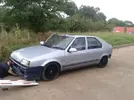
Shiply was again my saviour, and after a brief negotiation, a nice man called Tim turned up with a flat-bed truck from the mid-80's, loaded the 19 onto it's back using what appeared to resembled two bits of old motorway Armco, and then proceeded to follow behind his smoking steed to WE on a journey taking a little over three hours, during which I must have inhaled an amount of smoke equivalent to that ingested by someone who's smoked 60-a-day for the last 20 years.
Nonetheless the car was duly delivered and offloaded with care, and after a month or two, work began.
More to follow on the work carried out by WE, however if you want to take a look at their website, I've put the link below.

Home - Wisbech Engineering
More to follow...
[BREAK=Wisbech Engineering]
SMOOTH FABRICATOR
Huge progress made thanks to Mr Mark and sidekick Carl
The purpose of taking the 19 to WE was to have any outstanding jobs that required any element of design, engineering and fabrication completed, as I simply do not have or possess the skill, imagination, equipment, space, time or patience to do it myself.
On delivery of the 19 to WE I had a chat with Mark about the jobs that needed doing, and the initial list looked like this -
1. Fabricate driveshafts
2. Fabricate full custom exhaust system
3. Reconstruct top section of bulkhead panel and then;
4. Relocate brake servo and master cylinder position to passenger side bulkhead
5. Convert existing cable clutch pedal to hydraulic operation
6. Identify position to mount radiator and supply and fit radiator to suit
Driveshafts
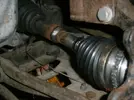
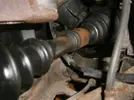
When the 19 was first despatched to Retro Power, it went with both the original Renault driveshafts fitted to the hubs, and a pair of 406 V6 driveshafts I had acquired on eBay many moons ago. During the course of it's stay, the Renault shafts went amiss and were never to be seen again.
The first job was to source replacements, however with the parts required being intended for a Renault, naturally there was a multitude of options. In the end, thanks to a combination of Mark providing all manner of measurements, spline thicknesses and spline count from the hubs, and a raft of other info requested by an equally helpful eBay vendor who went above and beyond to help identify what shafts he had in stock that I could use.
In the end a pair of Megane shafts were sourced from the eBay vendor, which I had delivered directly to Mark at WE, and it wasn't long before I had an e-mail saying the shafts had been made and fitted.
Gearshifter
A bit of a delay then followed - much like had happened at Retro Power, Mark began to get busy. In addition, the two Rovers that were in front of the 19 in the queue were being held up due to incorrect parts being sent for them from the States, and this was taking time to sort out.
Mark then took on a pair of apprentice hands to help him, in the form of Carl Houseman. Mark said he would be teaching Carl the ropes and that he would be letting Carl cut his teeth on some of the 19's smaller jobs. The first of those was the installation of the Peugeot 406 gearshifter unit. Again, this was another item that went missing at Retro Power, although they did kindly replace it.
Mounting the gearshifter and getting the cables to actuate properly proved problematic, and in the end Carl spent a full week on it. Having been an apprentice myself, I do know that you need time to get up to speed... I was nonetheless grateful when Mark said that he would not be passing the full labour cost on!
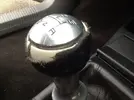
Carl did a good job integrating the 406 shifter into the Renault cabin, with no apparent modification needed to the centre console. In fact it looks quite at home. The unit came from a breakers' and as you can see the knob itself is quite tatty, there are however numerous aftermarket replacements available for a few pennies on eBay.
Bulkhead Alteration, Relocation of Brake Servo, and Hydraulic Clutch Conversion
The next job Mark turned his eye to was his best work on the car, from an engineering point of view.
One problem which became apparent when Mick and myself trial fitted the engine many moons ago was clearance of the brake servo. The engine was prevented from sitting in a nice position as there was no clearance to the rear cylinder head, so back then I knew it would have to be relocated elsewhere. Having owned an Escort van for work with the brake servo on the passengers' side of the bulkhead, I knew it was not impossible, and in fact the pivot bar assembly from a Mk6 Escort was one of the first parts to make it onto the pile when Mark said he was looking to make a start on this particular job.
A bit of research was carried out to see if there was a better servo and master cylinder combination to give the 325mm 4-pots up front a better feel. An apparently common modification on comparable Mk1 track Clios is to use the servo setup found on the later RenaultSport Clios, and I was soon the owner of said setup from a 182 Trophy being broken on eBay.
It was then down to Mark to take my heap of parts and work them into the 19.
His first job was to re-model the bulkhead and make it symmetrical once again. The offside front turret was then squared off, and the Escort pivot bar was than tied in to the turret via a welded boss. The servo was then mounted on a new piece of metal work which was stood off the bulkhead and tied in to the passenger side front turret, and the actuator rod was connected to the pivot bar by means of a movement which Mark expertly crafted to convert linear brake pedal movement into rotational movement, and then back into a linear movement to operate the servo, all bushed and rose-jointed as necessary.
I'll let the pictures do the talking.
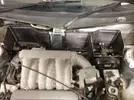
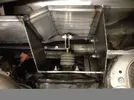
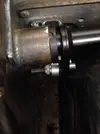
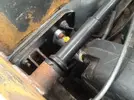
At the same time the clutch pedal was converted from cable to hydraulic actuation.
Exhaust System
If the new braking arrangement takes the gong for best engineering, then the exhaust Mark built on the 19 for me takes the 'Phwoar!' award!
The early plan was for Mark to ditch the original Pug exhaust manifolds and install tubular stainless versions, and then a full system to the back end of the car, motivated largely by the experience with the similar Vauxhall / GM V6 engine as fitted into my Vectra GSi - breathing is a big problem and a lot of extra power can be freed by sorting the exhaust out, in the Vauxhall engines' case tubular manifolds typically free up an additional 30-40bhp, so at this stage it would be an ideal time to do the same on the 19 to improve upon the 200bhp of the Pug engine.
Unfortunately the additional costs for bespoke manifolds proved prohibitive - all the individual jobs completed up to this point had gone over budget, and so it was decided that as the original manifolds were present and perfectly serviceable, to have a manifold-back exhaust system.
All I had to do was specify a tailpipe design and size, and with no other point of reference other than my aforementioned Vectra (which has similarly been converted to 3.0 V6) I instructed Mark to replicate the size and design of the Vectra's tailpipes - twin slash-cut pipes, each 3" in diameter.
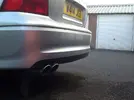
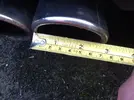
Mark then proceeded to build the exhaust in stainless with so called 'dairy' bends used where needed - apparently the best!
Again, no words can do a better job than pictures, so I'll let the photos of the finished work do the talking.
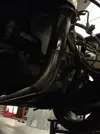
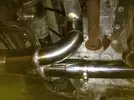
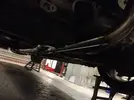
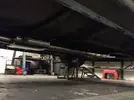
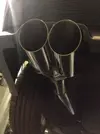
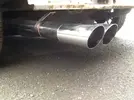
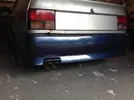
Due to the 19's age there is no emissions requirement for MOT, so there is no catalytic converter. Aside from the middle box there is no additional silencing, so it should make quite a nice bauble when struck up! The tailpipes fill the cut-out in the 16v rear bumper quite nicely also.
Mark appears to have crafted the whole lot from front to back in quite a hefty bore of pipe - hopefully this will wont create any problems as it's not really a job I can afford to have repeated! The pipe size also puts to bed any future plans for a remote turbocharger installation that I've been mulling over, as remote installation requires a pea-shooter size exhaust to work most effectively.
Radiator and Cooling Fan Installation
The last 'big' job I needed Mark to carry out was to provide a means of installing a radiator and fan, with no impact to the visual appearance of the car if at all possible. The engines' front cylinder head occupies the space where the original radiator likes to sit, so it was thinking caps on for this one.
Mark had warned that this would likely be the most costly individual job on the car to have done, owing to the costs associated with having a bespoke radiator made.
As my aim for this project has always been to keep costs to a minimum, I began to research what off the shelf radiators were out there which could help avoid the need to go down the bespoke radiator route. It makes good sense to me to use readily available existing parts where possible, to keep any future replacement costs down.
In order to assess what size radiators I should be considering, I e-mailed the editor of PPC magazine, Will Holman, for his advice. He recommended speaking to Allisport, a specialist fabricator who provides radiators for PPC mag's project cars, with the proprietor more than happy to provide advice without obligation. Speaking to the chap on the other end of the phone I was hoping he'd be able to tell me whether the radiator size / cooling capacity required should correlate with power / torque / displacement etc.
However, in the end it was explained to me that due to the number of variables it was virtually an impossible job to calculate a 'minimum' surface area for a radiator and that the only way to cater for the 19 would be by trial and error. He said there would be no harm in starting small; pointing out that there are numerous Caterham-style kit cars sporting big power turbo and V8 engine conversions which are adequately cooled by nothing more than a radiator the relative size of a fag packet inside the compact nose.
Mark also had a similar opinion, citing a friend who races competitively in a big power motor cooled by a rad out of an old Fiesta.
So with that advice in mind, I began scouring eBay and parts sites looking for a small radiator for Mark to try and squeeze in.
The first radiator the postman brought me was for an early VW Polo, apparently these are a popular rad among the kit car fraternity, which just the right dimensions to sit in the front grille. I took the rad over to Mark, but soon found out that the spouts for the top and bottom hoses were in the wrong position relative to the corresponding hose connections on the engine - the hoses would be under a lot of tension, and the angle of the bends would kill the flow going through the system.
There was also not much room to go bigger, unless the rad was positioned off centre to the right. There was also more vertical height to be had if I was prepared to have the front cross-member chopped out of the subframe, this was a job I agreed to, as Mark had said he would be able to fabricate a new one to suit the new radiator if need be.
Mark gave me some approximate dimensions of the space that was now available for a radiator, and the search was on to hunt down a radiator that was as close as possible to those dimensions.
A promising option was found with the right dimensions, but only when installed on it's side, making the coolant flow top to bottom instead of side-to-side. Mark was happy with the arrangement, but with the top and bottom hose spouts connected to the same side tank, it meant the spouts were now both at the 'top' end.
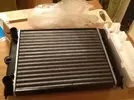
It was back on the hunt for a radiator with the right size, and the hose spouts at opposite ends. I eventually dropped lucky with a radiator for a B2 Volkswagen Passat.
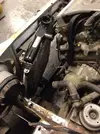
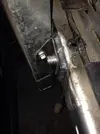
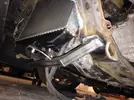
I had it sent to Mark, and he did the honours installing it, fashioning a new cross-member as promised and an additional bracket to give some additional strength. Mark also supplied and installed a suitable rad fan. Some pics of this work are below.
Odd Jobs and Homecoming
That was the major work completed. It just remained for me to think of anything else required on the car to take advantage of Mark's excellent engineering skills.
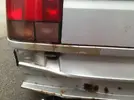
A couple of small extra jobs were carried out - I asked Mark if would chop out and renew the metal below the nearside rear light cluster on the back, which he did.
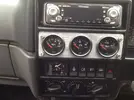
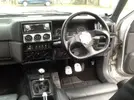
While the car had been away, I had also invested in an original triple guage cluster from an Audi Quattro, with gauges for oil pressure, oil temperature, and volts. In the time the 19 has been off road, I've become accustomed to cars which give the driver information, and I felt some additional gauges in the 19 would be of benefit.
The Audi set are from the right period, the only issue I had was thinking where to mount them. I didn't want additional guage pods cluttering the pillars or looking odd dobbed on top of the dash, so I asked Mark to make up a panel to replace the two central vents on the dash to make the installation look as original as possible.
I knew the width would be OK as you can replace a standard DIN headunit with a pod which will accept three 52mm gauges - the two central vents are the same width so I didn't expect any issue.
Mark did the business as I expected and worked the gauges into the dash for me.
More to follow...
Grandfather affectionately mocks Grandsons’ much loved Retro-Renault

Silver Streak is my first car which my Dad and I have owned since 1998 – 18 years now and counting!
This beast of a car came into my family when I was about 14-15 years old. My Dad bought her from my secondary school Chemistry teachers’ mother, to be used as a cheap second vehicle to run rubbish to the tip, and eventually for me to learn to drive in.
At first I couldn’t think of a car I would want to drive around in any less; indeed the car of my dreams at that time was a Vauxhall Nova SR… perish the thought! Gradually though, as I started driving her, the first car love affair began, to the point that my late Grandfather coined the name ‘Silver Streak’ as a comical, if somewhat sarcastic description for the car.
My love for this car is what has to date cost me countless thousands of pounds in maintaining, running and modifying her; endless frustration at the fact that car hasn’t moved its own power in over 5 years, all on account of my own wild plans, which you will see if you care to read on.
This report starts with a brief look at how the car changed between 2002-2005, when I was a student, and the car was on the road, and being used as a daily driver.
The majority of this report goes on to document from Autumn 2005 to the present – and sees my original decision to take the car off the road for a ‘small amount’ of TLC quickly spiral into a much bigger undertaking - to create my ultimate Renault 19, which has seen the 19 getting stripped to its bare bones, converted to run a much more modern and powerful engine, and complemented with a few other very tasty upgrades along the way.
[BREAK=The Early Years]
2002 – 2006:
THE GOOD OLD DAYS
Skint student flies flag for reliable French motoring on mean streets of Manchester
Silver Streak started life as a 1990 Renault 19 GTS. A Phase 1, 5-door version, fitted with a carburetor-fuelled 1.4 Energy engine and a whopping great 80bhp on board! Well, I thought it was pretty respectable at the time.
The decision to start modifying her came because it was the ‘in’ thing to do in sixth form. Friends of mine had various first motors, consisting of the usual fare; a Nova, a Corsa, a 205, a Fiesta… one lucky sod even had a Honda CRX – all cars which lent themselves to a touch of modification. Unfortunately I didn’t have the means to purchase a more modification-friendly motor, so the 19 had to do.
One of the first things I saved up and purchased was alloy wheels – 15” TSW Furys to be precise! A decent Pioneer headunit and sound system were added, and not long after that a Max Power universal induction cone and universal Rage Jap-style exhaust backbox to complement that tarmac-shredding 80-brake.
After a while, sixth form ended and I ended up moving to Manchester for 3 years of Uni. Somehow despite having only a relatively meagre income from a weekend job plus a small amount of student loan on drip-feed, the modification continued.
The 15” became 17” ones as a birthday present (thanks Mum), the front end was lowered a few mil on short springs, and the laughable Max Power cone filter was exchanged for a more subtle-looking, if ridiculously over-priced Powertec stainless mesh offering. What came next was what many of the old heads on here would say was probably my worst mod – a set of RGM eyebrows. At some point in 2005 the internal heater vents were colour-coded, having seen Trev from Fast Car magazine do it to his Phase 2 Cabriolet.
As I was often warned, a modified car makes a good target for thieves. So after experiencing two break-ins, the installation of a decent alarm system with ultrasonics, was an expensive but worthwhile addition to the mod list.
Towards the end of my booze-fuelled University adventure, the car saw a few more goodies added; some rather fancy looking interior treats in the form of racing pedals, a handbrake handle and a gearknob, all in silver to match the colour theme and all courtesy of the Ripspeed section in Halfords!
Once I had exhausted the after-market, I began to look to other Renaults for the next improvements. A full leather interior and steering wheel from a 19 16v were brought in to restore a bit of credibility. Both items were eBay purchases, and provided the perfect excuse for me and the old man to have a day trip down to Enfield and back.
By the time I had finished Uni and graduated, this is what she looked like, give or take:


Shortly after moving back home to Nottinghamshire, the car continued to be my daily driver to my new job as an electrical apprentice in Melton Mowbray. Whilst back at home, the brakes were upgraded to 19 16v specification, after Neal kindly donated me some spare 16v calipers. This was one of the last modifications made to the car before I took the decision to send the 19 on its’ long sabbatical, the final spec as follows:
ENGINE
E6J Energy - 1.4 8V
Powertec stainless induction cone
Rage 4" Jap-style backbox
BRAKES
19 16v discs and calipers
WHEELS
7" x 17" TSW Ribs (Special Chrome finish)
205/40 Toyo T1-S Proxes
SUSPENSION
Front: Lowered 30mm using Avo Springs
Rear: Standard
EXTERIOR
Colour-coded Door Handles
Colour-coded Mirrors
Debadged bootlid
Ford Focus LED side indicaors
Headlight eyebrows
Renault 19 16V Phase 1 smoked rear clusters
Renault Clio bonnet badge
INTERIOR
Renault 19 16V leather interior
Renault 19 16V steering wheel
Ripspeed silver gearknob, handbrake lever, cigarette lighter, pedals and floor mats
ICE
Pioneer DEH-P6500R CD/MP3 Headunit
Pioneer TS-Range 5.25" speakers in doors
Pioneer TS-Range 6.5" speakers in parcel shelf
Pioneer TS-Range 6" x 9" speakers in parcel shelf
Pioneer VCCS 12" subwoofers x 2 in boot
Legacy LA890 4-channel x 300W amplifier
SECURITY
Gemini ultrasonic alarm
[BREAK=Making Plans]
C1J? F7P? Turbo? F7R? E7J? L7X?
Jury considers verdict as Engine-gate suspect admits ‘I have a Vee in my bonnet’
Looking back I feel embarrassed to say that despite a plethora of modifications, the only maintenance the 19 received was that necessary to get it through an MOT.
Despite this neglect, the 19 had wanted for nothing, doing something in the order of 60,000 miles trekking back and forth between Manchester and Newark on Trent twice a month - in all weathers - for three years solid – without so much as a drop of fresh oil.
When I moved back home permanently, the engine was understandably a bit tired, oil was weeping from the head gasket and she generally seemed a little bit worse for wear. Add to this my parents’ wish for me not to spend any more money on a car of such an age and in such state and their wish for me to think about getting rid of her.
I agreed with them on the subject of getting a new car. But not in getting rid of the 19!
I felt the 19 deserved some form of reward for its’ years of tireless service. Thus, she would come home and be taken off the road in order to have:
• Anything broken fixed
• Anything worn renewed
• Anything imperfect made perfect
In addition to this, it would give me a chance to improve my own mechanical skills which up to this point had been woefully inadequate.
With a clean canvas to work on, I could crown the car with it’s piéce de resistance - a new engine of some form was to be fitted, with all auxiliary components such as brakes and suspension suitably upgraded or improved to suit.
I had mulled over the usual options – Valver F7P, Clio Williams and Megane Coupe F7R’s, the Renault 5/11 C1J Turbo and various permutations thereof including throttle bodies, forced induction – I even briefly fell in love with the idea of turbo-charging the 1.4 Energy.
In the end though, I had a bee in my bonnet to do something never done before. So on one particularly boozy ale-induced brainstorming session (sat in Lloyds Bar opposite Sainsburys’ in Fallowfield FYI) - I remember it well - I decided I would attempt to install a great big V6 under the bonnet.
Enchanted by the idea, I departed said drinking establishment, and shortly thereafter was on eBay browsing for ‘Renault V6 engines’. A few clicks quickly led me to what at the time seemed a good buy – an early Laguna 3.0 V6 on a Buy it now for £150.
The next day I phoned my old man and asked him to clear a space in the garage and would he mind taking delivery of a V6 seeing as I was ‘in absentia’. Words along the line of ‘pillock’ and ‘you’re not real, son’ quickly emanated in ear, but my Dad being my Dad – understanding – and somewhat of a hypocrite – duly obliged. A few weeks later I returned home to assess my latest purchase.

My delight at owning a great big engine destined for my beloved 19 soon turned to disappointment, as further investigation revealed that the engine had not been removed in the kindest fashion; there was damage to the flywheel, various components had been levered, marked or otherwise ruined, and various parts of the wiring had been cut to facilitate an easier removal.
Further to this internet research soon revealed the engine was also an auto, and that the auto gearboxes for this particular engine were notoriously unreliable. Not to mention the engine itself being painfully shy on the power front
So I decided to get shot of this engine and start again. I relisted the engine on eBay, and it eventually went for somewhere in the region of about £30, to a bloke wanting to build a RWD V6 Megane Coupe. I consider myself lucky to have got thirty quid for it; it would have been less had it not been for some bidding ‘assistance’ from Chris H…
It was fellow forum member in MicKPM who alerted me to the availability of a 3.0 V6 engine and gearbox from a Peugeot 406 sitting in a salvage yard in Heanor, Derbyshire.
This time I did my homework. The www revealed this engine carried 197bhp as standard, which meant even with the added weight from a V-engine, there was enough to see the car punching well above its weight. The only issue now, was whether this modern engine would lend itself to being mated to a much older car in the 19.
Having seen the engine successfully installed in some other early 90’s hatchbacks – Pug 205’s, 306’s and even a Citroen ZX, I was happy to take another punt. A few calls were made to arrange the borrowing of a Transit van and some pairs of hands, and not long thereafter, engine number two took pride of place in the garage.


On getting the lump back I knew I had made a much better purchase. All the wiring harness was there and intact, there was no obvious damage to any components, and I even got the gearbox with it. For £450 though you could arguably have expected to get the gearbox!
Soon after the excitement had worn off, the size of the task at hand was obvious. This project was going to be a mammoth undertaking. Especially for someone whose only previous mechanical experience involved a failed attempt at fitting a Max Power air filter…
[BREAK=Replacement Transport]
“A MOST UNRELIABLE CAR”
Shock as neglected 15 year old motor struggles with 400-mile weekly commute
Before work on stripping the car down could begin, I had to sort out a new car to ferry me about.
I stupidly thought the answer to trouble-free mile-munching motoring lay in this Mk1 Clio 16v.

I was originally bidding on the car on eBay, but lost in the dying seconds of the auction. At the time it was a heap, but a heap was all I could afford, and as it was in Beith in Scotland – not too far from Chris H – it was in the ideal place to collect the car and leave it to the big man to weave his magic and hopefully fashion into something that was mechanically half-decent (and reliable!)
The Clio remained in Chris’care for a several months until I had an opportunity to come and collect it, an opportunity which arose when we this fine forum held the first ‘Big Scottish Meet’. A young member of these forums, Dan, was coming to the meet from Devon, and very kindly took a massive detour to pick me up en route, so that I could drive then drive my newly MOT’d Clio back at the end of the trip.
Sadly, for all of Chris’s hard work, the Clio proved to be a nightmare to own. It could barely manage 2 weeks on the road before something else packed up, it went through countless clutch cables, and in the end I couldn’t risk taking the 19 off the road as it was needed as back-up transport on several occasions.
The Clio was put back on eBay, and I had an interested buyer come see the car, and despite the state it was in, he was smitten with it and at £600, he opened the bidding at far higher a price than I was expecting. Still, considering he was expecting to haggle I negotiated a little more and eventually we shook at £780 – it was such a good deal I actually made money on the car, even after the cost of the repairs Chris did.
The Clio is documented at the following link - Clio 16v
So the search was back on for new wheels. In the end I decided I couldn’t go far wrong with another 19 1.4 Energy – it didn’t take one for long to come up on eBay, and after a drive down to Walthamstow and parting with £112, I came back with Silver Streaks’ identical twin (see Project Double Vision)

The new 19 needed MOT’ing, needing only a leaky wheel cylinder replacing on the back to get it through. Shortly after that my uncle offered me £300 which I couldn’t honestly bring myself to turn down.
So the search was back on. A friend of mine had just invested in a new car, and was getting grief from his folks to sell his previous car, a Vectra Supertouring V6 saloon. Not long after, it ended up in the hands of yours truly, and despite the connotations of it being thirsty thrashed Vauxhall, it actually did me a decent turn and proved to itself to be a reliable motor, to the point where I could finally take the 19 off-road and begin to start the work I had planned for it.

There is a project report for the Vectra in the Non-Renault section - Project Griffin.
[BREAK=Stripping Begins]
“TEA AND A HOB NOB PLEASE, MAM”
Project Report readers in uproar as Day 1’s first important decisions take biscuit
By the time I had finally sorted out some reliable transportation, it was October 2006. After having enjoyed a period of earning some decent money and having a fairly luxurious motor to swank around in, it was time to get down to some hard work on the 19.
The first job I decided to tackle was a mechanical strip-down – engine, brakes and suspension. None of this could come off without the car being lifted off the ground, so the wheels came off and, corner by corner, the car was lifted onto axle stands.

Fluids were drained off, the battery disconnected and removed and then finally the engine could start to come apart.
A few people had approached me about having parts from the engine – a long-time friend through RSC was building a throttle-bodied 1.6 Energy Clio for his partner, and asked if he could have the straight-port cylinder head from my 1.4. So rather than take the whole engine out, I took out components one by one, until all that was left in the bay was the bottom end and gearbox.
A loan of an engine hoist from MicKPM helped see the last bits of the engine removed – the first time I had ever taken an engine out. All in all took me about 10 hours total in 2 hour stints here and there - impressive by my standards - but not a patch on the half hour it took Chris H when he changed the clutch on it in 2005!
I could probably get that time down if I hadn’t made the mistake of needlessly removing parts such as the intake and exhaust manifolds with the engine in situ.


With the engine out, the driveshafts, hubs and suspension could be withdrawn from the wheelarches, and the exhaust system dropped from underneath.


Now that the car was engine-less, it gave me the first opportunity to offer up the new V6 engine to see whether it would even fit, and if it did, what modifications were needed.


The first problems were obvious – the alternator fouled the slam panel at the front and the stock brake master cylinder and reservoir assembly were in the way at the back.
Either way it was obvious some expert help would be needed, so in mid-November I arranged for Chris H to travel down with a few bits and pieces I was having from him for the 19 and stay for a few days so he could cast his eye over proceedings.
[BREAK=The Big Man Visits]
IT’S “DEED”
The ‘H’ gives his verdict… and it isn’t good news
Chris and I started as soon as he got here, the big man eyeing up the engine and its intended new home. Very quickly the concensus view was that the lump wasn’t going to go anywhere near where it would need to be in order for driveshafts to align etc. without cutting out big chunks of the subframe – the engines’ crank pulley and the majority of the ML5T gearbox wanted to live where the wishbones mount.
In turn this would mean custom-built suspension and brakes – in other words, short of throwing £10K at it, the project – for now at least - was all but dead and buried. Not the most heartening of news, not helped by the fact that stood next to the V6 lump was a Megane F7R given to me by MicKPM (originally the buggered engine from Peter T’s old Megane Coupe) – and it looked positively matchbox-sized by comparison to the big V6.
Nonetheless, the parts which Chris had bought down from Scotland with him (a complete set of locks and central locking motors) were fitted, which was another little job done.

I had no grounds on which to disagree with Chris, as much as I wanted to. But as much as I could see for myself it probably would never fit, I never gave up on the idea of doing the V6 – at least not without investigating the options….
[BREAK=Soldiering On]
SPIRITS NOT DAMPENED
The restoration continues
Despite the revelation that a V6-powered R19 at this point in time was a no-goer - at least not without parting with serious money - work continued on stripping the car down and renovating it. After all, the car was getting a new engine one way or another, and I would still want the car in the same renewed and improved state regardless of what engine eventually ends up in there.
One improvement I had wanted to make was to bin the drum brake setup at the rear, and replace them with 16v discs. In order to do that, I would need to come by a disc axle. At the end of November I got wind of a chap breaking a 16v Chamade just outside a place called Alveston near Bristol. So one Sunday, with my best mate tagging along for company, and an Astra van loaned from work, the trip was made. The cost to me for the axle was just £5 – making it easily one of the biggest bargains of the entire project to date.
Before it went anywhere near the car, however, it was subjected to the usual treatment new acquisitions for the 19 get – a thorough seeing-to with the wire brush and abrasive paper to eradicate as much of the accumulated rust as possible. Even the old got busy with the rotary brush attachment! I think it was his preferred choice out of helping me and weeding the garden in the rainy outdoors!


Once that was done, I had some black Hammerite ‘direct to rust’ to apply to it, I think the results are rather good!


Before the new axle could go on, I had Mick (MicKPM) pay me a visit in early December. He’d been wanting to pay me a visit and see how things were going, and encouraged me to have another crack at getting the V6 in the bay, just to prove once and for all whether there was any life left in doing it. After all – the only time the engine has been anywhere near the bay its just been me doing it, and at the time I probably lacked a little bit of the confidence and experience you sometimes need to see a way round a problem.
To give the engine the best chance of going in, we stripped off the exhaust manifolds from the Vee, re-routed the not inconsiderable mass of engine loom and removed anything protruding that could have given us problems.
We also found that introducing the engine in to the bay at a slight angle, with the gearbox pointing in the direction of terra firma, also helped get the lump in the bay, we could see the engine could go a bit more, and my Dad turned up at the crucial moment armed with a pick-axe handle in his hand and crudely levered the lump home as far as it would go.


So, Take 2 was more successful than Take 1, when I tried this by myself, but the fit was still not ideal. There were several ancilliaries fouling the front cross-member on the subframe – the air conditioning pump, the oil filter housing and the front exhaust manifold.
The air con pump can at least be removed (and sold) and the engine fitted with a non-A/C auxiliary belt, the oil filter can be relocated to a remote position and the front exhaust manifold, well… there’s sure to be some solution to that eh?
Despite these problems, I feel galvanized that at least the engine will fit in between the chassis rails at least, even though it is looking like one of either the bonnet or the subframe will have to be sacrificed to give the engine a good home.
One idea floated by Mick was to trying offering the engine up to the car from underneath, as opposed to ‘going in the top’. For that though I would have to strip the car down even further, removing the subframe and steering assembly.
[BREAK= New Year, Fresh Hope]
2007 ARRIVES
Hopes of building fire-breathing Renault given boost
Removing the subframe proved to be a much easier job than expected – four bolts holding the frame to the chassis, and a pinch-bolt to release to separate the steering column from the rack.


With the subframe off I could sit the V6 engine on the subframe outside of the car to get a better view of the obstructions that we found when Mick was here.

Yep, issues with A/C pump, oil filter and exhaust manifold.
First one was easy to remedy – remove the pump.

Something to sell on at least! (Apparently these Delphi units are a pretty penny to come by new or reconditioned, so there may be some decent money to be made on this.)
That was all I could do for now, I need to investigate the options regarding the oil filter and the exhaust, something must be possible given all the highly modified cars that grace the pages of the glossy magazines, some of which are much wilder undertakings than this.
Towards the end of January, I finally got round to exchanging the drum axle on the car for the smart disc axle I bought and refurbished late last year.
A no-nonsense approach to getting the old beam off was taken. Lines and cables were butchered through (I was renewing them after all) and the rear shocks removed. Finally, all that was holding the beam to the car were four 19mm nuts – 2 each side of the chassis. These slackened off surprisingly easily considering they hadn’t seen a socket since they rolled off the production line, and the tired drum axle finally dropped off.


The new axle was then brought out and offered up, this was quite a cumbersome task to do on one’s own, but the help of blocks off wood to pain-stakingly raise each side of the beam on to the studs squarely soon paid off, and the new disc axle was soon in place with the nuts re-fitted after some wire brush treatment!

I had a pair of rear discs, so these were fitted – calipers still needed to be sourced.
I was also going to get the rear shocks bolted on, but as they too are being uprated at some point is there any point wasting time putting old ones on? No, I didn’t think so either!
Mick had been back in touch to say he was going to need his engine crane back to assist with a new car he was acquiring – Tim Harvey’s old Renault 19 Chamade BTCC car! Motorsport aside – it meant I didn’t have long to trial fit the V6 from beneath, so I had to get cracking.
One night on a cold frosty February day, the task began – on my own as always!
First of all I hitched the engine crane to the front end of the 19 and raised it up just enough for the V6 engine to be ‘walked’ on it’s sump beneath the engine bay.


I don’t know how I managed it at the time; it would have been a mad undertaking by anyone on their own at any time of year, much less in the dark with a frost forming.
Once the engine was in roughly the correct position, the car was gently lowered back on to its axle stands; I could then hitch the hoist to the engine and crank her up into place from below…


Bingo! It looks right at home in that bay and raising it from below is definitely the way forward. However I physically can’t check what problems there would be if I tried to put the subframe back on from underneath. I think that for one person would be asking a tad too much.
The start of 2007 led to amassing a huge stockpile of parts, some stock Renault, some aftermarket – all of which would find their way on to the car at various stages of the rebuild.
One such parts gathering mission took place in mid-February, when I accompanied Mick to Albert Looms, an absolutely massive breakers yard in Spondon, just outside Derby. Mick himself was trekking over to get hold of a cam cover for his Omega V6, while I was hoping there might be a 19 to raid some bits from – namely a pair of front hubs, as I had made the mistake of leaving the driveshafts attached to my original hubs.
As it turned out there were two 19’s – a sky blue Phase 1 19 GTS and an Iceberg Silver Phase 2 19 RT TD. The Phase 2 was in the nicer position than the GTS and so we set about stripping the hubs off. The first one was a bastard, but the second one was a delight to remove.
With mere minutes to spare before the yard shut, I spied that the Phase 2 had colour-coded mirrors.

Anyone who knows my home-brew mods will know I have tried to colour-code my mirrors many times, and while my last attempt was not a particularly bad job, they weren’t particularly good either, so to find a factory colour-coded set was a bonus. And they were electric as well to boot!
[BREAK=The Arrival of Spring(s)]
BOING! BOING!
Car is sole beneficiary after unorthodox Renault-enthusiasts’ ‘ménage-a-trois’
Remember how I said that Mick needed his engine crane back to take delivery of Tim Harvey’s old BTCC Renault 19?
Well the chap that Mick purchased said car from is a chap named Ewart.
Shortly after Ewart bought the BTCC Renault 19, he purchased some coilovers from a Renault 19 16v on eBay, thinking they would be of use on his BTCC car. As it happens, someone else was also bidding on said coilovers – me. But unknown to me at the time, I was sniped by Ewart in the dying seconds of the auction.
Ultimately, the coilovers were of no use to him on the BTCC 19, and Ewart had taken the opportunity to own another BTCC Renault – this time a Laguna. The Tim Harvey 19 ended up being advertised for sale on various Renault forums, which is how Mick heard about it and eventually came to own the car. When Ewart came to drop the car off to Mick – where incidentally I had gone on the day to lend a hand – conversations quickly exposed Ewart as my eBay sniper!
As Ewart had cut his losses with the BTCC 19, I enquired was happening with the coilovers. He said that if they were no use to him on the Laguna then he would sell them to me with pleasure.
To no great surprise, a call came the following week that the coilovers were no good, and so that weekend I took a ride over to Ewart’s base in Willenhall in the West Midlands to collect the struts and cast my eye over Ewart’s Laguna.

All in all the complete front and rear struts set me back £150, which incidentally had been my maximum bid in the original auction. “All’s well” as the saying goes eh?
Needless to say they had the ‘Gentle Ben’ treatment once back at home – a bit of a rub down with the wire brush on the metal work and bracketry, and some hot soapy water to get all the gunk off the springs and show up the funky blue!
The strut tops were then masked off, and the mounts sprayed satin black:


As the coilovers were the last major piece of the braking and suspension puzzle, I could now think about getting the car rolling again, in anticipation of sending the car away to have the engine grafted in.
[BREAK
FLACCID DIGESTIVE YOU SAY?
Track by American band proves inspiration to get this Retro-Renault ‘Rollin’
In the middle of June ’07 I attended the Performance Vauxhall Show, or ‘PVS’ for short. I had done a fair bit to the Vectra ST, and fancied taking it to the show, and had it on the stand with the VVOC. My visit to PVS also had another motive – there was a chap going running a Corsa V6 with whom my old man was familiar through work. My Dad mentioned that the place who built said Corsa V6 was pretty local, but beyond that he didn’t know anything more.
So late in the afternoon, at Santa Pod raceway, I approached a red Corsa, sounding very much like a V6, and introduced myself. The chap told me the place who did his conversion was a place called Power Crazy Motorsport in Lincoln – about 16 miles from me – and Paul, the bloke running the outfit, was happy to turn his attention (and his angle grinder) to just about any project you can think of.
I paid a visit to Paul, and he said he would have no problem taking on my project, and that the only issue was that he had several people waiting for his services. The best thing would be to ring him up once in a while to see when he could fit me in. He said one way he could get to work on it sooner was if I were to rent one of the forty-odd privately-rented garages out to the rear of his premises - he could then pull the car out to work on it at his convenience.
Before I could do that though, I had to get the car rolling.
Mad Pierre (AKA Peter T) had kindly donated a pair of 16v rear calipers to go on the new rear axle.

These received the usual treatment of a good clean and rub down, and in my temporary painting station (consisting off the top of the wheelie bins) they got the Hammerite satin black treatment;


I also made the decision to have a go at installing new rear brake lines, to make the job easier I removed the beam from the car. A trip down the factors saw investment made in a pipe flaring kit, a handful of new unions, a length of copper brake pipe, and a set of 19 16v rear brake pads.
Under the instruction of the old man, the two runs of pipe from the centre of the beam to each caliper were quickly fashioned into shape and flared off at each end.


All that remained was to fit the discs back on with the newly acquired and painted calipers, the new pads, and then screw the unions up. Back at the car, the new beam was manoeuvred back into position on the car, and the new rear suspension fitted:

Quite an improvement on what was filling that same wheel arch not too long ago! ‘Before’ picture:

The next task was do the same on the front wheels. The hubs I had raided from that Phase 2 19 at Looms scrapyard were next to receive a good helping of Hammerite. New hub fixings were assembled with the hub once the paint was dry.

The new fixings were sourced after seeing Andy Lovell (AKA Snowman) do a similar overhaul of his front hubs on his Clio. (Thanks for the link Andy!)
Brakes were one thing I had acquired early on; when I cut a deal with Chet – founder and proprietor of this fine forum, no less – to purchase a set of Hi-Spec 325mm grooved and vented discs together with a set of Billet 4-piston calipers.
He wanted £450 for them - to buy these new would have set me back about £1000 at the time, so on reflection they were advertised for a fair price. I went to look at them when he and Hanna, his other half, were visiting family in Peterborough but there was just one problem - I didn’t have £450 to hand. Thankfully, Chet was a gent about it and after taking £50 as a deposit, kindly agreed to let me pay him in installment each month until they were paid for – cheers Chet.

With the hubs newly renovated, suspension acquired, and brakes in hand, the front wheel arches could be rebuilt. First, the subframe went back on. Then the arch itself and inside the suspension turret got a thorough de-greasing and cleaning:

Then on went the coilover, newly renovated hub, and the brakes;

And then finally the wheel.

The above was repeated on the other side, and the car was returned to Mother Earth on it’s own wheels for the first time in a very long time:

There was still no real prospect of the car being able to have the V6 installed anytime soon, so my focus turned to the cars’ interior.
[BREAK=Inside Job]
AN INTERIOR AFFAIR
Dealings between forum members see car graced with new interior
While the car was waiting to go for it’s V6 engine surgery, I decided in the meantime to see about sorting the interior of the car out, bringing it up to the same standard as the mechanicals.
I already had the 16v leather interior, but I fancied a change of front seat. I have long been an admirer of Recaro’s offerings, the only obstacle was price. Decent new Recaro seats start at around £500 each, far too much than I could afford to lay out. So that left the second hand market – seats from old Ford RS Turbos and Cossies – usually all in a sorry state but still highly sought after by the Ford boys.
Then one day I had a brainwave and decided to exclude the word ‘Recaro’ in the eBay search. Whether it was fate I have no idea, but on the first page of search results was a pair of sports seats – clearly Recaros in the picture - from someone new to eBay, with the somewhat novice auction title: “A lovely pair of sports seats”.
My thinking that the sellers’ omission of the word “Recaro” in the listing title would put a dent in the number of viewers was vindicated – and in the end yours truly won the seats for a bargain £117.

Another bonus with the seats was that I didn’t have too far to go to collect them – Doncaster, to be precise. The seats aren’t actually a true ‘pair’ – one came as a standard fit in the sellers’ 1983 Opel Rekord apparently, and the second was purchased some years later for his wife who had back trouble. As it happens, the newer seat never made it into the car so is essentially in ‘as new’ condition.
One obvious difference between the two seats was the headrests – a hunt on eBay soon turned up a better looking replacement.
It then occurred that I would need base frames for the seats to mount them in the 19. Not only were frames for 19’s thin on the ground, the only place I managed to find them wanted £145 for each frame, plus delivery and the dreaded VAT – a cost I couldn’t afford.
So I decided to see about a DIY solution, and out came a sheet of MDF, a pencil and a jigsaw!

This very crude assembly gave me a pattern, and a fabrication workshop on the industrial estate where I used to work in my old job at the time knocked me frames up for both seats in 3mm steel for the princely sum of £15.

My original MDF creation was used to mark up the holes on the new metal frames and after fixing them to the seats it was time to offer them up to the sliding seat rails in the car.

A member of RSC had made the move from a mildly modified Clio Baccarat to a Clio 16v. The Baccarat had chrome-effect interior door handles which I thought looked quite smart, and so when he decided to break the car, I made sure I got my hands on the handles….

These went into the interior parts pile. The next and key part I was looking to acquire was a 16v dash and the interior plastics to replace the funky blue GTS interior the 19 had as standard. As I had a 5dr hatch and not a 3dr, I was on the lookout for someone specifically breaking a 16v Chamade, and ideally a Phase 2 as in my opinion, some of the switchgear looks a bit smarter than the Phase 1 stuff.
A suitable match came in the form of another RSC and Retro-Renault member, Oly Mills (AKA “Sirrell”). He had taken the opportunity to emigrate from his current base in Mansfield to Australia (wise man) and before he left, he agreed to sell me the interior of his Phase 2 16v Chamade – dashboard, interior plastics and the main wiring harness to get it all to work.
So one Sunday afternoon, I popped round to give Oly a hand stripping the interior out and returned with it and promptly added it to the parts pile for the big interior makeover! The only parts I didn’t get from Oly’s Chamade were a 16v shelf (because Chamades don’t have a parcel shelf) and 16v door cards.
Shortly after the dash was acquired, I traded my old hubs with Mad Pierre/Peter T for a black Stealth Shelf.

Mick came to my rescue once again with a set of door cards, electric window regulators, central locking motors and door wiring looms.
While swapping the dash, it also occurred to me that it would be the ideal time to convert my manual steering column with a power-assisted counterpart. I remembered that such an item was already in my possession after I agreed early on in the project to buy a few parts from a member - either TIB or Tom_16v on here. So that was fished out and added to the pile.
So it was time for the big interior swap – one weekend to gut the interior – rip out the old blue dashboard, interior plastics, carpet, door cards and wiring looms and swap them for their 16v equivalents.
To ease myself in I started with the door cards – a job I had done before when doing my speakers. Old blue door card:

And after, with the electric window assembly and 16v door card fitted:

Then it was time to take a deep breath and tackle the dash. I had no idea what sort of job this would be, and I had put it off for as long as I could. But I was growing impatient, and with no offers of help coming in, I just had to roll up my sleeves and take the plunge.


Actually, it was a far easier job than I expected, and took me around 9 hours to swap in total, including swapping the column and the carpet, and dressing in the replacement wiring harnesses.
Here are some before and after pictures. First, the old blue GTS interior:

And after the swap:

All it needed now was the seats! I had decided to use a place called TEK Seating on the estate at work to re-upholster my Recaro seats in black leather. TEK happened to be an agent for Recaro anyway, and repairs and re-upholstery were second nature. I booked the seats in with them to be re-covered. Three weeks passed by before the phone call I wanted finally came that they were done….


Fantastic job in my opinion – and looking much better with that replacement headrest I managed to source.
While the seats were being re-trimmed, I decided to send my custom-made mounting rails for the seats off to be powder-coated in black…

I sourced some new seat-rail fixings to make it all look new…

And with the seats at home, it was time to enjoy the results of my hard work…


For me, that is my ultimate R19 interior.
You may also notice a new steering wheel. This I acquired from Andrew Lowe on RSC, and picked it up from him in Walsall en route to see my beloved Nottingham Forest play Swindon Town away. (It was a poor result – we scored all 3 goals and lost 2-1!)
[BREAK=Odd Jobs]
BITTIN' AND BOBBIN'
Pain-staking wait for surgery date sees hoarding car parts taken to new level
Having been in routine contact with Paul at Power Crazy about getting the 19 booked in to have the V6 grafted in, it was obvious that it was not going to be seeing an angle grinder anytime soon.
While I waited for the news that it could finally go in, I passed the time with odd jobs on the 19 and by adding to the collection of parts that would be needed after the engine had gone in.
I decided to have a go at de-greasing and re-spraying the engine bay. After all, what better way could there be to welcome a new engine into it’s new home? The bay was stripped of any remaining parts and components, leafs and dirt removed from the bonnet shuts, scuttle and any little nooks and crannies. The majority of the rust was killed off with Kurust, with any remainder sanded away before a coat of primer and top-coat.
The aforementioned removed parts were cleaned down, and sprayed up in satin black where appropriate. Some pictures of the finished job:


That was more or less the last job that could be done. The parts pile soon started to grow again…. such items that found their way into my custody were:

Peugeot 406 V6 radiator. RRP £160, cost to me £26 (thanks eBay!)

New 16v wishbones complete with new balljoints, £20 from BuyPartsBy.com

Ford V6 badges – always liked the type-face of these, installed straight away!
Phase 1 Morette headlights also found their way into Silver Streak towers from a Retro member based in Cheshire, and whilst making the trip to collect those I also arranged to pick up these:

Clio V6 intake manifolds and engine cover, offered to me by a chap on one of the Clio V6 Owners Club forums. £100 the cost for the job lot, and if they could be made to fit, it should represent a small gain in power and a brilliant aesthetical improvement too.

Then one of my favourite buys. I have always loved the OZ Superleggera wheel, even back when I was 17 looking for bits to stick on the 19 these would have been my wheels of choice if money was no object. But at the time 17” versions were £1K+ a set new, so they had to wait. Thankfully, prayers were answered when a chap with a Clio 182 was selling these rims to put standard rims back on.
I acquired the full set of OZ wheels for £180 minus tyres. They weren’t in the best nick but I would have wanted them re-furbished anyhow.
Anyway, with the car now more or less ready for surgery, it was time to see about getting the car relocated to Lincoln, where she could lie in wait for Paul at Power Crazy to weave his magic on her.
[BREAK=Emigrating]
A JOURNEY TO THE CENTRE OF….. LINCOLN
Vehicle leaves home on journey of self-discovery
I had been over to Lincoln to sign up to rent one of the many garages to the rear of Power Crazy Motorsport – the firm I had arranged to have a go at putting the V6 into the 19. The plan was to bring the car here, that way Paul could bring the car out of the car and into the workshop as and when.
So with the contract signed and the keys in hand, it was time for the 19 to make its big move. A well known member of RSC, Craig Adams (also known as Evismaniac to many) had in his possession a towing dolly and an old Toyota Hi-Lux 4x4. So one morning, he very kindly agreed to tow the 19 to Lincoln for me. Before he arrived, I got the socket set out one last time and made sure all the wheels were on tight, all the subframe bolts were nipped up, and any loose parts or components were made secure.
Ole’ Silver Streak was then hauled aboard and we duly made our departure.


40 minutes later, we arrived at Power Crazy, and the 19 was duly rolled into her new home.


Whilst the car waited for D-day to come, I decided I could at least get the newly acquired OZ alloys booked in to be refurbished with Weldspec, a one-man band based in Bilsthorpe that overhauled the rims I had on the Vectra ST. He’d done a cracking job on them, so I knew I could count on him to make a decent job on the Superleggeras.
The brief was simple – all the bends and buckles ironed out if any, scratches and kerb-marks filled in, and repainted. My colour of choice was satin black. So the wheels were left in his capable for a fortnight, and when the call came, I was straight round for my newly licked wheels…
Before –

After –

All that was needed were tyres. I had bought a new pair of Event 205/40/17 tyres on eBay, I quite liked them as a tyre and one of these online tyre sellers was offering a promotion to shift his last pair on, I came by these for around £70.
Two more tyres were needed. A member on RSC was trying to move on some Ace alloy
wheels with tyres.

I had no interest in the wheels, but the tyres were reasonable, the two best were a pair of Cooper Xeons, again 205/40’s. A trip down my friendly tyre fitting centre saw the rubber fitted for a few beer tokens.

All the wheels needed were some centre caps. A quick look on the net revealed I could buy a set of black Oz centre caps for £52 – no thanks. So I wondered if I could use the tatty caps that came with the wheels and re-sticker them?
I tracked down some circular self-adhesive stickers in black with the Renault emblem - in just the right size - and handed them over to my man at Weldspec. All he needed to do was flatten the caps from their convex shape so the stickers would anneal nicely…


And in my impatience, I just had to take a trip over to Lincoln to let the 19 try on her new shoes!


[BREAK=Finding Retro Power]
TWO YEARS ON
You’re joking, right?
In mid-2009 it dawned on me that the car had been living in Lincoln for almost two years. Although I had been in fairly regular contact with Paul at Power Crazy, he had got himself into a situation where he (supposedly) was owed around £15K for a twin-V6 Vauxhall Corsa that he had built, and had then gone on to make custom throttle-bodies and manifolds etc.
Now, quite why you would allow someone to run up a £15K slate is beyond me. But nonetheless, the inevitable conversation came where Paul announced he was taking on no more long-term works on until Mr Corsa paid his bill… and that said Corsa was staying on his ramps until he did.
So after putting up around a £1K for two years’ rent to store the car, faithfully waiting my turn in the queue, I was back to square one again. Two years had amounted to complete bugger all. Arse.
One night the following week, I locked myself away at the computer and resolved not to come away until I had found someone – or somewhere – able and willing (and local) to undertake my V6 transplant Despite the popularity of car modification, finding anybody brave enough to use an angle grinder and a welder on a car proved more difficult than I anticipated, but in the end proverbial gold was struck when I clicked onto the website of a firm based near Nuneaton in Leicestershire – a place called Retro Power.

The outfit was founded and run by two brothers – Nathaniel and Callum Seviour, both of whom had engineering backgrounds and seemingly able to turn their hands to just about any aspect of restoration, repair or fabrication. Their website was impressive, with online project reports detailing the various Retro cars they had on their books. Most were in for full nut and bolt restoration, some were in for motorsport prep, and a few were in for all of the above, plus a new engine. The motorsport-prepped Pug 205 with a rear-mounted Vauxhall XE lump made me begin to think that perhaps these guys might be the ones to take on the R19.
A call was put in in November of 2009. The conversation was only brief, possibly no longer than 10 minutes, but those 10 minutes were enough to arrange the date of May 3rd 2010 as the day the car would be collected from me and whisked to the bowels of Leicestershire to undergo ‘the change’.
May 3rd couldn’t come quickly enough. Nathaniel (Nat) had kindly arranged to drive the company 4x4 and car trailer from Nuneaton to me in Newark. The V6 lump was hauled into the back of the 4x4, and then we headed to Lincoln to get the 19.
The car was awakened from its slumber in Garage 31 and hauled out into the fresh air.


Nat then had chance to have a quick look and get a rough idea of how difficult (or easy) mounting the lump was going to be.
The trailer was then reversed up…

And the 19 was hauled aboard….


Despite the fact May 3rd ended up being a Bank Holiday, the cost to have them make a round trip of about 120 miles to collect both engine and car was £80.
Work on the car began in earnest in mid-July, the only part the guys needed from me was the top engine mount bracketry which had been removed when Mick was here to help trial-fit the engine. Thankfully I was able to dig the part out, and I got the opportunity to drop it off when work sent me on a job in nearby Leicester.
At the end of July, I received a call from the boys to tell me that the engine was finally in!


The chassis rail on the nearside has been cut out to allow the engine to mount on its standard Peugeot mounting positions, with fixings fabricated and welded into/onto the engine bay and subframe where required. The bulkhead has also been re-modelled to allow the engine to be installed much more easily. The big plus point for me was that the stock Renault subframe had been kept in, which meant the brakes and suspension – which I had spent decent money on upgrading – could be retained.
I still had the bonnet at home, and the guys thought that as the car was outside and exposed to the elements that it would be a good idea to come and fit it. I had always thought that if the V6 found it’s way into the engine bay it would come at the cost of either the subframe or the bonnet, there was no conceivable way whatsoever that I could have my cake and eat it, in this respect.
However, I was pleasantly surprised when the bonnet clicked home without need to force it whatsoever!

So, the big milestone has finally been reached!
[BREAK
WHAT ABOUT NOW? WHAT ABOUT TODAY?
Westlife lyrics provide apt newspaper-style headline to Project Report entry
Right now - April 5, 2012 as a write this – nothing significant has happened with the 19 since July 2010 when the engine was grafted in.
Retro-Power still have the car, and it remains my hope that Nat and Callum will carry out all of the tasks which require an amount of fabrication, as I do not have the facilities or the skill to fabricate.
On that basis that includes them doing the following:
• Fabricating and installing driveshafts
• Fabricating exhaust manifolds to mate up to the stock R19 exhaust system
• Fabricating or sourcing an efficient compact radiator and mounting it
• Installing the Peugeot 406 gearshifter and link cables
Plus no doubt countless other tasks! The idea is then to take the car back from them and finish off putting the car back together and hopefully get it to a few shows – a task not helped by some chancer burgling the garage in Lincoln where I had a huge haul of parts stashed for the big re-build – the radiator, wishbones, Morette headlights, Clio V6 intake manifolds and engine cover, plus a rake of other bits of no particular value to anyone outside Renault 19 circles i.e. exhaust manifold heatshields, arch liners, headlights – all gone. Even the old 16v leather interior complete with rips was taken. Alas, none of it ever showed up again despite watchful eyes being kept out on eBay etc. I’m not bitter about it… much!
The main hold-ups with work continuing at the moment are both a) cashflow and b) Retro Powers’ diary! Since fitting the engine, Nat and Callum have taken on a couple of blokes to oversee the bodywork and painting side of their operation and let them focus on the mechanicals. This means that they need a constant flow of cars in for mechanical work followed by paintwork, in order for everyone to be occupied and earning their keep. As the work on mine is purely mechanical, it means it only gets a look in when things are quiet generally.
As I write this though I am just about to fire off an e-mail to see if there are any plans for work to begin again anytime soon. Last month I acquired a gearshifter unit and the linkage cables so I’m just waiting for a chance to drop that off and hopefully that may be the next job to get done on the car.
Updates to come when something meaningful happens!
[BREAK=From Hinckley with Shove]
FROM HINCKLEY WITH SHOVE
Iconic spy franchise provides far-fetched answer to thread author's difficulty in creating title for chapter in knackered cars' progress thread
Well bairns, I invested in a laptop today and my first port of call was this very fine web page. I then remembered having a project thread, and noted that it had not been updated for several years. I then remember the pace of this project, and considered that even after four years the thread might still be 'up to date'!
However, I'm pleased to report a fair bit of progress - the vital fabrication work, requiring skills in design, engineering, fabrication, welding and cat-skinning is all complete, and the car returned home in the early to mid-part of 2015 (about a year ago as I write this).
That's the nut-shell version. For the sadists among you, a more thorough update is provided below....
At the end of the last page, the car was still in the hands of Nat and Callum Seviour, brothers and joint-owners of a (then) newly-established multi-faceted vehicle restoration outfit called Retro Power, based near the town of Hinckley in Leicestershire.
The two of them had done the impossible and managed to graft in the Peugeot 406 V6 engine into the 19's engine bay, in a way that allowed the original obstructive Renault subframe (and with it, the stock brakes, suspension and geometry) to be preserved.
I had also had some luck in that the engine was compact enough to allow the original bonnet to be re-fitted without modification - originally it was thought that I would have to make a choice between having a custom subframe and suspension set up or having to modify the bonnet and lose the sexy lines that makes a 19 a 19 - thankfully I was fortunate enough that I didn't had to compromise with either.
While the V6 being installed was a milestone, another more significant milestone had also been reached about the same time - when my first child Lawrence was born.
Understandably, finances were very tight, and plans to commit to further progress on the 19 were abandoned in light of this. Retropower had no problem with this - their work was being noticed and their order book was filling up with customers wanting their full nut and bolt restorations carried out, and they had no issue with the car remaining with them until I was in a position to afford the next tranche of work to be carried out.
After my other half returned to work from maternity leave, I as able to start thinking about having more work carried out on the 19. Unfortunately, during the 'down time', Retropower had snowballed into a much bigger operation - the payroll had doubled, with two painters and bodyshop technicians recruited to leave Nat and Callum with the restoration / mechanical side of things. It was explained to me that because the 19 was only having mechanical work done to it, it would have to fit in around the full resto jobs as working on mine would result in downtime for the bodyshop - something no small business can afford to stand.
The 19 stood out on Retro Powers' yard for 2-3 years after the engine was first fitted. Despite everyone's best intentions, the 19 never felt the warmth of the Retro Power angle grinder again, and in a strong echo of the situation I was in when the car was stabled at Power Crazy Motorsport, it dawned on me that it was perhaps time to find someone else to carry on the story.
The answer to my conundrum did not take as much solving as it did last time - I was now an avid reader and subscriber of PPC magazine, and had noted in each issue in the advertising section the advert of a engineering workshop trading as 'Wisbech Engineering', with the strap-line "custom fabrication on any vehicle"- perfect.
The call was put in to Mark Gibbs, the owner and MD of Wisbech Engineering (hereon referred to as 'WE') and a plan of action agreed. All that had to be sorted out was the debrief with Retro Power, and transportation of the 19 from Hinckley to it's new digs in Terrington St Clement in Cambridgeshire.

Shiply was again my saviour, and after a brief negotiation, a nice man called Tim turned up with a flat-bed truck from the mid-80's, loaded the 19 onto it's back using what appeared to resembled two bits of old motorway Armco, and then proceeded to follow behind his smoking steed to WE on a journey taking a little over three hours, during which I must have inhaled an amount of smoke equivalent to that ingested by someone who's smoked 60-a-day for the last 20 years.
Nonetheless the car was duly delivered and offloaded with care, and after a month or two, work began.
More to follow on the work carried out by WE, however if you want to take a look at their website, I've put the link below.

Home - Wisbech Engineering
More to follow...
[BREAK=Wisbech Engineering]
SMOOTH FABRICATOR
Huge progress made thanks to Mr Mark and sidekick Carl
The purpose of taking the 19 to WE was to have any outstanding jobs that required any element of design, engineering and fabrication completed, as I simply do not have or possess the skill, imagination, equipment, space, time or patience to do it myself.
On delivery of the 19 to WE I had a chat with Mark about the jobs that needed doing, and the initial list looked like this -
1. Fabricate driveshafts
2. Fabricate full custom exhaust system
3. Reconstruct top section of bulkhead panel and then;
4. Relocate brake servo and master cylinder position to passenger side bulkhead
5. Convert existing cable clutch pedal to hydraulic operation
6. Identify position to mount radiator and supply and fit radiator to suit
Driveshafts
When the 19 was first despatched to Retro Power, it went with both the original Renault driveshafts fitted to the hubs, and a pair of 406 V6 driveshafts I had acquired on eBay many moons ago. During the course of it's stay, the Renault shafts went amiss and were never to be seen again.
The first job was to source replacements, however with the parts required being intended for a Renault, naturally there was a multitude of options. In the end, thanks to a combination of Mark providing all manner of measurements, spline thicknesses and spline count from the hubs, and a raft of other info requested by an equally helpful eBay vendor who went above and beyond to help identify what shafts he had in stock that I could use.
In the end a pair of Megane shafts were sourced from the eBay vendor, which I had delivered directly to Mark at WE, and it wasn't long before I had an e-mail saying the shafts had been made and fitted.


Gearshifter
A bit of a delay then followed - much like had happened at Retro Power, Mark began to get busy. In addition, the two Rovers that were in front of the 19 in the queue were being held up due to incorrect parts being sent for them from the States, and this was taking time to sort out.
Mark then took on a pair of apprentice hands to help him, in the form of Carl Houseman. Mark said he would be teaching Carl the ropes and that he would be letting Carl cut his teeth on some of the 19's smaller jobs. The first of those was the installation of the Peugeot 406 gearshifter unit. Again, this was another item that went missing at Retro Power, although they did kindly replace it.
Mounting the gearshifter and getting the cables to actuate properly proved problematic, and in the end Carl spent a full week on it. Having been an apprentice myself, I do know that you need time to get up to speed... I was nonetheless grateful when Mark said that he would not be passing the full labour cost on!

Carl did a good job integrating the 406 shifter into the Renault cabin, with no apparent modification needed to the centre console. In fact it looks quite at home. The unit came from a breakers' and as you can see the knob itself is quite tatty, there are however numerous aftermarket replacements available for a few pennies on eBay.
Bulkhead Alteration, Relocation of Brake Servo, and Hydraulic Clutch Conversion
The next job Mark turned his eye to was his best work on the car, from an engineering point of view.
One problem which became apparent when Mick and myself trial fitted the engine many moons ago was clearance of the brake servo. The engine was prevented from sitting in a nice position as there was no clearance to the rear cylinder head, so back then I knew it would have to be relocated elsewhere. Having owned an Escort van for work with the brake servo on the passengers' side of the bulkhead, I knew it was not impossible, and in fact the pivot bar assembly from a Mk6 Escort was one of the first parts to make it onto the pile when Mark said he was looking to make a start on this particular job.
A bit of research was carried out to see if there was a better servo and master cylinder combination to give the 325mm 4-pots up front a better feel. An apparently common modification on comparable Mk1 track Clios is to use the servo setup found on the later RenaultSport Clios, and I was soon the owner of said setup from a 182 Trophy being broken on eBay.
It was then down to Mark to take my heap of parts and work them into the 19.
His first job was to re-model the bulkhead and make it symmetrical once again. The offside front turret was then squared off, and the Escort pivot bar was than tied in to the turret via a welded boss. The servo was then mounted on a new piece of metal work which was stood off the bulkhead and tied in to the passenger side front turret, and the actuator rod was connected to the pivot bar by means of a movement which Mark expertly crafted to convert linear brake pedal movement into rotational movement, and then back into a linear movement to operate the servo, all bushed and rose-jointed as necessary.
I'll let the pictures do the talking.


At the same time the clutch pedal was converted from cable to hydraulic actuation.

Exhaust System
If the new braking arrangement takes the gong for best engineering, then the exhaust Mark built on the 19 for me takes the 'Phwoar!' award!
The early plan was for Mark to ditch the original Pug exhaust manifolds and install tubular stainless versions, and then a full system to the back end of the car, motivated largely by the experience with the similar Vauxhall / GM V6 engine as fitted into my Vectra GSi - breathing is a big problem and a lot of extra power can be freed by sorting the exhaust out, in the Vauxhall engines' case tubular manifolds typically free up an additional 30-40bhp, so at this stage it would be an ideal time to do the same on the 19 to improve upon the 200bhp of the Pug engine.
Unfortunately the additional costs for bespoke manifolds proved prohibitive - all the individual jobs completed up to this point had gone over budget, and so it was decided that as the original manifolds were present and perfectly serviceable, to have a manifold-back exhaust system.
All I had to do was specify a tailpipe design and size, and with no other point of reference other than my aforementioned Vectra (which has similarly been converted to 3.0 V6) I instructed Mark to replicate the size and design of the Vectra's tailpipes - twin slash-cut pipes, each 3" in diameter.


Mark then proceeded to build the exhaust in stainless with so called 'dairy' bends used where needed - apparently the best!
Again, no words can do a better job than pictures, so I'll let the photos of the finished work do the talking.


Due to the 19's age there is no emissions requirement for MOT, so there is no catalytic converter. Aside from the middle box there is no additional silencing, so it should make quite a nice bauble when struck up! The tailpipes fill the cut-out in the 16v rear bumper quite nicely also.
Mark appears to have crafted the whole lot from front to back in quite a hefty bore of pipe - hopefully this will wont create any problems as it's not really a job I can afford to have repeated! The pipe size also puts to bed any future plans for a remote turbocharger installation that I've been mulling over, as remote installation requires a pea-shooter size exhaust to work most effectively.
Radiator and Cooling Fan Installation
The last 'big' job I needed Mark to carry out was to provide a means of installing a radiator and fan, with no impact to the visual appearance of the car if at all possible. The engines' front cylinder head occupies the space where the original radiator likes to sit, so it was thinking caps on for this one.
Mark had warned that this would likely be the most costly individual job on the car to have done, owing to the costs associated with having a bespoke radiator made.
As my aim for this project has always been to keep costs to a minimum, I began to research what off the shelf radiators were out there which could help avoid the need to go down the bespoke radiator route. It makes good sense to me to use readily available existing parts where possible, to keep any future replacement costs down.
In order to assess what size radiators I should be considering, I e-mailed the editor of PPC magazine, Will Holman, for his advice. He recommended speaking to Allisport, a specialist fabricator who provides radiators for PPC mag's project cars, with the proprietor more than happy to provide advice without obligation. Speaking to the chap on the other end of the phone I was hoping he'd be able to tell me whether the radiator size / cooling capacity required should correlate with power / torque / displacement etc.
However, in the end it was explained to me that due to the number of variables it was virtually an impossible job to calculate a 'minimum' surface area for a radiator and that the only way to cater for the 19 would be by trial and error. He said there would be no harm in starting small; pointing out that there are numerous Caterham-style kit cars sporting big power turbo and V8 engine conversions which are adequately cooled by nothing more than a radiator the relative size of a fag packet inside the compact nose.
Mark also had a similar opinion, citing a friend who races competitively in a big power motor cooled by a rad out of an old Fiesta.
So with that advice in mind, I began scouring eBay and parts sites looking for a small radiator for Mark to try and squeeze in.
The first radiator the postman brought me was for an early VW Polo, apparently these are a popular rad among the kit car fraternity, which just the right dimensions to sit in the front grille. I took the rad over to Mark, but soon found out that the spouts for the top and bottom hoses were in the wrong position relative to the corresponding hose connections on the engine - the hoses would be under a lot of tension, and the angle of the bends would kill the flow going through the system.
There was also not much room to go bigger, unless the rad was positioned off centre to the right. There was also more vertical height to be had if I was prepared to have the front cross-member chopped out of the subframe, this was a job I agreed to, as Mark had said he would be able to fabricate a new one to suit the new radiator if need be.
Mark gave me some approximate dimensions of the space that was now available for a radiator, and the search was on to hunt down a radiator that was as close as possible to those dimensions.
A promising option was found with the right dimensions, but only when installed on it's side, making the coolant flow top to bottom instead of side-to-side. Mark was happy with the arrangement, but with the top and bottom hose spouts connected to the same side tank, it meant the spouts were now both at the 'top' end.

It was back on the hunt for a radiator with the right size, and the hose spouts at opposite ends. I eventually dropped lucky with a radiator for a B2 Volkswagen Passat.
I had it sent to Mark, and he did the honours installing it, fashioning a new cross-member as promised and an additional bracket to give some additional strength. Mark also supplied and installed a suitable rad fan. Some pics of this work are below.


Odd Jobs and Homecoming
That was the major work completed. It just remained for me to think of anything else required on the car to take advantage of Mark's excellent engineering skills.
A couple of small extra jobs were carried out - I asked Mark if would chop out and renew the metal below the nearside rear light cluster on the back, which he did.

While the car had been away, I had also invested in an original triple guage cluster from an Audi Quattro, with gauges for oil pressure, oil temperature, and volts. In the time the 19 has been off road, I've become accustomed to cars which give the driver information, and I felt some additional gauges in the 19 would be of benefit.
The Audi set are from the right period, the only issue I had was thinking where to mount them. I didn't want additional guage pods cluttering the pillars or looking odd dobbed on top of the dash, so I asked Mark to make up a panel to replace the two central vents on the dash to make the installation look as original as possible.
I knew the width would be OK as you can replace a standard DIN headunit with a pod which will accept three 52mm gauges - the two central vents are the same width so I didn't expect any issue.
Mark did the business as I expected and worked the gauges into the dash for me.


More to follow...
Last edited by a moderator:

