JB
Member
Feb 3, 2005
Time to start a progress report on this methinks.
1992 phase 1 16v 3 door hatch....cost = £150
Another eBay bargain!
Car was bought with "power steering leak"...other than the odd bit of rust that was all that was discussed in the ad.
Leak coming from the rack area, haven't looked yet to see what exactly.
The drive home was a noisy one...lots of knocking and vibration. Ball joint or two definately gone. Heavy vibrations due to dead rear mount. Got thru 3 litres of PS fluid on the way home.
Bit of rust around the vent and rear arches, nothin to worry about.
The car is generally a bit neglected I feel, i.e. dirty interior, but I think its been standing around for a while. Drivers seats lots of rips.
Carpet in passenger footwell wet, could be a leak, could be matrix...that will be investigated.
Engine itself is pretty nice. Its got about 112K on the clock but sounds very smooth and quiet, be a shame to pull it out.
Initial pics:
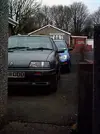
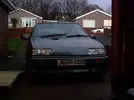
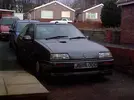
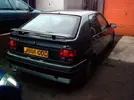
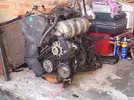
The engine as it is now:
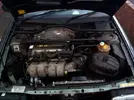
Didn't notice in the flesh but looks like coolant has erupted and got onto the airbox...
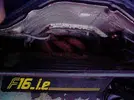
here u can see(just) the exhaust manifold right back practically touching the heatshield...
Here's the current tatty P1 interior
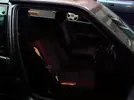
I got a MINT set of P2 cloth seats off jimbo, and I mean mint. Pics to follow
Also got a spare rack and pump off Jimbo.
-------------------------------
Been sat for a few days as when I get home from work it is getting dark so haven't done much...but decided tonight to get off my arse and do something...so I rigged up a floodlight on a stepladder so I could stick it wherever I want to work in the dark...perfect!
Decided to start doing the cheap/free things first until funds become available. So I wanted to remove all the interior and give it a good clean out.
Front seats - wanted to just undo the bolts from the underside to lift the whole assys out but as suggested they were pathetic...first came off OK but second was just a round blob of rust....the socket was just turning like a pencil sharpener on a pencil....so I didn't bother...
Took the seats off the rails from inside, leaving rails in place...this is fine as the new seats didnt come with the rails, just means I can't fully remove the carpet...no matter...
Got all seats out:
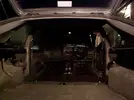
Boot carpet out:

Under carpet looks like rubble dust. Also found the odd bit of broken glass...maybe evidence of a break in once. Plus an ear ring and a couple of hairclips...obviously a girl has been in this car plenty of times.
I would like to get the front carpets out to dry them as they are quite wet up front but will have to leave I guess...will dry out sooner or later.
So next job I'll clean all the interior, hoover etc....not TOO fussed, just want it clean...feels a bit manky at the mo.
----------------
Future plans?
Engine out....replace all knackered bits...i.e. balljoints, bushes whatever...rear mount. Engine can come out ASAP as that costs nothing and I can get on with cleaning engine bay etc.
New engine involving the btm end from the other project no doubt plus a head of some description TBA
Just get it as a nice, fast fun car...not going over board, I just want a nice hatch.
---------------
[BREAK]
Feb 25, 2005
Battery gone flat (or prolly just the terminal come off) either way can't open using remote so discovered that driver's door wont open with the key, took lock out to have a gander and it would appear that this key doesnt match the barrel...it isn't just tight, just doesn't seem to be right....no biggy.
Also while I'm in no hurry I thought I would take the dash off...mainly for fun, and also to have a gander at the matrix, see if it is leaking or not as the floor is STILL wet somehow....all in the name of fun.
Soon I will get the engine all disconnected ready for removal.
----------------
Mar 02, 2005
Dash is giving way slowly, just want to get that heater box out to check matrix....
Drained coolant, rad out.....it's a start lol
----------------------
Mar 03, 2005
Right got the arse of a heater box out, not looking forward to trying to get it back in lol. What a fuckin fiddle. God knows how many things I broke getting it out (none I hope).
But it looks OK to me...no signs of leaking, the matrix looks in very good nick. No signs of corrosion, no signs of water leakage. So that really kinda rules that out for the source of water on my soggy floor.
I'll get pics up soon. I just pulled the dash forward enough to get it out as Neal did....thanks for tips btw Neal.
------
Continued pulling bits off and disconnecting stuff preparing the engine for removal. ECU out, many hoses out....etc etc don't you just hate them silly hose clips that cannot be undone...the standard renualt ones, that need butchering off...
Air box came out easy, well kind of...basically all the studs just sheared off easier than if I was undoing the nuts...still came out. But the suport bracket is gunna need grinding out, all the bolts have broken the captive nuts off on the inside of the rail, so they just turn.
Getting there....if a hoist became available ASAP it could be out straight away...
------------------
Mar 04, 2005
Hoist available this weekend! Shit need to get a move on.
Got the roll pin out the driver's shaft (passenger out) Broke my breakers bar trying to get the hub nut off so I will just let the shaft stay there hanging underneath.
Now I have cleared a lot of stuff out the way I can clearly see the rear mount has totally collapsed and the engine is basically resting on the rack. Nice.
Access to the manifold to d/pipe was not as I expected...got under the car expecting to see what I saw under the chammy and I could hardly see either...the whole exhaust just seems to be hanging differently...passenger side I finally got out from above after removing all the heatshielding...but the driver's one is a bugger...can't get a socket on it properly as it seems really close to the shield on the downpipe...can only get a spanner on it...but got no room to get good leverage...plus a 12mm spanner fits it...slightly corroded to say the least....I don't think its coming off..will have to cut it off methinks.
But TBH it's nearly ready to come out...just disconnect few more bits here and there...nothing much hopefully it will be out this weekend!
See how it goes.
----------------------------
Mar 05, 2005
Sat morning - nearly there. Stan is bringing hoist over at 330 today. All I need to do is pull out driver's shaft (oo-er), disconnect fuel lines, cut off mani stud, and undo rear mount.
Can't be arsed trying with the mani stud anymore, it's being cut off...ended up cutting the airbox bracket off too...well one part of it, but Chris gave me good tip that the screws and captive nuts beneath, if turning can be lined up and lift out, and they did! Nice 1 H
Promise I'll get pics today!
-----------------------
Mar 05, 2005
Finally some pics!
Finished preping it today for removal, just cut the manifold stud off, and when I saw it in my hand it was just a rusty blob so it was never coming off in the traditional way of unscrewing.
Went and collected hoist with Stan attached and it just happened nice and quick, apart from a trip to buy some rope to actually lift the engine with. BIG SHOUT OUT TO STAN for the help and lend of the hoist.
I had everything ready so all that was left to do was take the weight of the engine so I could pull out the bolt on the rear mount and lift away...
It's now safely tucked away in the garage to await stripping of bits for new engine. I'll try my best to keep the block and head together as when it was running it was really nice, quiet and smooth so it seems a tidy motor for emergencies.
Anyway heres some pics...
Dash off for getting the heater box out...like my new seat?
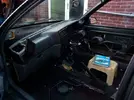
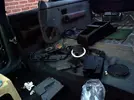
Back of car full of bits...
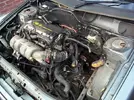
Engine ready for removal....
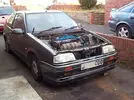
Bonnet off...
Coming out....

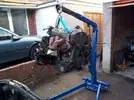
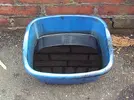
Oh and here's a shot of the treacle that came out of it...
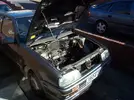
Put the bonnet back, car looks funny cos theres no weight up front now its sitting really high!
-------------------------
Mar 06, 2005
Today I set about starting to tidy up the bay a bit..nothing mad just a quick blast with the jetwash will do.
Firstly tho I wanted to swap the racks across...struggled for ages with one of the track rod ends stuck in the hub, was bending my removal tool!! So kept soakin it in wd40 and belting it with a hammer...finally gave.
Had to undo some of the union to the rack itself as I need to use one of the hoses that run in the car, as the rack I was supplied with just been cut off thru the pipes...and on the pass side it isn't just jubilee clipped on..no big deal, undid all that and got it out, new rack needs track rods ends, had one new one lying around need to buy another.
Got the new rack in, taped up as best I could any holes leading into the interior prior to jet washing...
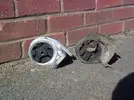
Here's a shot of the dead rear mount in situ...
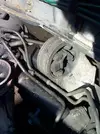
And here is a comparison with a new one
Here is some damage caused by the engine leaning on the rack...
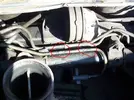
It hasnt worn thru those pipes yet...in fact I couldnt see any obvious damage to the old rack so not sure where the leak was coming from.
Here's an interesting one...found this on the chassis leg next to where the ancillaries lie...
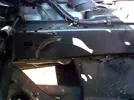
Looks like somehow the alt pulley has made contact at some point with the chassis and rubbed this patch away....maybe a mount had gone or something once...it wasnt rubbing while ive had it.
Here's the engine in its new home, for the foreseeable future...
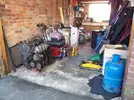
Next tasks? I think I can start putting the interior back together...the matrix looks fine so I will stick that and the dash all back together and start hoovering it out and put the new seats in so it starts to look nice again.
Here is a link to a page of misc pics...pics that really dont need explaining...just random....
Hatch Misc Pics
------------------------
Mar 07, 2005
bastard car!
spent about an hour removing 1 poxy ball joint...my god i was swearing and shouting ,.....every slip of the ratchet i was cursing out loud...got a funny look from a bloke walkin by....i swear i nearly smashed the poxy thing...this bolt...every turn was full on total body effort...i was knackered afetrwards...like a full on total body work out down the gym! really annoyed.
so tonight i picked up another new track rod end, screwed it in, and replaced the lower ball joint..and reassembled the hub assy.
pulled the ARB bush off the end but it looks fine so wont bother with a new one there...will chk others soon.
got the boyo down tomoz til sun so doubt much will get done for a while.
--------------------
Mar 09, 2005
wow amazing how things can change....did other sides ball joint today and it was a piece of piss. nice cos i didnt fancy bein angry again.
recap for the drivegear...new ball joints, new track rod ends...awaiting new shocks and springs to complete the frt.
new goodies arrived today...
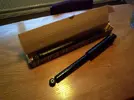
and a few more randoms added to misc pics...
-------------------------
Mar 15, 2005
last night i pulled the loom off the engine sitting in the garage...and pulled off ancillaries to start swapping over to the new block...need to clean them all up tho as they are minging from prolly 13 years of grime.
chris and whoever else manages to remove alternators with the engine in the car i salute you as i struggled for ages with the thing out of the car! it was like a chinese (or is it japanese?) puzzle thingy...just fiddled for ages trying to find the right angle to fit it thru the gaps!!
still all off now and i have a large box full of random bits and bobs, that i need to remember where all went lol
----------------------
Mar 18, 2005
stripped everything i need off the old block...gearbox is off, i pulled the clutch off too to have a look and it looks very new to me...emergency clutch now i guess...pulled the flywheel offf...might do something with that for t'other
all sensors and stuff i need out...
got all the timing stuff off...needed the rear cambelt cover with was a bitch, couple of the bolts needed drilling out, couldnt get the aux pulley off to i did what god intended and put a hole around it in the cover the right size to slip over it...not feckin get stuck behind it. after all that fucking fuss the aux pulley fell off on its own anyway...gay.
need to think about how to get the dipstick tube out and into the other block...hmm think i shall remove the sump and tap it out with a drift from the inside...ill just mash it tryin to grip it from the outside and pulling...there is a nice shoulder on it too where it meets the block which i can use to tap it into the other block...
many many things will be power washed tomoz...gearbox, all the brkts everything....everything is minging and covered in grime...
the gearbox looks like some cowboy took it off last...few nuts missing, some sheared...looks like they had to cut one off as they used some sort of grinder and put a slit right thru the bell housing! non critical tho.
did take some pics, but on the phone...new phone so havent got a way to get em to the pc yet...hmmm
------------------
Mar 21, 2005
sat morning i wanted to try cleaning a few bits up...basically all the ancillaries brkts and bits and bobs coming off the hatch engine. want them reasonably clean to assemble onto new one. gearbox as well.
some shots of the box...
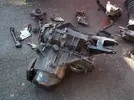
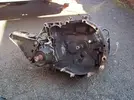
needed to remove frt springs to give to neal, i want new ones anyway so no problems...so pulled the struts out and lined them up for a quick clean too...
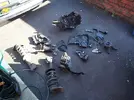
nothing over the top just laid the bits out on the drive and gave them a blast with the pressure washer...used the detergent bottle attachment too to add a bit of soap to the fun.
gave it all a blast...not a lot of diff really but it got most crud off...good enough for brkts etc...gearbox is well grimy tho so i think i will set to tht with thinners and brush to get the grime off.
needed to try and remove the spring from the struts for neal...usual fun and games doin that...they looked original so i had doubts as to whether i would manage or not...twisted an allen key into a lovely spiral...need to get a pic of that its cool.
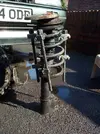
one gave but the other, the hex split at the end of the strut so that was the end of that so i just gave neal the whole strut :lol:
heres a shot of rear cambelt cover..modded to as god intended it...will make future work easier...needed to do that anyway to get it off...but as soon as i got it off the bloody pulley just fell of anyway...bah humbug!
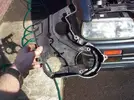
that was it really...more pics added here Misc Hatch Pics
---------------------------
[BREAK]
Mar 23, 2005
righty...last night, i decided seein as engine stuff is draggnig due to money, i will get the interior totally finished...nothing stopping me buildin it all back up now...the matrix seemed fine so it can go back in...and the dash put back.
wanted to change a bulb in the ins. panel as i remember one had gone, so pulled that out found the offender and got a new one in there..chked all the others too..put that back in.
cleaned the boot floor out...washed it down with a rag and soapy water, hoovered the boot carpet...must have looked odd from the street as the carpet was on the driver in frt of the car but from the road all u cud see was me hoovering what looked like the drive lol.
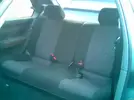
anyway, cleaned all rear half-ish, just wiped dust off etc, refitted the carpet, shelf.
i also pulled the headlinging down in each corner to chk see if the sunroof drain pipes were all attached...they were.
cleaned up the contacts on the boot lock thingy.
stuck the new rear seats in tonight, looks half finished...nice to have something to sit on as well when im inside...its nice sittin in the backseat with nothin in frt...i want the back half of a car in my bedroom to sit in!
so lookin back inside its finished. swap the rear struts and the whole rear half will be done....
reassmebled the door as it had been in bits to get to the lock...decided cant be arsed to change the lock...security innit!
so interior-wise all thats left to do is insert heater box and re-attach dash, and stick in new seats....bargain!
i have taken loads of pics on my phone, but i am awaiting new cable so i can get them all on pc...then we shall have pics!
got 3 centre caps for the wheels for 99p off ebay on the way! bargain!
--------------------------------
Mar 30, 2005
righty some pics....
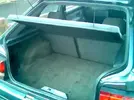
cleaning and finishing the boot...

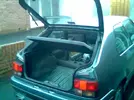
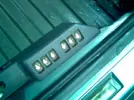
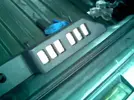
cleaned up the contacts on the boot catch...just in case like.
reassembled dash...
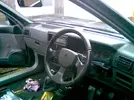
heres the annoying speedo clip:

see how the white bit is "full" of the metal bit, so when it is in the hole in the box, theres no way i can see of squeezing it in to release the clips. ...ordered a new set of plastic bits from renault today, also the metal clip equivilant, to see if that fits easier...or at all!
some pics from taking the bits off the old block...
box off:
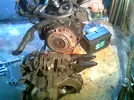
flywheel:

clutch:
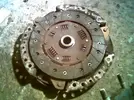
seems very new, the grooves are still very deep in it...may use this instead of my ebay one, as the friction material seems to be wider on this one...whether thats due to differences in mfrs...sachs and valeo, or differences due to the one i got off ebay not bein a proper 16v one...
a minging ht lead covered in mayo ..there was about 2" of water and oil down the plugwells...nice.
and heres the complimentary crap one carried around behind the wheel arch....free of charge to all renault owners!
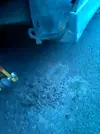
--------------------------
Apr 02, 2005
bought this this week:
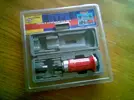
impact driver...somethign i have always thought about getting...saw this one in hyper value for 3.99 so i thought i would get it. brilliant bit of kit, i am totally impressed so far.
i got the frt fogs out! which is amazing really, i had already tried with a screwdriver and there was no way it was coming out...with this thing, a few whacks and it starts to turn...well worth getting one!
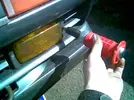
i also got the nuts of the runners for the seats on the underside of the car...something again i couldnt do before....so i decided i would finally get the runner out before fitting the seats and dry out the carpets properly...i left the doors open all day today as it was a sunny day...the carpet dried, but the spongy stuff underneath is still soggy so i am gunna get it out and dry it properly.
got one out, will do the other another day and get the carpet out.
pulled the other arch liner off....
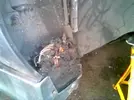
lovely much as usual...rust-promotion!
got these thru the post :
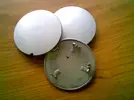
99p off ebay! bargain as the car was missing two
also got these from renault
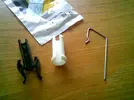
new plastic bits, ready for their one way trip into the box....! bought the metal clip as well see if i can use that instead..dunno but it was cheap.
-----------------------
Apr 03, 2005
grabbed a few mins on the car today, last night i had one sides seat rails out...today the other side was a pain, all but 1 nut is out...its well stuck, well rounded even with my new found love, the impact driver, its hard to budge it..need to get a 1/2" deep socket tomoz to tackle it...failing that...not sure...try and cut the nut without damaging the thread? we'll see. difficulty is gettin enough room to get a good swing at the impact driver.
took the std zorst off...
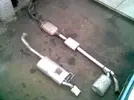
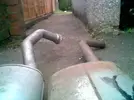
nice shiny proper tail pipe...looks quite new, not much rot...
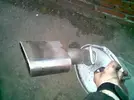
interesting kink where it goes over the axle...dunno if thats meant to be there or not?
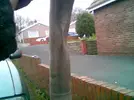
usual fun and games dismantleing the sections...impact driver, dremel, drills, grinding burrs, hacksaws...all off in the end tho, i think in total 1 bolt actually unscrewed in tact...
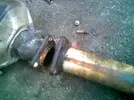
cant rememebr if i have shown this before, but here is the zorst i got off neal which i have decided to give a go should make it stand out a bit heh heh
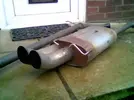
here it is next to the std, as neal moaned about the mounting of it...i have photoshopped the hangers over each other and they seem ok, but until i try it on i will take neals word for it...joy ahead apparently...
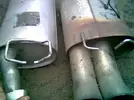
the section out the back to the centre section looks quite different, i am worried about the straightness of it compared to std....not enough kinks.
more pics added here Misc Hatch Pics
----------------
Apr 09, 2005
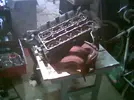
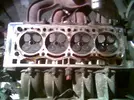
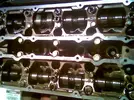
head gone off the hatchs engine to huw...here are some pics from the night i removed it...all seems to be in good nick...gasket totally in tact, bores nice and clean, very little ridge...
huw came and collected it and gave me his old head in part ex...something else to experiment on.
---------------------------
today...bodywork.
the hatch's body is a bit scruffy...at first i was not gunna bother doin anything to it, just wanted it to run well but after meeting a bloke who runs his own body repair business, and chatting to him i got lots of enthusiasm to give it a go...
basically the stickers that run down the side of the car about 6" down from the window line has been scraped off by someone previously..with what looks like a screwdriver...so i started cleangin it up today with encouraging results:
BEFORE


scuffs and scratches like that run downs the length of both sides...
set to it with 2000wet n dry and a lot of water, smoothing out the scratches and scuffs..being careful not to rub too far into the next layer of paint...this technique only works if the scratch is in the laquar or top layer of paint...any more and its re-paint time...
so after a rub down:
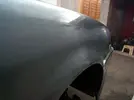
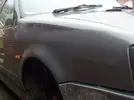
then polish it back up with t-cut....worked out nicely i think...good enough for me anyway and a mile better than before....this whole car i have decided is goin to be mint.
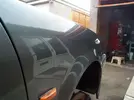
click here to see more
---------------------
Apr 10, 2005
more work on the body today...i am now addicted...am gunna make this cars body mint!
just carried on getting rid of all the scratches and scuffs...some scratches r deep and need paint, there are digs here and there....all ebing rubbed back and painted...started to sort rust...starting small first heh heh...need to get a angle grinder for the arches as there a fair bit to get out....
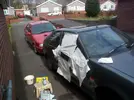
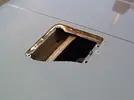
this needs sorting
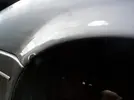
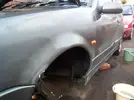
more here!!
---------------------
Apr 13, 2005
just more bodywork....been rubbing down areas containing scratches...rusty bits...tackling little things first...frt arches had little ammoutns of rust, so little just rub away by hand in a few secs...so they have been treated and primed...currently letting it go off, then i will rub that back smooth ready for the top coats...
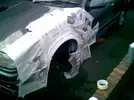
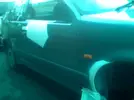
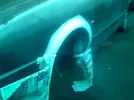
looking at the n/s rear 1/4 panel, when i first had the car, the rear arch looked a bit dubious in shape...the arch is a bit bumpy, looked like it had been filled before, and now on closer inspection i was right...it has been filled and repainted...the paint being applied all the way from the stickerline down...plus, it is not quite the same shade, so now that i am removing all traces of the stickerline it is obvious where one shade ends and the other starts!

thats after a rub down and t-cut. its never gunna look right...
so i am starting to decide to redo the panel...get all the old filler out? or just rub it back to a better shape? more investigation i guess to see if there is any rust...if it it all just filler no point in redoin the filler...re-shape and repaint the whole btm half to the right shade....
Body Work Pics
---------------------
[BREAK]
on other note...the head i got off huw..started stripping it for bits.
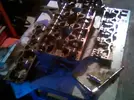
when removing the cam carriers, the bearing journals were covered in mayo, hard to see but they were...pointing to more evidence of huws leakyhead...
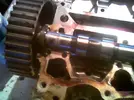
ill have all the bits off it and maybe use the head for experimentation...
Hatch Misc Pics
------------------------
Apr 14, 2005
more bodywork...got a new toy to play with:
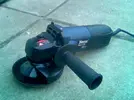
ebay
rear arch:

a little grinding:

the vent...could see the bubbles on top before and on the inside it was plastered with rubber/silicone stuff...as r a few other areas on the car...
after a flash with the grinder, i found a lump of filler in the hole...looks like someone just pushed a blob of filler in without cutting or treating any of the rust just to hide it...
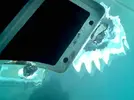
inside, after removing all the shite it revealed a rusty mess...not too bad tho...nothing a bit of filler or fibreglass cant handle...structurally its mainly all there...it'll be fine.
Bodywork Pics
---------------------
Apr 19, 2005
bah...got areas all ready to paint last week...it was about weds..i had done the primer before hand...3 patches...big on on drivers door getting rid of key scratch, and frt two arches....
so they were all primed up...got them masked up ready for top coat....literally as i was shaking the can ready it started to rain!! u couldnt make it up!
so covered in plastic sheeting (bin bags) to await finer weather...well its rained almost every day since! typical!
but last night it was fine so i got it done...altho the tape i had put on last week has become solid and very difficult to remove (twat!) but i got top coat on at last...
ill leave it for a week or so now before touchin it with wet n dry to prep it for lacquer.
--------------------------
Apr 21, 2005
more bodywork...
been havin fun with the angle grinder...cut out as much rust as i could see on the o/s rear arch...wasnt much there,...treated it with kurust:
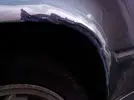
...and then started filling it...first swipe of filler:
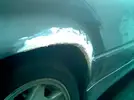
that will finish that side off, once i shape it and prep it for paint.
the vent is ready...borrowed some fibre glass stuff of stan to put on the inside, then will fill the outside and paint. didnt get round to it last night as the temp dropped off and everything was taking ages to dry so i will doit later today.
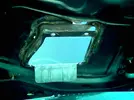
--------------
the n/s rear arch, i suspected it had been had a go at before as the shape was a bit funny. there was a small spot of rust coming thru anyway so i started having a nose with the grinder....
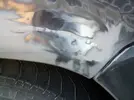
soon became apparent that this has had a new arch welded in. too far out imo hence the poor shape i noticed...
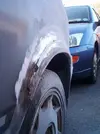
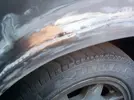
tacked on all along...
heres the rust that has come thru...since the job i presume...unless they didnt do it proper...but looks ok. saves me doin it...i canjust treat the rust and fill it...
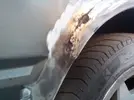
it will be fine once finished.
drive , car, dads car, my other car, neighbours car were covered in dust after grinder thru all the filler lol.
more added here Hatch Body Pics
oh..got some top coat on the previously delayed primed areas at last..just need to leave it for a bit now before flatting it back for lacquer.
---------------------
Apr 28, 2005
not a vast amount of progress due to shit weather....but i keep having a go everyday...just concentrating on finishing the body work.
got the vent sorted, cleaned it all up, fibreglassed the holes from the inside and filler on the outside...the inside has been painted (roughly - who cares its inside) and the outside is primed ready to go...
o/s rear arch has been filled, primed and painted...needs flatting back again and another topcoat as a fucking fly landed on it when it was wet and i picked it off leavin a hole in the paint....gay.
but its coming together. within a few days, all that will be left on the body (ext.) will be the n/s rear arch, which will need a bit of welding to fill a gap and to stop the new bit flapping...then filling and painting.
i also plan to get the wheels refurbed back to new...better than new.
engine-wise? the bottom end in the other progress report will be used, along with a nice head i am working on...see the other report soon for info.
-----------------------------
Jun 17, 2005
Righty...haven't updated here for a while...nothing exciting happening. I seem to be forever fiddling with something but cannot find anything to write about.
Only bodywork has been continuing.
Right, the o/s rear arch is done as above, heres pics.
[img:600:800]http://turborenault.co.uk/data/MetaMirrorCache/www.renault_turbo.com_jonboy_hatch_body_body37.jpg[/img]
been painted various times, but whole car is going to be painted now, will rub the whole lot down and make it a coplete respray job. Myself. I have invested in air compressor and kit...
got round to sorting the n/s rear arch finally. Well to be honest I am still fiddling with it making it perfect, but it is essentially done.
heres the damage after clearing all the crap out,
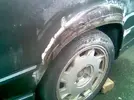
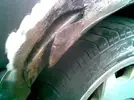
plate cut, bent and fitted into position ready for welding...
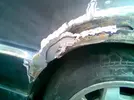
seem to have missed the bit after i welded it in so no pics...god knows how...i have tooooo many pics on my pc it is overwhelming to keep organised and on top of things.
anyway..
after welding it in been filling it, rubbing it, filling it rubbing it, religiously almost every day til its perfect, still 100% happy yet.


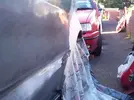

bit of primer
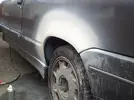

i had filled a bir of rust on the frt n/s wing, but it was still bugging me as there was also a ding...so i tapped it in a bit with hammer and fillled/rubbed.
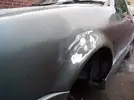
so...where the feck am i? major bits of external body sorted i think...i am now in the process of rubbing it all back ready for painting.
will refurb the wheels myself soon.
took side skirts off and the sills are lovely and clean, no rust, altho i did find this trapped in the side skirt!
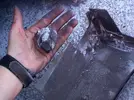
yes thats a fuckin great rock about the size of a tangerine! lol!
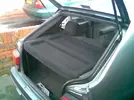
also, cant remember if i showed this before but i got a black rear parcel shelf for it rather than the grey one that was in there...much better!
-----------------------
[BREAK]
Jun 20, 2005
more arsing around on sunday, roasting my back nicely at the same time.
More fucking about with that rear arch. Discovered filler primer is a good thing.
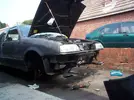
pulled the frt bumper off for some reason...not entirely sure why but i did, think it was something to do with painting the car, making it easier, but looking at it i decided made no diff,...stuck it back on.
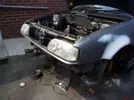
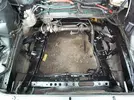
i also decided to sort of some more rust. the subframe was pretty manky, lots of surface rust all over it, so i treated the whole lot and any other rust i could see in the area, and then hammerited it all...just for protection more than looks....but looks ok...its only an engine bay after all.
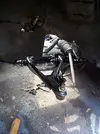
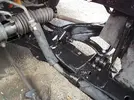
tonight i got both bearings out of the frt hubs, ready for new ones. they are both tbh the hubs off the chamade as they died so i donated the hatch's hubs to it...
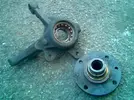
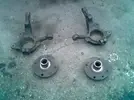
techy to follow on bearings.
Hatch Misc
------------------------
Jun 30, 2005
Did some finding out about painting, costs mainly, for paint, lacquer, activator, primer and thinners i'm looking at about 70ish quid.
not cheap but a lot cheaper than paying someone to do it. still unsure tho. May hire a unit to do it in or something. ill defo prime it at home, i can manage that.
-----
wheels, got the tyres removed off them so I can start refurbing them. Plan is to strip all the old paint off and fill the kurb dents in and respray them, pucker and new.

here they are before touching them
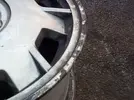
tbh this is the worst of the kurbing, its just minor scratches, they are in overall great condition.
I started off by applying paint stripped, great stuff, burns your skin and all!, then i whisked over them with a wire brush dril attachment to get most of the crap off...back pretty much to bare metal.
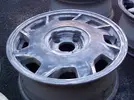
Will sand them nice n smooth next and fill in the scratches.
Wheels Gallery here.
--------
Made a start on a rocker cover too....also paint stripper and wire attachment....wil paint that too.
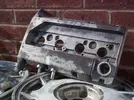
Rocker Gallery here.
-----------------------------
Jul 06, 2005
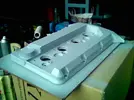
finished off cleaning the rocker with wire brushes and wet n dry etc. washing clean with soapy water, then rinsing with boiling water.
rocker cover is currently drying...painting anywhere other than in a booth just seems a nightmare. still its just a rocker cover.
here it is primed yesterday, today it is painted and lacquered. pics tomoz after i polish it up.
the wheels got on my nerves, i got one wheels stripped ready to paint but that took ages, so i have dropped the other three offf to a local shot blasting company to blast the others back to bare metal. saves a lot of effort and will be neater tbh. should get them back tomoz.
---------------------------
Jul 07, 2005
rocker cover and wing mirrors painted, lacquered and polished!
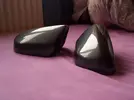

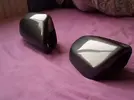
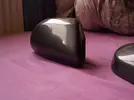
rocker and mirrors...
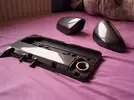
more rocker cover pics here
----------------------------
Jul 09, 2005
right, got the wheels back yesterday....dissapointing.
The blasters had used far too coarse a grit, so my wheels came back with a surface texture comparible to a sugar lump!!!

not very happy. tbh i did thnk if i had all four like that i would have just painted them, but as it stood, I had only sent 3 to be done, so 3 out of 4 would be odd.
So I had little choice but to rub them all down by hand anyway! Annoyed! Thank god for flap wheels.
got em done anyway...
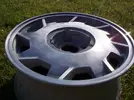
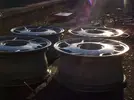
flap wheel in a flexishaft thingy in a drill....nice when it works, nasty when it catchs the flex and leaps out ur hand like a possessed cat!
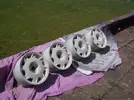
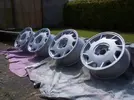
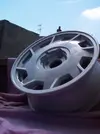
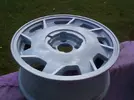
today, went and bought things...etch primer, and lacquer mainly. Got the lacquer in tin form, so I could use the proper spray gun to do the lacquering.
primer...
panited...
and lacquered...
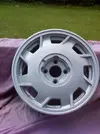
More Wheel pics here
--------------------------
[BREAK]
Aug 16, 2005
hmm tum ti tum....been doin bits here and there...nothing really exciting worth writing about everytime, as its usually just more rubbing of bodywork here and there.
discovered i need to do a bit of welding on the sills, but nothing I cant handle.
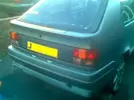
stripped the back a bit to rub it down ready for painting:
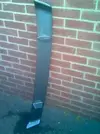
took the boot lock out as it was very stiff and sticky to give it a clean and a grease...turns out the bit that connects to the c/l solenoid is broken so it was never working with the central locking....may sort it...may not bother tbh.
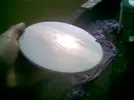
also finished the wheels off completely by finishing the caps to go with them...
check out the reflection in that baby!
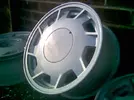
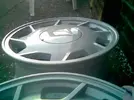
More Wheels Pics
----------------------
Aug 17, 2005
got some frt struts delivered today from a chap breaking a 19. £35 for the pair seems reasonable...but they look well used of course...think i will strip them down to grease up the bearing (even replace them!) and paint up the rusty parts...
i wanted new but thats not gunna happen for a while, so at least with these i can get the car on 4 wheels again...well when i get another wheel bearing.
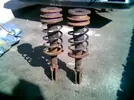
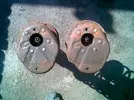
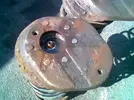
filled with WD40 to try and begin thinking about undoing them...
------------------
Aug 18, 2005
made a start on the sills...
did the easy one first, which i just got to work on with angle grinder and knotted wire attachment to rip the bubbling underseal off.
bloody underseal just hides rust from you...you cant see it going on under neath, so rip back as much as you can to reveal any rust.
then i treated it and hammeraited the whole sill...well the vunerable bit, ie the vertical flange and the inside edges...cant really see it in the pics but its done.
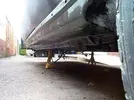
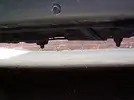
other side will need some welding...tackle that another day.
---------------------
Sep 05, 2005
re the struts...
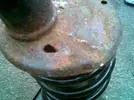
managed to get one apart for a clean up, it practically didnt turn, very rusty:-
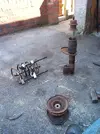
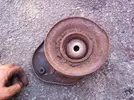
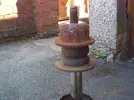

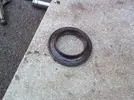
the bearing was dry as feck and all the bearings and bearing surfaces are pitted and nasty..but for now i am just gunna clean it uo and reuse it as i dont wanna sink more money in it now til it is a running car..then will treat it to all new suspension.
bearing cleaned up and regreased...
cleaned it up..
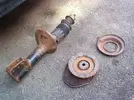
gave the bits a like of hammerite, cos i can...
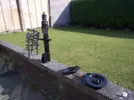
the other strut didnt wanna play ball, so as usual the end of the strut where you insert the allen key split so thats the end of gettting that apart...i have another old strut which is in better condition with no spring, so i think i will destroy this rusty fecker to get the spring off to stick on the other good strut...looks it has a hole in it...get rid i say.
rusty as feck...
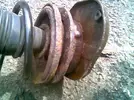
holed...
Hatch Misc Pics
----------------------
Sep 05, 2005
Well today I went to have a chat with my friendly local body shop man...top bloke, really helpful and gives me loads of advice, his work is pucker too. Got himself actually in the unit I used to have as a workshop where i used to work...got himself a nice little setup by the looks of it as there are many main dealers round the area and whenever I have been there, he has been fixing a Jaguar of some sort, so must have a good deal going on.
Anyway...Encouragement to the max and I decided to go for it...
bought this little lot today...
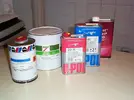
thats paint (tungy grey) and lacquer and necessary activators and thinners to do the whole job!!!!
so watch this space...car being painted ASAP.
---------------------
To get the car ready for painting..need to go over the whole lot with 800 wet n dry again...then its ready...
also just need to finish off this rusty sill....
the rear o/s sill was a bit rotten in a few spots so I just cut a whole chunk out!
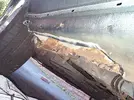
big chunk cut out and will let in a nice whole new piece tomoz. its all been cleaned up since that pic and slapped a load of hammerite into the hole.
made up a nice piece to let in...

the little join in the middle is because i had to slit it to put a bend in it as the sill at the rear isnt straight, there is a kink in it...so had to shape the peice to fit well..
tomoz first thing that bit will be welded in. and sealed with hammerite.
--------------------------
Sep 05, 2005
oh and a hub is in the garage having a new bearing pressed in so the car will be on three wheels tomoz! what a novelty!
--------------------------
Sep 06, 2005
Got the plate welded in...haven't tidied it up yet, will grind it off tomoz to tidy up a bit and then skim over with fibre glass methinks.
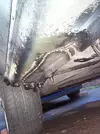
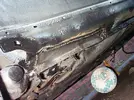
nice football eh
got the hub back from garage so will put a third wheel on tomoz hopefully and finish that patch and continue prep for paint.
-----
oh yeah, got attacked by the angle grinder today as well, tidying up the plate, the thing let loose and jumped on me, eating through my trousers goin feckin nuts! had to rip it off by its tail (wire) and throw it clear...feckin thing.
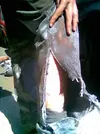
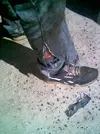
---------------------------
Sep 07, 2005
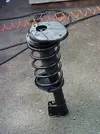
Amongst other things, I got new strut ready to go on...only one for now as I have only got one whole ready and only one hub with a bearing in it...
strut ready to go on...
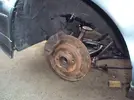
hub/disk assy back on...
and strut on!...
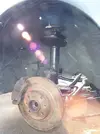
arty lens flare eh!
and finally...a wheel!! oh the novelty!
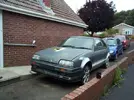
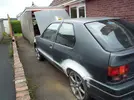
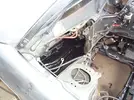
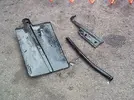
also the state of the skuttle under the battery tray caought my eye, so I cleaned that out and gave it a nice protective coat of hammerite and cleaned up the bits...
----------------------------
Sep 11, 2005
finished welding the plate in. Ground back the welds so I could fill it with fibreglass...you can really see the angle too at the rear of the sill i had to follow with the plate.
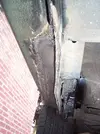
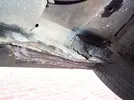
and slapped some fibreglass in there.
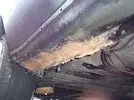
will shape that a bit better and slap some hammerite over it.
body wise...the plan left is:
finish o/s sill (75% done)
finish rubbing down, little bit of primer here and there.
Paint! (gulp!)
------------------------
Sep 19, 2005
got another hub and bearing ready:
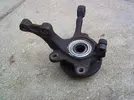
prepared another strut, having to salvage bits from one or two others...
remains of one strut after being mullered with angle grinder:
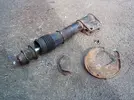
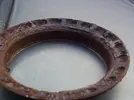
remains of one of the bearings, you can see the impressions where the bal bearings have sat for what looks like a LONG time. the stuff between them is solid!:
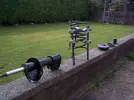
painted as well:
painted the sill patch too.
---------------------
Sep 22, 2005
four wheels woo!
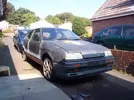
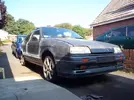
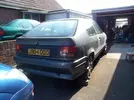
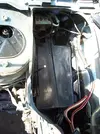
and battery tray back in scuttle...
-----------------------
[BREAK]
Sep 22, 2005
swapped broken speedo cable for good one today. that was NOT fucking fun!
ouch!
:roll:
anyway...as you see it is now on 4 wheels, so to try and complete the look, i decided to clear out and finish the interior, as it has been a bit of a store for all the bits that are currently off the car, so it looked a bit shitty.
so i cleared all the crap into the boot out of sight til its needed, and refitted the spongy sound proofing and carpets.
gave the carpets a good hooveering and its starting to look spangly!
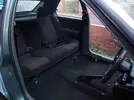
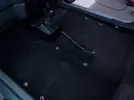
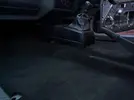
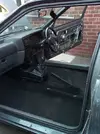
also fitted the subframes for the frt seats, but the camera batteries failed on me so no pic yet. Was going to fit the frt seats, but after crawling around under the car fitting the subframes, I got covered in 6 months worth of shit off the drive under the car so I didnt want to get in the car to fit seats after i had just hoovered it out!
----------------------------
Sep 30, 2005
seats in! thats the interior all finished!
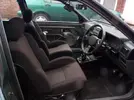
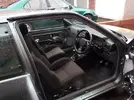
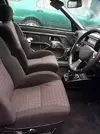
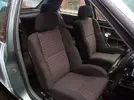
whats left....
engine
windscreen
tyres
rear struts swap (bought)
paint
-------------------------
Jun 09, 2006
Notice the gap in dates? that will be uni and winter...
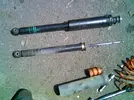
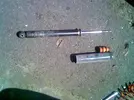
swapped the rear struts over for brand spanking sexy renault decarbon jobbies i had off ebay for £20...for both!
the olds ones didnt feel to healthy and were leaking a bit...decarbon items themselves but prolly original!
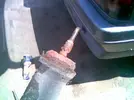
Gunna concentrate on getting it running now before I paint it...engine in...tyres on wheels...windscreen, then T&T and ins.!
----------------------
Jul 05, 2006
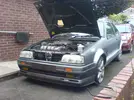
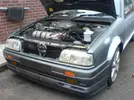
Got the engine in this week!
hoorah!
Stan the Man came round with his hoist. Just as we were lifting it off the floor the ally eye broke clean off! good job it was only a tiny bit off the ground and not full height half way into the car!!!!
Anyways...in it is!
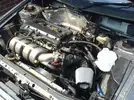
Haven't had it running yet, there was still a few bits n bobs i needed to sort...but I think it is pretty much all there now.
I jumped the gun a bit earlier and tried her out after charging the battery, but I was too soon and the Batt gave up too soon...but everything seems to be coming on electrical wise.
i was having visions of fucked up imobs and key fobs, but it all just works, which is nice...
Need to sort an exhaust, i started bodging an adaptor to enable me to mate the std backbox to a stainless straight through centre section but i ran out of bloody welding wire!!
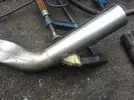
Maybe tomoz she will fire into life.....maybe!?
--------------------------
Jul 06, 2006
Fired into life this morning...first turn of the key.
Sounded a bit tasty with just a downpipe lol. but it worked nicely!
--------------------------
Jul 21, 2006
Not much happened now since that first firing...its fired up three times to show various ppl lol...made my boy jump when it burst into life with only the downpipe lol. But now it is just sitting there waiting to go on the road...
Minimum things needed to get on road:
Windscreen - £100 (fitted)
4 Tyres - £150 (fitted)
MOT - £40 (assuming nowt wrong)
Tax - £100
Insurance - £400 budget
so thats still about £800 I need to get it on the road...I will be getting this money in one way or another by the end of the summer....Chamade is being MOT'd next week and sold plus I have a funny little summer job starting which will earn a few quid.
What I have done this week tho is sort the exhaust, in some fashion. I wanted to try and get the stainless centre section in place but retain the std backbox.
I started by making a sleeve to weld onto the end of the centre section that the std backbox could slip into and be clamped with a clamp (surprise!).
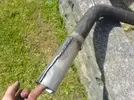
That's basically welded half way up the slit and to the pipe...leaving a slit that can clamp onto the backbox pipe. Of course the back box has that funny clam shaped fitting as std so that was cut off.
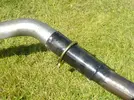
Bit of hammerite for the sake of it...will all rust anyway!
Here it is as a whole with decat section:
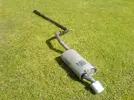
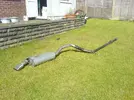
Now it all looks good but when fitted it resulted with the backbox being at a funny angle and no matter how I twisted and contorted the various joints available I could not get it to sit straight:

Neal, who gave me the stainless, did say he had problems with this system never sitting right no matter how much he fiddled with it, so I guess this has been made worse by mating it to a different backbox...
So to solve this time for more bodging! Decided to make a joint along the backbox pipe so that I could swivel it.
So chop:
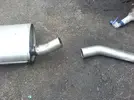
Rolled up a sleeve that will close up just right when tightened:
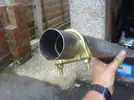
This slips back onto the box and allows for swivelling action!
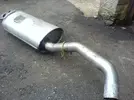
put it all back on, fiddle like feck and gets to this:
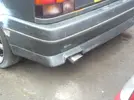
Still not perfect!..but by fuck thats as good as its getting! Esp, in this heat lol!
Oh, got some nice new Cat gaskets too:
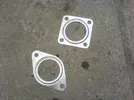
Just gunna go start it up no see how it sounds...batt was dead again yesterday, but it has stood for a week...
---------------------------
Jul 21, 2006
Crappy battery been playing up all day. Needed more water. Done now, started her up again...running well it seems.
Exhaust sounds alright...got a bite to it lol...a bit of a rasp which I'm not sure I like, but it quietened down a bit after it warmed up...sounded nice Very Happy gunna be noisy at full beans tho i bet.
Let the thing run until it warmed right up...
Fan did not kick in...soon found that the rad switch is a bit dodgey as a quick wiggle brought the fan to life.
also the Aux Coolant pump is not running...I know most say don't bother but its there so I want it to work. Relay seems alright, very clean inside, no moisture has got to it or corrosion. and it clicks when I plug it in, so I assume the pump itself has issues...or the wiring.
Stuck the skirts and spoiler back on...because it won't be painted now until it is fully running on the road, so I may as well stick all the bits on so it can be MOT'd etc. looking nice again...at long last...even if it is a patch work of primer. Will get some pics.
--------------------------
Jul 23, 2006
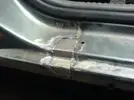
Before I stuck the skirts on I found and remember one last little patch that needed a bit of attention...nothing major...on top of the sill in the door jam area...
after a bit of a grind:
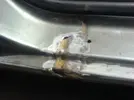
piece of metal shaped and in place to be let in:
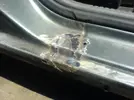
then a bird came and shat on it lol:

so I ground the birdshit away...
Slapped some hammerite over it for now...
So skirts/spoiler back on...
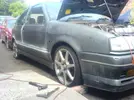
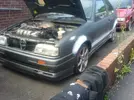
And this is as far as it is going to get for a while no I'm afraid...again...money issues are going from bad to worse...for now. But its ground to a halt again.
gagging to drive the thing.
------------------------
Time to start a progress report on this methinks.
1992 phase 1 16v 3 door hatch....cost = £150
Another eBay bargain!
Car was bought with "power steering leak"...other than the odd bit of rust that was all that was discussed in the ad.
Leak coming from the rack area, haven't looked yet to see what exactly.
The drive home was a noisy one...lots of knocking and vibration. Ball joint or two definately gone. Heavy vibrations due to dead rear mount. Got thru 3 litres of PS fluid on the way home.
Bit of rust around the vent and rear arches, nothin to worry about.
The car is generally a bit neglected I feel, i.e. dirty interior, but I think its been standing around for a while. Drivers seats lots of rips.
Carpet in passenger footwell wet, could be a leak, could be matrix...that will be investigated.
Engine itself is pretty nice. Its got about 112K on the clock but sounds very smooth and quiet, be a shame to pull it out.
Initial pics:


The engine as it is now:

Didn't notice in the flesh but looks like coolant has erupted and got onto the airbox...

here u can see(just) the exhaust manifold right back practically touching the heatshield...
Here's the current tatty P1 interior

I got a MINT set of P2 cloth seats off jimbo, and I mean mint. Pics to follow
Also got a spare rack and pump off Jimbo.
-------------------------------
Been sat for a few days as when I get home from work it is getting dark so haven't done much...but decided tonight to get off my arse and do something...so I rigged up a floodlight on a stepladder so I could stick it wherever I want to work in the dark...perfect!
Decided to start doing the cheap/free things first until funds become available. So I wanted to remove all the interior and give it a good clean out.
Front seats - wanted to just undo the bolts from the underside to lift the whole assys out but as suggested they were pathetic...first came off OK but second was just a round blob of rust....the socket was just turning like a pencil sharpener on a pencil....so I didn't bother...
Took the seats off the rails from inside, leaving rails in place...this is fine as the new seats didnt come with the rails, just means I can't fully remove the carpet...no matter...
Got all seats out:

Boot carpet out:

Under carpet looks like rubble dust. Also found the odd bit of broken glass...maybe evidence of a break in once. Plus an ear ring and a couple of hairclips...obviously a girl has been in this car plenty of times.
I would like to get the front carpets out to dry them as they are quite wet up front but will have to leave I guess...will dry out sooner or later.
So next job I'll clean all the interior, hoover etc....not TOO fussed, just want it clean...feels a bit manky at the mo.
----------------
Future plans?
Engine out....replace all knackered bits...i.e. balljoints, bushes whatever...rear mount. Engine can come out ASAP as that costs nothing and I can get on with cleaning engine bay etc.
New engine involving the btm end from the other project no doubt plus a head of some description TBA
Just get it as a nice, fast fun car...not going over board, I just want a nice hatch.
---------------
[BREAK]
Feb 25, 2005
Battery gone flat (or prolly just the terminal come off) either way can't open using remote so discovered that driver's door wont open with the key, took lock out to have a gander and it would appear that this key doesnt match the barrel...it isn't just tight, just doesn't seem to be right....no biggy.
Also while I'm in no hurry I thought I would take the dash off...mainly for fun, and also to have a gander at the matrix, see if it is leaking or not as the floor is STILL wet somehow....all in the name of fun.
Soon I will get the engine all disconnected ready for removal.
----------------
Mar 02, 2005
Dash is giving way slowly, just want to get that heater box out to check matrix....
Drained coolant, rad out.....it's a start lol
----------------------
Mar 03, 2005
Right got the arse of a heater box out, not looking forward to trying to get it back in lol. What a fuckin fiddle. God knows how many things I broke getting it out (none I hope).
But it looks OK to me...no signs of leaking, the matrix looks in very good nick. No signs of corrosion, no signs of water leakage. So that really kinda rules that out for the source of water on my soggy floor.
I'll get pics up soon. I just pulled the dash forward enough to get it out as Neal did....thanks for tips btw Neal.
------
Continued pulling bits off and disconnecting stuff preparing the engine for removal. ECU out, many hoses out....etc etc don't you just hate them silly hose clips that cannot be undone...the standard renualt ones, that need butchering off...
Air box came out easy, well kind of...basically all the studs just sheared off easier than if I was undoing the nuts...still came out. But the suport bracket is gunna need grinding out, all the bolts have broken the captive nuts off on the inside of the rail, so they just turn.
Getting there....if a hoist became available ASAP it could be out straight away...
------------------
Mar 04, 2005
Hoist available this weekend! Shit need to get a move on.
Got the roll pin out the driver's shaft (passenger out) Broke my breakers bar trying to get the hub nut off so I will just let the shaft stay there hanging underneath.
Now I have cleared a lot of stuff out the way I can clearly see the rear mount has totally collapsed and the engine is basically resting on the rack. Nice.
Access to the manifold to d/pipe was not as I expected...got under the car expecting to see what I saw under the chammy and I could hardly see either...the whole exhaust just seems to be hanging differently...passenger side I finally got out from above after removing all the heatshielding...but the driver's one is a bugger...can't get a socket on it properly as it seems really close to the shield on the downpipe...can only get a spanner on it...but got no room to get good leverage...plus a 12mm spanner fits it...slightly corroded to say the least....I don't think its coming off..will have to cut it off methinks.
But TBH it's nearly ready to come out...just disconnect few more bits here and there...nothing much hopefully it will be out this weekend!
See how it goes.
----------------------------
Mar 05, 2005
Sat morning - nearly there. Stan is bringing hoist over at 330 today. All I need to do is pull out driver's shaft (oo-er), disconnect fuel lines, cut off mani stud, and undo rear mount.
Can't be arsed trying with the mani stud anymore, it's being cut off...ended up cutting the airbox bracket off too...well one part of it, but Chris gave me good tip that the screws and captive nuts beneath, if turning can be lined up and lift out, and they did! Nice 1 H
Promise I'll get pics today!
-----------------------
Mar 05, 2005
Finally some pics!
Finished preping it today for removal, just cut the manifold stud off, and when I saw it in my hand it was just a rusty blob so it was never coming off in the traditional way of unscrewing.
Went and collected hoist with Stan attached and it just happened nice and quick, apart from a trip to buy some rope to actually lift the engine with. BIG SHOUT OUT TO STAN for the help and lend of the hoist.
I had everything ready so all that was left to do was take the weight of the engine so I could pull out the bolt on the rear mount and lift away...
It's now safely tucked away in the garage to await stripping of bits for new engine. I'll try my best to keep the block and head together as when it was running it was really nice, quiet and smooth so it seems a tidy motor for emergencies.
Anyway heres some pics...
Dash off for getting the heater box out...like my new seat?

Back of car full of bits...

Engine ready for removal....

Bonnet off...

Coming out....


Oh and here's a shot of the treacle that came out of it...

Put the bonnet back, car looks funny cos theres no weight up front now its sitting really high!
-------------------------
Mar 06, 2005
Today I set about starting to tidy up the bay a bit..nothing mad just a quick blast with the jetwash will do.

Firstly tho I wanted to swap the racks across...struggled for ages with one of the track rod ends stuck in the hub, was bending my removal tool!! So kept soakin it in wd40 and belting it with a hammer...finally gave.
Had to undo some of the union to the rack itself as I need to use one of the hoses that run in the car, as the rack I was supplied with just been cut off thru the pipes...and on the pass side it isn't just jubilee clipped on..no big deal, undid all that and got it out, new rack needs track rods ends, had one new one lying around need to buy another.
Got the new rack in, taped up as best I could any holes leading into the interior prior to jet washing...
Here's a shot of the dead rear mount in situ...

And here is a comparison with a new one

Here is some damage caused by the engine leaning on the rack...

It hasnt worn thru those pipes yet...in fact I couldnt see any obvious damage to the old rack so not sure where the leak was coming from.
Here's an interesting one...found this on the chassis leg next to where the ancillaries lie...

Looks like somehow the alt pulley has made contact at some point with the chassis and rubbed this patch away....maybe a mount had gone or something once...it wasnt rubbing while ive had it.
Here's the engine in its new home, for the foreseeable future...


Next tasks? I think I can start putting the interior back together...the matrix looks fine so I will stick that and the dash all back together and start hoovering it out and put the new seats in so it starts to look nice again.
Here is a link to a page of misc pics...pics that really dont need explaining...just random....
Hatch Misc Pics
------------------------
Mar 07, 2005
bastard car!
spent about an hour removing 1 poxy ball joint...my god i was swearing and shouting ,.....every slip of the ratchet i was cursing out loud...got a funny look from a bloke walkin by....i swear i nearly smashed the poxy thing...this bolt...every turn was full on total body effort...i was knackered afetrwards...like a full on total body work out down the gym! really annoyed.
so tonight i picked up another new track rod end, screwed it in, and replaced the lower ball joint..and reassembled the hub assy.
pulled the ARB bush off the end but it looks fine so wont bother with a new one there...will chk others soon.
got the boyo down tomoz til sun so doubt much will get done for a while.
--------------------
Mar 09, 2005
wow amazing how things can change....did other sides ball joint today and it was a piece of piss. nice cos i didnt fancy bein angry again.
recap for the drivegear...new ball joints, new track rod ends...awaiting new shocks and springs to complete the frt.
new goodies arrived today...

and a few more randoms added to misc pics...
-------------------------
Mar 15, 2005
last night i pulled the loom off the engine sitting in the garage...and pulled off ancillaries to start swapping over to the new block...need to clean them all up tho as they are minging from prolly 13 years of grime.
chris and whoever else manages to remove alternators with the engine in the car i salute you as i struggled for ages with the thing out of the car! it was like a chinese (or is it japanese?) puzzle thingy...just fiddled for ages trying to find the right angle to fit it thru the gaps!!
still all off now and i have a large box full of random bits and bobs, that i need to remember where all went lol
----------------------
Mar 18, 2005
stripped everything i need off the old block...gearbox is off, i pulled the clutch off too to have a look and it looks very new to me...emergency clutch now i guess...pulled the flywheel offf...might do something with that for t'other
all sensors and stuff i need out...
got all the timing stuff off...needed the rear cambelt cover with was a bitch, couple of the bolts needed drilling out, couldnt get the aux pulley off to i did what god intended and put a hole around it in the cover the right size to slip over it...not feckin get stuck behind it. after all that fucking fuss the aux pulley fell off on its own anyway...gay.
need to think about how to get the dipstick tube out and into the other block...hmm think i shall remove the sump and tap it out with a drift from the inside...ill just mash it tryin to grip it from the outside and pulling...there is a nice shoulder on it too where it meets the block which i can use to tap it into the other block...
many many things will be power washed tomoz...gearbox, all the brkts everything....everything is minging and covered in grime...
the gearbox looks like some cowboy took it off last...few nuts missing, some sheared...looks like they had to cut one off as they used some sort of grinder and put a slit right thru the bell housing! non critical tho.
did take some pics, but on the phone...new phone so havent got a way to get em to the pc yet...hmmm
------------------
Mar 21, 2005
sat morning i wanted to try cleaning a few bits up...basically all the ancillaries brkts and bits and bobs coming off the hatch engine. want them reasonably clean to assemble onto new one. gearbox as well.
some shots of the box...


needed to remove frt springs to give to neal, i want new ones anyway so no problems...so pulled the struts out and lined them up for a quick clean too...

nothing over the top just laid the bits out on the drive and gave them a blast with the pressure washer...used the detergent bottle attachment too to add a bit of soap to the fun.
gave it all a blast...not a lot of diff really but it got most crud off...good enough for brkts etc...gearbox is well grimy tho so i think i will set to tht with thinners and brush to get the grime off.
needed to try and remove the spring from the struts for neal...usual fun and games doin that...they looked original so i had doubts as to whether i would manage or not...twisted an allen key into a lovely spiral...need to get a pic of that its cool.

one gave but the other, the hex split at the end of the strut so that was the end of that so i just gave neal the whole strut :lol:
heres a shot of rear cambelt cover..modded to as god intended it...will make future work easier...needed to do that anyway to get it off...but as soon as i got it off the bloody pulley just fell of anyway...bah humbug!

that was it really...more pics added here Misc Hatch Pics
---------------------------
[BREAK]
Mar 23, 2005
righty...last night, i decided seein as engine stuff is draggnig due to money, i will get the interior totally finished...nothing stopping me buildin it all back up now...the matrix seemed fine so it can go back in...and the dash put back.
wanted to change a bulb in the ins. panel as i remember one had gone, so pulled that out found the offender and got a new one in there..chked all the others too..put that back in.
cleaned the boot floor out...washed it down with a rag and soapy water, hoovered the boot carpet...must have looked odd from the street as the carpet was on the driver in frt of the car but from the road all u cud see was me hoovering what looked like the drive lol.
anyway, cleaned all rear half-ish, just wiped dust off etc, refitted the carpet, shelf.
i also pulled the headlinging down in each corner to chk see if the sunroof drain pipes were all attached...they were.
cleaned up the contacts on the boot lock thingy.
stuck the new rear seats in tonight, looks half finished...nice to have something to sit on as well when im inside...its nice sittin in the backseat with nothin in frt...i want the back half of a car in my bedroom to sit in!
so lookin back inside its finished. swap the rear struts and the whole rear half will be done....
reassmebled the door as it had been in bits to get to the lock...decided cant be arsed to change the lock...security innit!
so interior-wise all thats left to do is insert heater box and re-attach dash, and stick in new seats....bargain!
i have taken loads of pics on my phone, but i am awaiting new cable so i can get them all on pc...then we shall have pics!
got 3 centre caps for the wheels for 99p off ebay on the way! bargain!
--------------------------------
Mar 30, 2005
righty some pics....
cleaning and finishing the boot...


cleaned up the contacts on the boot catch...just in case like.


reassembled dash...

heres the annoying speedo clip:

see how the white bit is "full" of the metal bit, so when it is in the hole in the box, theres no way i can see of squeezing it in to release the clips. ...ordered a new set of plastic bits from renault today, also the metal clip equivilant, to see if that fits easier...or at all!
some pics from taking the bits off the old block...
box off:

flywheel:

clutch:

seems very new, the grooves are still very deep in it...may use this instead of my ebay one, as the friction material seems to be wider on this one...whether thats due to differences in mfrs...sachs and valeo, or differences due to the one i got off ebay not bein a proper 16v one...
a minging ht lead covered in mayo ..there was about 2" of water and oil down the plugwells...nice.

and heres the complimentary crap one carried around behind the wheel arch....free of charge to all renault owners!

--------------------------
Apr 02, 2005
bought this this week:

impact driver...somethign i have always thought about getting...saw this one in hyper value for 3.99 so i thought i would get it. brilliant bit of kit, i am totally impressed so far.
i got the frt fogs out! which is amazing really, i had already tried with a screwdriver and there was no way it was coming out...with this thing, a few whacks and it starts to turn...well worth getting one!

i also got the nuts of the runners for the seats on the underside of the car...something again i couldnt do before....so i decided i would finally get the runner out before fitting the seats and dry out the carpets properly...i left the doors open all day today as it was a sunny day...the carpet dried, but the spongy stuff underneath is still soggy so i am gunna get it out and dry it properly.
got one out, will do the other another day and get the carpet out.
pulled the other arch liner off....

lovely much as usual...rust-promotion!
got these thru the post :

99p off ebay! bargain as the car was missing two
also got these from renault

new plastic bits, ready for their one way trip into the box....! bought the metal clip as well see if i can use that instead..dunno but it was cheap.
-----------------------
Apr 03, 2005
grabbed a few mins on the car today, last night i had one sides seat rails out...today the other side was a pain, all but 1 nut is out...its well stuck, well rounded even with my new found love, the impact driver, its hard to budge it..need to get a 1/2" deep socket tomoz to tackle it...failing that...not sure...try and cut the nut without damaging the thread? we'll see. difficulty is gettin enough room to get a good swing at the impact driver.
took the std zorst off...

nice shiny proper tail pipe...looks quite new, not much rot...

interesting kink where it goes over the axle...dunno if thats meant to be there or not?

usual fun and games dismantleing the sections...impact driver, dremel, drills, grinding burrs, hacksaws...all off in the end tho, i think in total 1 bolt actually unscrewed in tact...

cant rememebr if i have shown this before, but here is the zorst i got off neal which i have decided to give a go

here it is next to the std, as neal moaned about the mounting of it...i have photoshopped the hangers over each other and they seem ok, but until i try it on i will take neals word for it...joy ahead apparently...

the section out the back to the centre section looks quite different, i am worried about the straightness of it compared to std....not enough kinks.

more pics added here Misc Hatch Pics
----------------
Apr 09, 2005
head gone off the hatchs engine to huw...here are some pics from the night i removed it...all seems to be in good nick...gasket totally in tact, bores nice and clean, very little ridge...


huw came and collected it and gave me his old head in part ex...something else to experiment on.
---------------------------
today...bodywork.
the hatch's body is a bit scruffy...at first i was not gunna bother doin anything to it, just wanted it to run well but after meeting a bloke who runs his own body repair business, and chatting to him i got lots of enthusiasm to give it a go...
basically the stickers that run down the side of the car about 6" down from the window line has been scraped off by someone previously..with what looks like a screwdriver...so i started cleangin it up today with encouraging results:
BEFORE


scuffs and scratches like that run downs the length of both sides...
set to it with 2000wet n dry and a lot of water, smoothing out the scratches and scuffs..being careful not to rub too far into the next layer of paint...this technique only works if the scratch is in the laquar or top layer of paint...any more and its re-paint time...
so after a rub down:


then polish it back up with t-cut....worked out nicely i think...good enough for me anyway and a mile better than before....this whole car i have decided is goin to be mint.


click here to see more
---------------------
Apr 10, 2005
more work on the body today...i am now addicted...am gunna make this cars body mint!
just carried on getting rid of all the scratches and scuffs...some scratches r deep and need paint, there are digs here and there....all ebing rubbed back and painted...started to sort rust...starting small first heh heh...need to get a angle grinder for the arches as there a fair bit to get out....


this needs sorting


more here!!
---------------------
Apr 13, 2005
just more bodywork....been rubbing down areas containing scratches...rusty bits...tackling little things first...frt arches had little ammoutns of rust, so little just rub away by hand in a few secs...so they have been treated and primed...currently letting it go off, then i will rub that back smooth ready for the top coats...


looking at the n/s rear 1/4 panel, when i first had the car, the rear arch looked a bit dubious in shape...the arch is a bit bumpy, looked like it had been filled before, and now on closer inspection i was right...it has been filled and repainted...the paint being applied all the way from the stickerline down...plus, it is not quite the same shade, so now that i am removing all traces of the stickerline it is obvious where one shade ends and the other starts!

thats after a rub down and t-cut. its never gunna look right...
so i am starting to decide to redo the panel...get all the old filler out? or just rub it back to a better shape? more investigation i guess to see if there is any rust...if it it all just filler no point in redoin the filler...re-shape and repaint the whole btm half to the right shade....
Body Work Pics
---------------------
[BREAK]
on other note...the head i got off huw..started stripping it for bits.

when removing the cam carriers, the bearing journals were covered in mayo, hard to see but they were...pointing to more evidence of huws leakyhead...

ill have all the bits off it and maybe use the head for experimentation...
Hatch Misc Pics
------------------------
Apr 14, 2005
more bodywork...got a new toy to play with:

ebay
rear arch:

a little grinding:

the vent...could see the bubbles on top before and on the inside it was plastered with rubber/silicone stuff...as r a few other areas on the car...
after a flash with the grinder, i found a lump of filler in the hole...looks like someone just pushed a blob of filler in without cutting or treating any of the rust just to hide it...

inside, after removing all the shite it revealed a rusty mess...not too bad tho...nothing a bit of filler or fibreglass cant handle...structurally its mainly all there...it'll be fine.


Bodywork Pics
---------------------
Apr 19, 2005
bah...got areas all ready to paint last week...it was about weds..i had done the primer before hand...3 patches...big on on drivers door getting rid of key scratch, and frt two arches....
so they were all primed up...got them masked up ready for top coat....literally as i was shaking the can ready it started to rain!! u couldnt make it up!
so covered in plastic sheeting (bin bags) to await finer weather...well its rained almost every day since! typical!
but last night it was fine so i got it done...altho the tape i had put on last week has become solid and very difficult to remove (twat!) but i got top coat on at last...
ill leave it for a week or so now before touchin it with wet n dry to prep it for lacquer.
--------------------------
Apr 21, 2005
more bodywork...
been havin fun with the angle grinder...cut out as much rust as i could see on the o/s rear arch...wasnt much there,...treated it with kurust:

...and then started filling it...first swipe of filler:

that will finish that side off, once i shape it and prep it for paint.
the vent is ready...borrowed some fibre glass stuff of stan to put on the inside, then will fill the outside and paint. didnt get round to it last night as the temp dropped off and everything was taking ages to dry so i will doit later today.

--------------
the n/s rear arch, i suspected it had been had a go at before as the shape was a bit funny. there was a small spot of rust coming thru anyway so i started having a nose with the grinder....

soon became apparent that this has had a new arch welded in. too far out imo hence the poor shape i noticed...


tacked on all along...
heres the rust that has come thru...since the job i presume...unless they didnt do it proper...but looks ok. saves me doin it...i canjust treat the rust and fill it...

it will be fine once finished.
drive , car, dads car, my other car, neighbours car were covered in dust after grinder thru all the filler lol.
more added here Hatch Body Pics
oh..got some top coat on the previously delayed primed areas at last..just need to leave it for a bit now before flatting it back for lacquer.
---------------------
Apr 28, 2005
not a vast amount of progress due to shit weather....but i keep having a go everyday...just concentrating on finishing the body work.
got the vent sorted, cleaned it all up, fibreglassed the holes from the inside and filler on the outside...the inside has been painted (roughly - who cares its inside) and the outside is primed ready to go...
o/s rear arch has been filled, primed and painted...needs flatting back again and another topcoat as a fucking fly landed on it when it was wet and i picked it off leavin a hole in the paint....gay.
but its coming together. within a few days, all that will be left on the body (ext.) will be the n/s rear arch, which will need a bit of welding to fill a gap and to stop the new bit flapping...then filling and painting.
i also plan to get the wheels refurbed back to new...better than new.
engine-wise? the bottom end in the other progress report will be used, along with a nice head i am working on...see the other report soon for info.
-----------------------------
Jun 17, 2005
Righty...haven't updated here for a while...nothing exciting happening. I seem to be forever fiddling with something but cannot find anything to write about.
Only bodywork has been continuing.
Right, the o/s rear arch is done as above, heres pics.
[img:600:800]http://turborenault.co.uk/data/MetaMirrorCache/www.renault_turbo.com_jonboy_hatch_body_body37.jpg[/img]
been painted various times, but whole car is going to be painted now, will rub the whole lot down and make it a coplete respray job. Myself. I have invested in air compressor and kit...
got round to sorting the n/s rear arch finally. Well to be honest I am still fiddling with it making it perfect, but it is essentially done.
heres the damage after clearing all the crap out,


plate cut, bent and fitted into position ready for welding...

seem to have missed the bit after i welded it in so no pics...god knows how...i have tooooo many pics on my pc it is overwhelming to keep organised and on top of things.
anyway..
after welding it in been filling it, rubbing it, filling it rubbing it, religiously almost every day til its perfect, still 100% happy yet.


bit of primer


i had filled a bir of rust on the frt n/s wing, but it was still bugging me as there was also a ding...so i tapped it in a bit with hammer and fillled/rubbed.

so...where the feck am i? major bits of external body sorted i think...i am now in the process of rubbing it all back ready for painting.
will refurb the wheels myself soon.
took side skirts off and the sills are lovely and clean, no rust, altho i did find this trapped in the side skirt!

yes thats a fuckin great rock about the size of a tangerine! lol!
also, cant remember if i showed this before but i got a black rear parcel shelf for it rather than the grey one that was in there...much better!

-----------------------
[BREAK]
Jun 20, 2005
more arsing around on sunday, roasting my back nicely at the same time.
More fucking about with that rear arch. Discovered filler primer is a good thing.
pulled the frt bumper off for some reason...not entirely sure why but i did, think it was something to do with painting the car, making it easier, but looking at it i decided made no diff,...stuck it back on.


i also decided to sort of some more rust. the subframe was pretty manky, lots of surface rust all over it, so i treated the whole lot and any other rust i could see in the area, and then hammerited it all...just for protection more than looks....but looks ok...its only an engine bay after all.


tonight i got both bearings out of the frt hubs, ready for new ones. they are both tbh the hubs off the chamade as they died so i donated the hatch's hubs to it...


techy to follow on bearings.
Hatch Misc
------------------------
Jun 30, 2005
Did some finding out about painting, costs mainly, for paint, lacquer, activator, primer and thinners i'm looking at about 70ish quid.
not cheap but a lot cheaper than paying someone to do it. still unsure tho. May hire a unit to do it in or something. ill defo prime it at home, i can manage that.
-----
wheels, got the tyres removed off them so I can start refurbing them. Plan is to strip all the old paint off and fill the kurb dents in and respray them, pucker and new.

here they are before touching them

tbh this is the worst of the kurbing, its just minor scratches, they are in overall great condition.
I started off by applying paint stripped, great stuff, burns your skin and all!, then i whisked over them with a wire brush dril attachment to get most of the crap off...back pretty much to bare metal.

Will sand them nice n smooth next and fill in the scratches.
Wheels Gallery here.
--------
Made a start on a rocker cover too....also paint stripper and wire attachment....wil paint that too.

Rocker Gallery here.
-----------------------------
Jul 06, 2005
finished off cleaning the rocker with wire brushes and wet n dry etc. washing clean with soapy water, then rinsing with boiling water.
rocker cover is currently drying...painting anywhere other than in a booth just seems a nightmare. still its just a rocker cover.
here it is primed yesterday, today it is painted and lacquered. pics tomoz after i polish it up.

the wheels got on my nerves, i got one wheels stripped ready to paint but that took ages, so i have dropped the other three offf to a local shot blasting company to blast the others back to bare metal. saves a lot of effort and will be neater tbh. should get them back tomoz.
---------------------------
Jul 07, 2005
rocker cover and wing mirrors painted, lacquered and polished!


rocker and mirrors...

more rocker cover pics here
----------------------------
Jul 09, 2005
right, got the wheels back yesterday....dissapointing.
The blasters had used far too coarse a grit, so my wheels came back with a surface texture comparible to a sugar lump!!!


not very happy. tbh i did thnk if i had all four like that i would have just painted them, but as it stood, I had only sent 3 to be done, so 3 out of 4 would be odd.
So I had little choice but to rub them all down by hand anyway! Annoyed! Thank god for flap wheels.
got em done anyway...


flap wheel in a flexishaft thingy in a drill....nice when it works, nasty when it catchs the flex and leaps out ur hand like a possessed cat!

today, went and bought things...etch primer, and lacquer mainly. Got the lacquer in tin form, so I could use the proper spray gun to do the lacquering.

primer...

panited...

and lacquered...


More Wheel pics here
--------------------------
[BREAK]
Aug 16, 2005
hmm tum ti tum....been doin bits here and there...nothing really exciting worth writing about everytime, as its usually just more rubbing of bodywork here and there.
discovered i need to do a bit of welding on the sills, but nothing I cant handle.
stripped the back a bit to rub it down ready for painting:


took the boot lock out as it was very stiff and sticky to give it a clean and a grease...turns out the bit that connects to the c/l solenoid is broken so it was never working with the central locking....may sort it...may not bother tbh.

also finished the wheels off completely by finishing the caps to go with them...
check out the reflection in that baby!


More Wheels Pics
----------------------
Aug 17, 2005
got some frt struts delivered today from a chap breaking a 19. £35 for the pair seems reasonable...but they look well used of course...think i will strip them down to grease up the bearing (even replace them!) and paint up the rusty parts...
i wanted new but thats not gunna happen for a while, so at least with these i can get the car on 4 wheels again...well when i get another wheel bearing.


filled with WD40 to try and begin thinking about undoing them...

------------------
Aug 18, 2005
made a start on the sills...
did the easy one first, which i just got to work on with angle grinder and knotted wire attachment to rip the bubbling underseal off.
bloody underseal just hides rust from you...you cant see it going on under neath, so rip back as much as you can to reveal any rust.
then i treated it and hammeraited the whole sill...well the vunerable bit, ie the vertical flange and the inside edges...cant really see it in the pics but its done.


other side will need some welding...tackle that another day.
---------------------
Sep 05, 2005
re the struts...
managed to get one apart for a clean up, it practically didnt turn, very rusty:-


the bearing was dry as feck and all the bearings and bearing surfaces are pitted and nasty..but for now i am just gunna clean it uo and reuse it as i dont wanna sink more money in it now til it is a running car..then will treat it to all new suspension.
bearing cleaned up and regreased...

cleaned it up..

gave the bits a like of hammerite, cos i can...

the other strut didnt wanna play ball, so as usual the end of the strut where you insert the allen key split so thats the end of gettting that apart...i have another old strut which is in better condition with no spring, so i think i will destroy this rusty fecker to get the spring off to stick on the other good strut...looks it has a hole in it...get rid i say.
rusty as feck...

holed...

Hatch Misc Pics
----------------------
Sep 05, 2005
Well today I went to have a chat with my friendly local body shop man...top bloke, really helpful and gives me loads of advice, his work is pucker too. Got himself actually in the unit I used to have as a workshop where i used to work...got himself a nice little setup by the looks of it as there are many main dealers round the area and whenever I have been there, he has been fixing a Jaguar of some sort, so must have a good deal going on.
Anyway...Encouragement to the max and I decided to go for it...
bought this little lot today...

thats paint (tungy grey) and lacquer and necessary activators and thinners to do the whole job!!!!
so watch this space...car being painted ASAP.
---------------------
To get the car ready for painting..need to go over the whole lot with 800 wet n dry again...then its ready...
also just need to finish off this rusty sill....
the rear o/s sill was a bit rotten in a few spots so I just cut a whole chunk out!

big chunk cut out and will let in a nice whole new piece tomoz. its all been cleaned up since that pic and slapped a load of hammerite into the hole.
made up a nice piece to let in...

the little join in the middle is because i had to slit it to put a bend in it as the sill at the rear isnt straight, there is a kink in it...so had to shape the peice to fit well..

tomoz first thing that bit will be welded in. and sealed with hammerite.
--------------------------
Sep 05, 2005
oh and a hub is in the garage having a new bearing pressed in so the car will be on three wheels tomoz! what a novelty!
--------------------------
Sep 06, 2005
Got the plate welded in...haven't tidied it up yet, will grind it off tomoz to tidy up a bit and then skim over with fibre glass methinks.


nice football eh
got the hub back from garage so will put a third wheel on tomoz hopefully and finish that patch and continue prep for paint.
-----
oh yeah, got attacked by the angle grinder today as well, tidying up the plate, the thing let loose and jumped on me, eating through my trousers goin feckin nuts! had to rip it off by its tail (wire) and throw it clear...feckin thing.


---------------------------
Sep 07, 2005
Amongst other things, I got new strut ready to go on...only one for now as I have only got one whole ready and only one hub with a bearing in it...
strut ready to go on...

hub/disk assy back on...

and strut on!...

arty lens flare eh!
and finally...a wheel!! oh the novelty!


also the state of the skuttle under the battery tray caought my eye, so I cleaned that out and gave it a nice protective coat of hammerite and cleaned up the bits...


----------------------------
Sep 11, 2005
finished welding the plate in. Ground back the welds so I could fill it with fibreglass...you can really see the angle too at the rear of the sill i had to follow with the plate.


and slapped some fibreglass in there.

will shape that a bit better and slap some hammerite over it.
body wise...the plan left is:
finish o/s sill (75% done)
finish rubbing down, little bit of primer here and there.
Paint! (gulp!)
------------------------
Sep 19, 2005
got another hub and bearing ready:

prepared another strut, having to salvage bits from one or two others...
remains of one strut after being mullered with angle grinder:

remains of one of the bearings, you can see the impressions where the bal bearings have sat for what looks like a LONG time. the stuff between them is solid!:

painted as well:

painted the sill patch too.
---------------------
Sep 22, 2005
four wheels woo!


and battery tray back in scuttle...

-----------------------
[BREAK]
Sep 22, 2005
swapped broken speedo cable for good one today. that was NOT fucking fun!
ouch!

:roll:
anyway...as you see it is now on 4 wheels, so to try and complete the look, i decided to clear out and finish the interior, as it has been a bit of a store for all the bits that are currently off the car, so it looked a bit shitty.
so i cleared all the crap into the boot out of sight til its needed, and refitted the spongy sound proofing and carpets.
gave the carpets a good hooveering and its starting to look spangly!


also fitted the subframes for the frt seats, but the camera batteries failed on me so no pic yet. Was going to fit the frt seats, but after crawling around under the car fitting the subframes, I got covered in 6 months worth of shit off the drive under the car so I didnt want to get in the car to fit seats after i had just hoovered it out!
----------------------------
Sep 30, 2005
seats in! thats the interior all finished!


whats left....
engine
windscreen
tyres
rear struts swap (bought)
paint
-------------------------
Jun 09, 2006
Notice the gap in dates? that will be uni and winter...
swapped the rear struts over for brand spanking sexy renault decarbon jobbies i had off ebay for £20...for both!
the olds ones didnt feel to healthy and were leaking a bit...decarbon items themselves but prolly original!


Gunna concentrate on getting it running now before I paint it...engine in...tyres on wheels...windscreen, then T&T and ins.!
----------------------
Jul 05, 2006
Got the engine in this week!
hoorah!
Stan the Man came round with his hoist. Just as we were lifting it off the floor the ally eye broke clean off! good job it was only a tiny bit off the ground and not full height half way into the car!!!!
Anyways...in it is!


Haven't had it running yet, there was still a few bits n bobs i needed to sort...but I think it is pretty much all there now.
I jumped the gun a bit earlier and tried her out after charging the battery, but I was too soon and the Batt gave up too soon...but everything seems to be coming on electrical wise.
i was having visions of fucked up imobs and key fobs, but it all just works, which is nice...
Need to sort an exhaust, i started bodging an adaptor to enable me to mate the std backbox to a stainless straight through centre section but i ran out of bloody welding wire!!

Maybe tomoz she will fire into life.....maybe!?
--------------------------
Jul 06, 2006
Fired into life this morning...first turn of the key.
Sounded a bit tasty with just a downpipe lol. but it worked nicely!
--------------------------
Jul 21, 2006
Not much happened now since that first firing...its fired up three times to show various ppl lol...made my boy jump when it burst into life with only the downpipe lol. But now it is just sitting there waiting to go on the road...
Minimum things needed to get on road:
Windscreen - £100 (fitted)
4 Tyres - £150 (fitted)
MOT - £40 (assuming nowt wrong)
Tax - £100
Insurance - £400 budget
so thats still about £800 I need to get it on the road...I will be getting this money in one way or another by the end of the summer....Chamade is being MOT'd next week and sold plus I have a funny little summer job starting which will earn a few quid.
What I have done this week tho is sort the exhaust, in some fashion. I wanted to try and get the stainless centre section in place but retain the std backbox.
I started by making a sleeve to weld onto the end of the centre section that the std backbox could slip into and be clamped with a clamp (surprise!).

That's basically welded half way up the slit and to the pipe...leaving a slit that can clamp onto the backbox pipe. Of course the back box has that funny clam shaped fitting as std so that was cut off.

Bit of hammerite for the sake of it...will all rust anyway!
Here it is as a whole with decat section:


Now it all looks good but when fitted it resulted with the backbox being at a funny angle and no matter how I twisted and contorted the various joints available I could not get it to sit straight:

Neal, who gave me the stainless, did say he had problems with this system never sitting right no matter how much he fiddled with it, so I guess this has been made worse by mating it to a different backbox...
So to solve this time for more bodging! Decided to make a joint along the backbox pipe so that I could swivel it.
So chop:

Rolled up a sleeve that will close up just right when tightened:

This slips back onto the box and allows for swivelling action!

put it all back on, fiddle like feck and gets to this:

Still not perfect!..but by fuck thats as good as its getting! Esp, in this heat lol!
Oh, got some nice new Cat gaskets too:

Just gunna go start it up no see how it sounds...batt was dead again yesterday, but it has stood for a week...
---------------------------
Jul 21, 2006
Crappy battery been playing up all day. Needed more water. Done now, started her up again...running well it seems.
Exhaust sounds alright...got a bite to it lol...a bit of a rasp which I'm not sure I like, but it quietened down a bit after it warmed up...sounded nice Very Happy gunna be noisy at full beans tho i bet.
Let the thing run until it warmed right up...
Fan did not kick in...soon found that the rad switch is a bit dodgey as a quick wiggle brought the fan to life.
also the Aux Coolant pump is not running...I know most say don't bother but its there so I want it to work. Relay seems alright, very clean inside, no moisture has got to it or corrosion. and it clicks when I plug it in, so I assume the pump itself has issues...or the wiring.
Stuck the skirts and spoiler back on...because it won't be painted now until it is fully running on the road, so I may as well stick all the bits on so it can be MOT'd etc. looking nice again...at long last...even if it is a patch work of primer. Will get some pics.
--------------------------
Jul 23, 2006
Before I stuck the skirts on I found and remember one last little patch that needed a bit of attention...nothing major...on top of the sill in the door jam area...
after a bit of a grind:

piece of metal shaped and in place to be let in:

then a bird came and shat on it lol:

so I ground the birdshit away...

Slapped some hammerite over it for now...
So skirts/spoiler back on...


And this is as far as it is going to get for a while no I'm afraid...again...money issues are going from bad to worse...for now. But its ground to a halt again.
gagging to drive the thing.
------------------------
Last edited by a moderator:

