Many owners have fitted a PiperX to their Vee, and according to the manufacturers, they should be cleaned/serviced each year. With that in mind, I decided to visit my old mate Mossy and see if PiperX were telling the truth.
First Steps
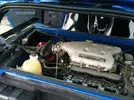
Remove the exterior engine covers.
Remove the surrounding covers.
Remove the inner engine cover.
Once done, locate the PiperX and carefully unclip the three spring-loaded clips that hold the filter to the main housing. This should be straightforward, but depending on how your induction kit was fitted, some clips may be harder to access. (In my case, the previous owner had fitted mine, and the underside clip was close to the bracket, making it tricky to unclip.)
Once all three clips are undone, you can separate the two units to reveal the actual filter.
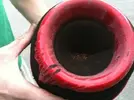
As you can see, PiperX were telling the truth—these filters do need to be cleaned yearly! Empty any residue into the bin and grab a damp cloth.
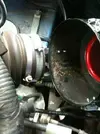
Wipe away the dirt and grime inside the housing unit, then prepare a bucket of warm soapy water.
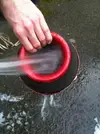
Thoroughly clean the filter—the water will become very dirty, very quickly!
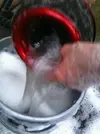
Give it a final rinse using a hosepipe. Do NOT use a pressure washer, as it is too powerful for the foam element.
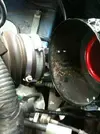
Use a microfiber cloth to absorb excess water, then leave the filter to dry naturally for approximately 30 minutes. Do NOT use a hairdryer or any heating equipment to speed up the process, as this can damage or melt the foam.

Once dry, apply Dirt Retention Oil in linear strokes along the outside of the filter. (Recommended product: Dirt Retention Oil - Product Code C9007)

Spray a small amount inside the filter to help protect it from sucking in unwanted debris.
Allow the unit to stand for 10 minutes, and that's it! Just carefully refit your PiperX.
Final Thoughts:
There certainly seems to be a difference now that it's been serviced. The noise "feels" cleaner—though that might be psychological! Throttle response also seems sharper and more instant.
[smilie=approve.gif]
First Steps

Remove the exterior engine covers.
Remove the surrounding covers.
Remove the inner engine cover.
Once done, locate the PiperX and carefully unclip the three spring-loaded clips that hold the filter to the main housing. This should be straightforward, but depending on how your induction kit was fitted, some clips may be harder to access. (In my case, the previous owner had fitted mine, and the underside clip was close to the bracket, making it tricky to unclip.)
Once all three clips are undone, you can separate the two units to reveal the actual filter.

As you can see, PiperX were telling the truth—these filters do need to be cleaned yearly! Empty any residue into the bin and grab a damp cloth.

Wipe away the dirt and grime inside the housing unit, then prepare a bucket of warm soapy water.

Thoroughly clean the filter—the water will become very dirty, very quickly!

Give it a final rinse using a hosepipe. Do NOT use a pressure washer, as it is too powerful for the foam element.

Use a microfiber cloth to absorb excess water, then leave the filter to dry naturally for approximately 30 minutes. Do NOT use a hairdryer or any heating equipment to speed up the process, as this can damage or melt the foam.

Once dry, apply Dirt Retention Oil in linear strokes along the outside of the filter. (Recommended product: Dirt Retention Oil - Product Code C9007)

Spray a small amount inside the filter to help protect it from sucking in unwanted debris.
Allow the unit to stand for 10 minutes, and that's it! Just carefully refit your PiperX.
Final Thoughts:
There certainly seems to be a difference now that it's been serviced. The noise "feels" cleaner—though that might be psychological! Throttle response also seems sharper and more instant.
[smilie=approve.gif]
Last edited:

