Chris H
master of boobies
Fuel pumps, they don't last forever so they can be viewed as a serviceable item. Also if your planning on modifying your vehicle where it requires more fuel such as adding forced induction then you need something that can keep up with and indeed exceed the demand required.
This guide is done using a Renault 19 EFI vehicle, a GT Turbo vehicle and others with external pumps this is even easier as its accessible under the vehicle, its just like changing a fuel filter - easy! Other in tank cars are easier as you can remove the pump from an access panel.
On the 19 however the access panel only covers the Fuel level sender, to get to the fuel pump you have to either cut the boot floor or drop the tank. I always drop the tank. I once got a vehicle (my first white ph1 Chamade) and the previous owner had cut at the floor, it was terrible.
Anyway this guider assumes you have the pumps cradle out already and you have your new pump to fit.
I have here a new fuel pump, an HRC Performance Pump from Ebay apparently rated at 255 lph at an unknown pressure. These pumps it seems are either Nippon Denso or Dynapex units. I'm not sure, they could be Chinese tat for all I know. I just know others have used then successfully, it was cheap (less than £50 to the door next day) and even if not the full 255 lph even half that rating is enough for a standard car. The standard Bosch pump is a 130 lph unit.
Anyway onto the job at hand.
This is the pump cradle as removed
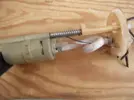
This is the top, usually dirty. The green is the outlet (High pressure thus metal barb) the red is the return (low pressure thus plastic barb) The electrical connector supplies the power feed to the tank. Make sure its not corroded away to nothing or you will have to repair it.

This is the bottom end of the pump, it should be clean. Here we see the filter sock and the angular hole on the plastic body is the fuel return

You need to remove the filter sock, to do this use a flat screwdriver to pop it off
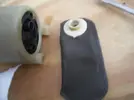
To separate the carrier body I pop the tags with a screwdriver and it comes apart
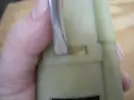
This is the bottom half pulled off the pump, this reveals the rubber vibration damper and also the actual pump itself

Then if not done so already you remove the power feed connectors to the pump and also the fuel hose to the pump. Then just pull it out of the top half of the carrier
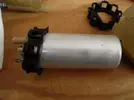
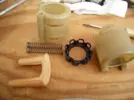
This picture shows the 2 halves of the carrier, the 2 springs, top rubber damper and the top part that slides over the support rods. Theres no need to take it down this far
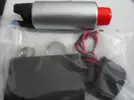
If you have a stock pump you just put it ion and put it back together. However I have an uprated pump which is physically smaller, quite a bit smaller actually. Heres a picture of what I got for my money, included was pump, foam sleeve, filter sock, connector plug, jubilee clips (dubious quality) and a short section of fuel hose. The clips and hose will not be used, use the original parts.
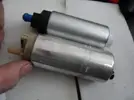
And here it is beside the original Bosch pump
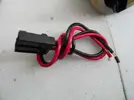
The new pump has a different style of connection, a plug instead of 2 separate spade terminals as per the original. A new plug and loom was supplied for this. It was rather long, much longer than required so I cut a good amount off of it so it was suitable
The original spade connectors on the housing
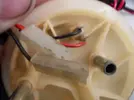
I un-soldered the original wires and soldered on the new connector.
I then had to figure out how to hold the new pump in the old housing so that it wouldn't move about and more importantly lift up so it is always immersed in fuel.
The best way was to use what I already had. This is the lower vibration damper rubber, shaped for the Bosch pump.
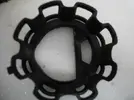
I cut the shaped part out so it was a circular hole
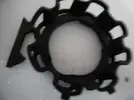
This was done so I could use both original dampers with the new pump. However we will come back to this.
As I have no immediate need for lots of fuel, I need to make sure the return line is as helpful as it can be. A good return line will be able to reduce the system pressure to zero. Remember pressure is a restriction to flow outside of a pump. A similar comparison is to a turbo wastegate, if a wastegate can't flow enough then boost will continue to build instead of dropping off as its meant to.
Here is the standard return hole

I opened the hole out, not enough so the support leg (which the fuel flows through) can poke out the bottom easily just enough to reduce the restriction. This should help reduce pressure in the return line thus getting the rail pressure to where it should be.

Back to making the pump fit the cradle. With the supplied rubber end of the new pump this would fit inside the original rubber pump vibration damper., This was the bottom sorted. The top I decided to invert the upper vibration damper, this worked perfectly, the holds the pump at the top where the metal transitions to the plastic of the pump body. So its held securely. The picture shows the idea

The new pump came with a foamy type sleeve to go over the pump body, this required cutting to fit into the new setup, this also had the benefit of further supporting the top rubber damper to pump interface
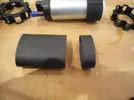
Like this, magic
Pump back on the cradle, connected up, looking good
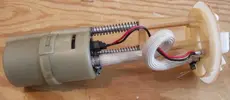
The final piece is the pumps filter sock. The new pump came with a larger finer grade of filter than the original. You should always run a filter here, you don't want to suck up debris as it WILL damage the pump. The size difference is quite noticable
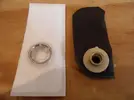
The bottom of the socks

Fit the new sock in the correct orientation and your done. This is what it look like completed
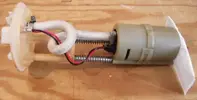
All that remains if to fit it to the vehicle.
Other Points to Note
I strongly recommend fitting a new fuel filter. Might as well whilst the system is de-pressurised . However if this has not been done before expect to get creative with the filter bracket so it can be used again.
Do you need an uprated fuel pump?
To be honest no. A like for like pump will be fine if your old one is dying. However the cost of a standard pump is nearly 3 times that of an up-rated one.
What about if I have a turbo?
Depends on what power you are trying to get. However I would uprate it as its better to have plenty in reserve, it also means you can keep sensible injector durations as the pump has enough flow and pressure to supply the fuel. The standard pump at 50 PSI (lets say thats fuelling pressure required at 1 BAR boost) may be marginal or may not be flowing anywhere near what the engine requires.
Ok I got one but my cars otherwise standard, what about all this extra fuel supply?
Well, here it gets a bit speculative.
As I mentioned above make sure the return system is free flowing, replace any crushed, kinked or damaged return lines, increase their diameter if possible. You then have to hope the regulator can flow enough fuel back to the tank easily, so if you have a damaged fuel pressure regulator you need to replace it. Likewise make sure the vacuum line to the regulator is free from leaks.
The ECU will adjust the fuel trims during light and normal loadings to retain emissions compliance. So at normal driving the ECU will reduce the injector duration accordingly. However in open loop situations it will use the ecu's base maps to fuel.
Now thankfully due to various factors the 19's and clio 16V's run rather lean, you can see this on power runs. Richening them up will smooth things out and add a bit of a safety net for high load operation.
The fuel pump in all likelihood is not seeing full battery voltage, now you can rectify this by running a separate power supply to the pump. But this voltage drop will slow the new pump a bit reducing its output slightly which is what you want in this situation.
Overall don't worry about it to much. The flow is roughly twice that of the original pump but the return line should cope reasonably well also its not clear at what pressures these ratings are given. For the Bosch pump I'm using the Haynes as a reference as I can't find datasheets on it, in reality the differences may not be that big.
This guide is done using a Renault 19 EFI vehicle, a GT Turbo vehicle and others with external pumps this is even easier as its accessible under the vehicle, its just like changing a fuel filter - easy! Other in tank cars are easier as you can remove the pump from an access panel.
On the 19 however the access panel only covers the Fuel level sender, to get to the fuel pump you have to either cut the boot floor or drop the tank. I always drop the tank. I once got a vehicle (my first white ph1 Chamade) and the previous owner had cut at the floor, it was terrible.
Anyway this guider assumes you have the pumps cradle out already and you have your new pump to fit.
I have here a new fuel pump, an HRC Performance Pump from Ebay apparently rated at 255 lph at an unknown pressure. These pumps it seems are either Nippon Denso or Dynapex units. I'm not sure, they could be Chinese tat for all I know. I just know others have used then successfully, it was cheap (less than £50 to the door next day) and even if not the full 255 lph even half that rating is enough for a standard car. The standard Bosch pump is a 130 lph unit.
Anyway onto the job at hand.
This is the pump cradle as removed

This is the top, usually dirty. The green is the outlet (High pressure thus metal barb) the red is the return (low pressure thus plastic barb) The electrical connector supplies the power feed to the tank. Make sure its not corroded away to nothing or you will have to repair it.

This is the bottom end of the pump, it should be clean. Here we see the filter sock and the angular hole on the plastic body is the fuel return

You need to remove the filter sock, to do this use a flat screwdriver to pop it off

To separate the carrier body I pop the tags with a screwdriver and it comes apart

This is the bottom half pulled off the pump, this reveals the rubber vibration damper and also the actual pump itself

Then if not done so already you remove the power feed connectors to the pump and also the fuel hose to the pump. Then just pull it out of the top half of the carrier

This picture shows the 2 halves of the carrier, the 2 springs, top rubber damper and the top part that slides over the support rods. Theres no need to take it down this far

If you have a stock pump you just put it ion and put it back together. However I have an uprated pump which is physically smaller, quite a bit smaller actually. Heres a picture of what I got for my money, included was pump, foam sleeve, filter sock, connector plug, jubilee clips (dubious quality) and a short section of fuel hose. The clips and hose will not be used, use the original parts.

And here it is beside the original Bosch pump

The new pump has a different style of connection, a plug instead of 2 separate spade terminals as per the original. A new plug and loom was supplied for this. It was rather long, much longer than required so I cut a good amount off of it so it was suitable

The original spade connectors on the housing

I un-soldered the original wires and soldered on the new connector.
I then had to figure out how to hold the new pump in the old housing so that it wouldn't move about and more importantly lift up so it is always immersed in fuel.
The best way was to use what I already had. This is the lower vibration damper rubber, shaped for the Bosch pump.

I cut the shaped part out so it was a circular hole

This was done so I could use both original dampers with the new pump. However we will come back to this.
As I have no immediate need for lots of fuel, I need to make sure the return line is as helpful as it can be. A good return line will be able to reduce the system pressure to zero. Remember pressure is a restriction to flow outside of a pump. A similar comparison is to a turbo wastegate, if a wastegate can't flow enough then boost will continue to build instead of dropping off as its meant to.
Here is the standard return hole

I opened the hole out, not enough so the support leg (which the fuel flows through) can poke out the bottom easily just enough to reduce the restriction. This should help reduce pressure in the return line thus getting the rail pressure to where it should be.

Back to making the pump fit the cradle. With the supplied rubber end of the new pump this would fit inside the original rubber pump vibration damper., This was the bottom sorted. The top I decided to invert the upper vibration damper, this worked perfectly, the holds the pump at the top where the metal transitions to the plastic of the pump body. So its held securely. The picture shows the idea

The new pump came with a foamy type sleeve to go over the pump body, this required cutting to fit into the new setup, this also had the benefit of further supporting the top rubber damper to pump interface

Like this, magic

Pump back on the cradle, connected up, looking good

The final piece is the pumps filter sock. The new pump came with a larger finer grade of filter than the original. You should always run a filter here, you don't want to suck up debris as it WILL damage the pump. The size difference is quite noticable

The bottom of the socks

Fit the new sock in the correct orientation and your done. This is what it look like completed

All that remains if to fit it to the vehicle.
Other Points to Note
I strongly recommend fitting a new fuel filter. Might as well whilst the system is de-pressurised . However if this has not been done before expect to get creative with the filter bracket so it can be used again.
Do you need an uprated fuel pump?
To be honest no. A like for like pump will be fine if your old one is dying. However the cost of a standard pump is nearly 3 times that of an up-rated one.
What about if I have a turbo?
Depends on what power you are trying to get. However I would uprate it as its better to have plenty in reserve, it also means you can keep sensible injector durations as the pump has enough flow and pressure to supply the fuel. The standard pump at 50 PSI (lets say thats fuelling pressure required at 1 BAR boost) may be marginal or may not be flowing anywhere near what the engine requires.
Ok I got one but my cars otherwise standard, what about all this extra fuel supply?
Well, here it gets a bit speculative.
As I mentioned above make sure the return system is free flowing, replace any crushed, kinked or damaged return lines, increase their diameter if possible. You then have to hope the regulator can flow enough fuel back to the tank easily, so if you have a damaged fuel pressure regulator you need to replace it. Likewise make sure the vacuum line to the regulator is free from leaks.
The ECU will adjust the fuel trims during light and normal loadings to retain emissions compliance. So at normal driving the ECU will reduce the injector duration accordingly. However in open loop situations it will use the ecu's base maps to fuel.
Now thankfully due to various factors the 19's and clio 16V's run rather lean, you can see this on power runs. Richening them up will smooth things out and add a bit of a safety net for high load operation.
The fuel pump in all likelihood is not seeing full battery voltage, now you can rectify this by running a separate power supply to the pump. But this voltage drop will slow the new pump a bit reducing its output slightly which is what you want in this situation.
Overall don't worry about it to much. The flow is roughly twice that of the original pump but the return line should cope reasonably well also its not clear at what pressures these ratings are given. For the Bosch pump I'm using the Haynes as a reference as I can't find datasheets on it, in reality the differences may not be that big.

