Mart
Staff member
I couldn't find any guides on the 'net for this, so thought I'd write up one for TR on how to deactivate the Megane 225/R26 tyre pressure monitoring system (TPMS) using the Renault CLIP tool. However, I take no responsibility if you end up 'bricking' the uch ecu...which I'm sure won't happen 
The screen-shots below are from version 156 of CLIP - Yours might be slightly graphically different depending on the SW revision.
For those who haven't used CLIP before (but assuming you've at least installed the software/drivers), make sure your laptop battery is fully charged or plugged in at the mains, and that the car's battery is equally fully charged and/or a trickle charger is connected.
1) Plug the can-bus adaptor into your laptop usb socket, and the other adaptor lead into the car's OBD socket, which on the Megane 225/R26 is located at the bottom of the centre part of the dash/at the front of the centre console...
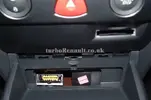
...All 4 LEDS on the adaptor should be on/flickering, showing connection has been made.
2) Switch ignition key to point 2, or if you have a key-card, insert it into the slot & hold the start/stop button for ~10 seconds to 'force' the ignition on (all the dash lights will briefly illuminate once it's 'on').
3) Fire up your copy of CLIP & after a few seconds you should see the front-page...
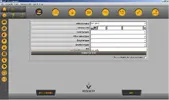
4) Next to 'Vehicle VIN', click the button with the picture of a car/question mark. The software will now attempt to read the car's VIN.
5) If successful, the following screen will now be displayed. I've deleted the VIN that was showing (but yours will be), and I've also selected CM1V (after-sales type) from the drop-down menu(*), as the car in question was a ph2 225 with the Cup pack. If you're not sure what spec your car is, the after-sales type code should be printed on the label at the bottom of the driver's door pillar. Once you've selected the spec, the engine type & gearbox type will auto-fill. At this point, enter 0 in the RO box.
*The after-sales box may also auto-fill depending on model spec of your car/once the VIN has been registered/entered.
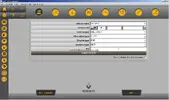
6) Click 'computer test' and after ~20 seconds, you'll see something like this screen...
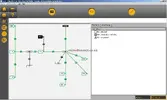
7) Which in this instance, there were no errors & the multiplex/computers are all ok. Marvellous
8 ) Click 'continue' at the bottom-right of the screen.
9) And this is the next screen that'll be displayed...
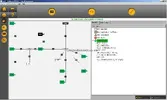
10) To deactivate the TPMS is a 2-part procedure involving re-configuring the UCH and the Instrument Panel. We'll start with re-configuring the UCH first, so left-click on the 'UCH' wording, and click 'Diagnose' in the bottom-right corner, and after a few seconds you'll see...
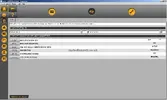
12) Click on the yellow/black spanner button (top right) to enter the repair/config' section...
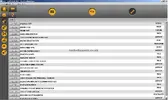
13) At this point, take a screen-grab/paste to Paint, or take a photo, and store this file somewhere safe! - That's your UCH config (yours might look slightly different/have different options active/deactive depending on spec). If you somehow manage to bugger up the UCH coding, you'll at least have your original UCH spec list to fall back on, to program in again. From the above, you can see that I've already deactivated the TPMS (showing 'without') but ignore that for now.
14) Click on the config button, left hand side of the screen (circled red)...
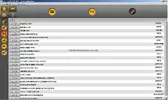
...and this page will now be displayed...
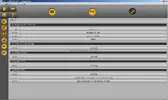
15) Click on any of the lines that say 'UCH TYPE'. I forgot to screen-shot the next page, but basically it's just a warning page saying the config is about to be erased until it's been reprogrammed, or something like that. Anyway, click next/continue at the bottom of that screen.
16) I didn't screen-shot the next screen either (half a job, I know ) but it's fairly obvious what to do - You just select from the drop-down list whether your car is 3-door, 5-door, cabriolet, etc, then click next/continue, and this option screen will now load...
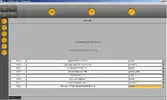
17) Using the drop-down menus, select 'with' or 'without' depending on your model spec, with ref' to that UCH config screen-grab you made earlier...You did remember to screen-grab it, didn't you!? The only difference being you now select 'without' for the 'tyre pressure monitor function'. When done, click 'Next' (bottom left corner), and you'll see this page...
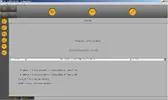
18 ) Choose the relevant one-touch window setting from the drop-down menu, and click 'Next'.
19) You'll now see a couple of 'verification' screens, just highlighting the choices you've made - If all is present & correct, click 'Validate' on each screen.
20) Et voilà. Part 1 completed. Now click the left (back) arrow (next to the 'home' button, top left corner) until you get back to this screen...
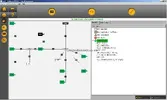
21) Part 2. Now to configure the dashboard computer. Left-click on 'Instrument Panel' then click the 'Diagnose' button. When that page has loaded, click on the yellow/black spanner (top right corner) to enter the Instrument Panel repair/config section, which should look something like...
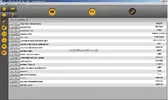
22) Now click on the 'Write config' button (circled red)...
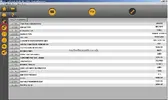
...and this screen should be displayed...
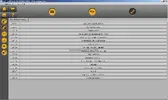
23) Click 'Tyre Pressure Monitoring' line to load up this screen...
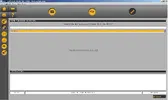
24) Use the drop-down menu & select 'without', then click the 'Validate' button (bottom right).
25) TPMS is now fully deactivated. Click the 'home' button (top left), then 'Quit' the CLIP software. Switch off the ignition, disconnect the adaptor from the OBD socket, and refit the flap. Job done
The screen-shots below are from version 156 of CLIP - Yours might be slightly graphically different depending on the SW revision.
For those who haven't used CLIP before (but assuming you've at least installed the software/drivers), make sure your laptop battery is fully charged or plugged in at the mains, and that the car's battery is equally fully charged and/or a trickle charger is connected.
1) Plug the can-bus adaptor into your laptop usb socket, and the other adaptor lead into the car's OBD socket, which on the Megane 225/R26 is located at the bottom of the centre part of the dash/at the front of the centre console...

...All 4 LEDS on the adaptor should be on/flickering, showing connection has been made.
2) Switch ignition key to point 2, or if you have a key-card, insert it into the slot & hold the start/stop button for ~10 seconds to 'force' the ignition on (all the dash lights will briefly illuminate once it's 'on').
3) Fire up your copy of CLIP & after a few seconds you should see the front-page...

4) Next to 'Vehicle VIN', click the button with the picture of a car/question mark. The software will now attempt to read the car's VIN.
5) If successful, the following screen will now be displayed. I've deleted the VIN that was showing (but yours will be), and I've also selected CM1V (after-sales type) from the drop-down menu(*), as the car in question was a ph2 225 with the Cup pack. If you're not sure what spec your car is, the after-sales type code should be printed on the label at the bottom of the driver's door pillar. Once you've selected the spec, the engine type & gearbox type will auto-fill. At this point, enter 0 in the RO box.
*The after-sales box may also auto-fill depending on model spec of your car/once the VIN has been registered/entered.

6) Click 'computer test' and after ~20 seconds, you'll see something like this screen...

7) Which in this instance, there were no errors & the multiplex/computers are all ok. Marvellous
8 ) Click 'continue' at the bottom-right of the screen.
9) And this is the next screen that'll be displayed...

10) To deactivate the TPMS is a 2-part procedure involving re-configuring the UCH and the Instrument Panel. We'll start with re-configuring the UCH first, so left-click on the 'UCH' wording, and click 'Diagnose' in the bottom-right corner, and after a few seconds you'll see...

12) Click on the yellow/black spanner button (top right) to enter the repair/config' section...

13) At this point, take a screen-grab/paste to Paint, or take a photo, and store this file somewhere safe! - That's your UCH config (yours might look slightly different/have different options active/deactive depending on spec). If you somehow manage to bugger up the UCH coding, you'll at least have your original UCH spec list to fall back on, to program in again. From the above, you can see that I've already deactivated the TPMS (showing 'without') but ignore that for now.
14) Click on the config button, left hand side of the screen (circled red)...

...and this page will now be displayed...

15) Click on any of the lines that say 'UCH TYPE'. I forgot to screen-shot the next page, but basically it's just a warning page saying the config is about to be erased until it's been reprogrammed, or something like that. Anyway, click next/continue at the bottom of that screen.
16) I didn't screen-shot the next screen either (half a job, I know

17) Using the drop-down menus, select 'with' or 'without' depending on your model spec, with ref' to that UCH config screen-grab you made earlier...You did remember to screen-grab it, didn't you!?

18 ) Choose the relevant one-touch window setting from the drop-down menu, and click 'Next'.
19) You'll now see a couple of 'verification' screens, just highlighting the choices you've made - If all is present & correct, click 'Validate' on each screen.
20) Et voilà. Part 1 completed. Now click the left (back) arrow (next to the 'home' button, top left corner) until you get back to this screen...

21) Part 2. Now to configure the dashboard computer. Left-click on 'Instrument Panel' then click the 'Diagnose' button. When that page has loaded, click on the yellow/black spanner (top right corner) to enter the Instrument Panel repair/config section, which should look something like...

22) Now click on the 'Write config' button (circled red)...

...and this screen should be displayed...

23) Click 'Tyre Pressure Monitoring' line to load up this screen...

24) Use the drop-down menu & select 'without', then click the 'Validate' button (bottom right).
25) TPMS is now fully deactivated. Click the 'home' button (top left), then 'Quit' the CLIP software. Switch off the ignition, disconnect the adaptor from the OBD socket, and refit the flap. Job done
