Arj256
Member
I bought my Williams 2 a few months ago, and it's soon turned into abit of a project so here I go:
When I went up to have a look at the Williams, I took some spare wheels which Naples Kindly lent me.
When I was happy with the car, I left the wheels up there and got a train back up there later on.
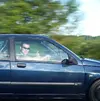
This is what she looked like on the drive back from Wales:

As you can see it had an odd coloured fuel cap where the locks had been changed at some point.
So when I got home I set about taking the lock out of the original 449 cap and swapping them over.
After breaking the 449 one, I worked out the proper way of taking the lock out.
So I did it right on the one which counted, and put it on which improved the look straight off.
After doing that I proceeded with putting the cat on, so I could put it in for a Mot.
Which when I did, I realised that the spring joint flange wasn't on and the original one had been butchered by some exhaust place.
After a lot of filing away, I managed to get it to fit well enough so I could put the cat and exhaust on.
So I was ready to get a Mot in time for FCS :roll:
Got my phone call and it failed well.
Which was annoying, it needed headlight alignment, side repeater bulb, Exhaust had a hole in it, Front brakes seized, rear handbrake efficiency 3% and corrosion.
With my lack of a welder I booked it in to have the corrosion sorted, and thought I would fix what it failed on.
I took the Scorpion centre section off, and took it up to my mates to get welded up. This came back good.
I then set about un seizing the rear callipers, these where pretty seized.
I kept hammering them back and forth for a while with plenty of wd40.
After a while it seemed they where moving happily, but the handbrake wasn't working well still.
So I adjusted the cables and still no joy.
So new callipers seemed the best option, and I had wanted decent rear brakes for a while.
So I ordered 2 new rear callipers, new handbrake cables and some Mintex rear pads.
When I got these I fitted, I bled them up and the handbrake was a lot better.
Now when I did the wheels up the car wouldn't move lol.
Then I set about unceasing the Wilwood 4 Pots, these where making plenty of creaking and had worse stopping power than my revised valver setup.
So I took the pads out, and Wd40 / Copper greased the pistons up, and after a lot of pushing of each piston back.
I got them lovely and quiet and the stopping power is now what people comment about them.
When I looked at the headlight to adjust the aim it turned out the adjustment screw had broken which was annoying.
I decided that most of my driving is at night, so a pair of new headlights would be a good idea.
So went and got some from Gsf, and put them in and the difference they make I would say are worth for the cost.
With all the faults fixed as far as I was concerned, I gave her a clean and rebooked an Mot


I was confident I would finally get an Mot after not being able to drive it for a month, and when they rang me up saying it had failed again, I was most displeased :evil:.
They said the rear handbrake wasn't up to the required efficiency despite all new parts.
And failed it on the headlight alignment despite asking them to do it before testing.
But they "fixed" it for some more money even though I doubt they did, but that's the benefit of the new mot system :roll: and I eventually had an Mot .
.
I also got advisory's on: 'Racing suspension' 'Buckets and Harnesses', don't think I will be going there again.
With an mot I set about refurbing the Williams wheels which I had bought off Kj16v.
They where pretty corroded and curbed, so I used a file to take out the curbing and then used sandpaper to get a good finish
Came out a lot better than you would think, with this done I sent them to be shot blasted and powder coated.
This was the end result:

With some painted Williams wheels I put on some new Goodyear Eagle F1's, and they where put onto the car.
As I wanted to tidy up my interior I decided I would take out the roof glue and stuck on cardboard bits.
This took ages to get off, but eventually found a good way of using the blade to get it evenly off.


When I took this off I was surprised at how much glue and bits of cardboard soon added up.
My eventual plan is to take all the sound deadening and glue/clips out and spray up the inside in 449.
Other jobs which I have done have been fitting a new Fuel Filter, Fitted my Magnecores, And a CD player as im not hardcore lol.
One of the more recent things I have done has been attempting to sort out the knocking which I was getting from the Gaz Coilovers which where fitted to the car.
I initially thought they where the top mounts, but it turned out that it was the design of the Coilovers which was at fault.
This meant the top mount wouldn't spin on its bearing, so I bought some washers from B&Q and used 12mm worth on each side, and rebuilt them back together.
This has made them quieter but they still make noises and need servicing.
The bonus is they have lowered the top threads as you can see:

As I now had an mot, I no longer needed to have my cat fitted.
So I booked the car in to get an extended flange made up for the supersprint manifold.
As the early ones where apparently not long enough and needed modifying so this was done.
This was the end result:

This was done allright, but they failed to sort out the exhaust hanging really low, I have found a way of sorting it out after trial and error but im not happy with the Scorpion.
Will see how it goes though.
This is how it was looking up to this point:


The Final thing I have done to it so far was changing the stickers.
I thought I would go for some black Williams Stickers to match the black wheels.
This was one of those ideas which seemed a good idea in theory, but when I did it the stickers it went wrong and the black didn't work out how I had intended, so think I will go for gold again.

That's as far as I have got with the car for now.
The future plans are to renew the front suspension - Wishbones, Arb Rubbers, Track Rod Ends,
New Coilovers.
Paint the Inside 449.
Sort Out The Paintwork.
Exhaust Wrap.
[BREAK=Sound Insulation]
I recently did an oil and oil filter change so I knew the history of when it had been changed, no pics as its not really very exciting but always buy a genuine filter, the one which was in there was twice the size of the normal one which made it a tad tricky to get out of the engine bay :roll:
As I wasn't too happy with the aerial on the roof and not actually having a cable going to it I decided to take it out and to use a rubber bung to stop it leaking:

As you can see I had to use some tape as I didn't take into account that there would be 2 holes.
So will have to sort that out later.
Another thing I have put in where some Williams mats which Zollo kindly gave me:


These have come in handy for day to day duty's for keeping the car clean inside and still making it feel like a normalish car lol.
I decided that I would start the fun task of taking out the sound insulation; this was one of those jobs which I eventually wish I didn't start as it was so boring and took quite a while.
Here are the pics for when I started it:


As you can see I slowly got through the sound insulation with the trusty hammer and scraper / heat gun combo.
With only half the sound insulation taken off during the evenings, I have been taking odd bits off:


As you can see, I still had remnants of the tar and due to me being paranoid decided not to use the heat gun on areas near the fuelling system, as apparently the heat guns can set alight a bbq.
Due to not using a heat gun I resorted to a "chisel" and hammered it off which took ages and left a lot more remnants of tar.
When I got to the front of the car I took the passenger bucket seat out and then decided to take out the roll cage for ease of access so somehow managed to take that out on my own.
With it out I got rid of the remaining sound deadening in the front of the car.
Its surprising what the insulation hides from you, I have noticed a couple of rusty bits which id never of known about.
With just the remnants of the sound insulation left I set about using a scraper to get rid of the fine bits and white spirit to get rid of the glue which is left.
After a while this was the end result:


As you can see there a few bits which need cleaning but I have run out of motivation to do those so will late till later.
It is a boring job to do lol.
I weighed all the sound insulation which I have taken out and it came to 12kg on some scales, so not the most accurate but a good indication of how much it weighs.
Due to my bonnet having horrible dents on it and wanting to shed some more weight I managed to find this nice and cheap:

A carbon fibre skin bonnet. Nice and light just need to get some pins for it later on.
Not sure to spray it or not due to it having scratches in the lacquer.
Another addition was fitting my fire extinguisher, as these can come in quite handy :wink:
I put it under the passenger seat as this is the easiest place to reach and unhook it in a rush.


Other odd jobs which I have done where change the coolant for some nice new Type D, since doing this I have been getting better mpg to!
I also got some Piaa headlight bulbs to improve night driving, and they have been a good improvement and give a nice white light.
Not bad for £29.
Quick pic of them:

One of the problems I found of driving a stripped out car day to day is that there is no where to store you phone and odd bits, so after keeping an eye out in the scrappy I managed to get hold of the rare vent pocket for £5
So I went and fitted it:

Another job which I did was to fit the Rocker cover which I had powder coated and fit my carbon fibre inlet manifold cover
Before fitting this, I had to fit the rocker cover breather hose which I got off Mat brown.
This was a simple job, but I took the airbox off to make it nice and simple and to also clean out the throttle body.
So I did this and when I had the airbox off, I looked at my air feed pipe and it was full of gravel from the gravel trap :roll:
There was loads of it in there which wouldn't have done any help for the induction.
So if your car ever goes into the gravel trap its worth cleaning this pipe out.
With everything fitted and cleaned back up, I fitted the rocker cover.
This was pretty simple so only the end result picture:

I have the pulley cover to go on as well but I haven't gotten round to fitting that yet.
After driving the car and getting quite fed up of it driving bad, I have decided to take it off the road for a while so that I can get all the parts which I want to fit.
Then when it's back on the road it will drive just how I want it
So it's now gone in my garage now, and I have begun saving up for a nice long list of parts which should hopefully have me setup for track days next year.
Ironically on the last night of driving the car I got in and hear the lovely noise of air coming out of the tyre.
So I will now have to buy another Eagle F1
Here it is tucked away for quite a while...

So will update the thread in a while.
[BREAK= New Parts]
Update:
I now have the car back on the road, abit sooner than expected, but I was getting bored not having any transport and whilst it was off the road I had accumulated a small pile of parts to go and fit:


First off all I needed to sort out the exhaust, due to having problems with it hanging low in the middle.
I decided to change exhaust to one which had a centre mount which would keep it hanging high.
When I got the exhaust, I decided to give it a good clean up and paint it in black high temp paint to make it look tidier.


Unfortunately I didn't take any pictures of the exhaust after being painted but it's the same but black.
I went to fit the exhaust, and if only Clio exhausts where made to fit anything. Things would be so much easier.
I spent some time sorting out the blow I had on my manifold so took that off and resealed it.
When I came to mate up the decat to the exhaust, there was smaller bit of pipe inside the decat to ensure a good fit normally.
Due to the Devil having a smaller pipe diameter, it meant the gaskets wouldn't sit flush
Also when I went to line the centre hanger up, the hanger on the exhaust seemed to be too far away for the exhaust rubber to stay on the hanger which sucked.
So I had to take the decat off and grind away the lip it had, to ensure that the gaskets fitted fine.
And with the central exhaust hanger, I took it off the car which was easier said than done.
My drill had broken so I had no real way of getting the seized bolt out.
After borrowing a drill from my friendly neighbour.
I got the bracket plate out and decided the best way to sort this would be to make some spacer plates to bring the mount closer to the exhaust hanger.
Then weld a washer onto the end of the hanger to stop the rubber sliding off if it was at abit of an angle.
So with that done and me foolishly forgetting to take pics, it was fitted to the car and that worked great and all lined up well which was good.
Shame that when I got round to fitting the backbox in the dark and rain that it wasn't simple to line up.
After looking at it, it would seem that there is to much bend on the pipe to get it over the torsion bar, so instead of it hitting the torsion bar like usual its hitting the chassis.
The only way I have solved this temporarily is by the trusty cable ties.
I think I will get an exhaust place to sort it out later on, as laying on wet tarmac in the cold is losing its novelty value.
Pic of the centre section on the car (only one I took unfortunately)

With the exhaust on, albeit with the aid of cable ties.
I proceeded to crack on with fitting my new suspension.
When I bought the car it came with Gaz Coilovers.
But due to all the shopping runs the previous owners must have done :wink: they where well past there best.
So after looking at what was on offer and listening to what people had on the forum, I decided to go with some Avo Coilovers with 180lbs springs
I decided that I would proceed with fitting the easier shocks first which in theory should be the rear shocks.
One of the shocks came out fine, but the one near the petrol tank I couldn't undo the bolt with a spanner.
So I had to use a breaker bar to undo it.
Great if I could get to the bolt from that direction but as the tank was in the way it wasn't easy to get to.
So I got my sister to stand on the torsion bar whilst I undid it.
It worked well and eventually I had the shock out, and I could proceed with fitting the new ones.
Here are the new shocks fitted:


With the rear shocks on, I started to fit the front shocks.
I had to take off old Coilovers first which was simple enough.


With these off, I proceeded with fitting the new Avo Coilovers.
Following the drawing supplied, this was relatively straight forward with just having to cut the bump stop to suit the ride height.
So I put the new top mount bearings on and rebuilt the shock and put it back onto the car.
When I put it on I noticed that the thread wasn't long enough on the top of the unit for the securing nut and top threaded plate.
So I had to take the nut off and only run with the threaded top plate to get it to fit on the thread correct.
With both shocks on (only took one picture)

I proceeded to put the car back on the ground.
When it was on the ground it was very low, I could just see half the tyre.
It looked good like that but had no handling or practicality benefits being like that, so I had wind it up to get it to a useable height.
After a lot of messing around I got it to the top of the thread and this was as high as I could get the shock:

This is still to low imo, so im going to have to measure my spring lengths and see what Avo say about it..
I have also got a few more parts to fit so that it will be good as new.
Got some new wishbones to fit when I do the Arb rubbers and track rod ends

I also won these on eBay for £11.50 which was a bargain, should fit on the bonnet nicely.

And after some jumping out of gear incidents, I have invested in some new engine mounts and the R19 gearbox mount.
So it should be good for some time.

That's it for now.
I have got to crack on and fit a lot of the parts I have.
Unfortunately it keeps raining
[BREAK= Assorted Work]
Update:
It's been an age since I have updated this, so I will try and remember back from where I left it.
After buying the new wishbones and Arb rubbers, I proceeded with fitting them.
The Arb rubbers where a lot easier to fit than valver ones due to the revised clamping setup which made things a lot quicker.
The old rubbers where cracked so it was worthwhile changing.

Putting the new wishbones on was easy enough, the bolts where co-operative so it didn't take too long.


And here's the new ball joint with a see through rubber;

With the new parts put on, I proceeded to put it back together.

I then repeated this for the other side, but I didn't get pictures for it.
Also around this time I got my roll cage professionally fitted at Xsport Racing - Motorsport Preparation, Roll Cages, Composite Panels & Much More of whom I would recommend, as they did a good job welding it in.
Unfortunately when they where fitting it in, they let something slip and cracked my windscreen:

This meant I got a new one for free, which I was quite happy about as it was the aged original one.

I unfortunately didn't really take many good pictures of when it was first fitted.
With the cage fitted in, I preceded to paint and under seal some of the areas where the old under seal had been damaged by the heat of welding.
And to under seal up the additional harness mounting point which they had fitted.


Next on the agenda was having a go at wrapping up my manifold with heat wrap.
This meant having to take off the manifold, I thought I may be lucky and take it off as a whole.
After a lot of messing around and trying to push the engine back and forwards, it was clear there isn't enough room unless you start taking off the starter motor etc.
So I just separated the down pipe and took it off the normal way.

Here is the manifold off and cleaned up ready for wrapping.

I proceeded with wrapping up the manifold with my 1' x 50" wrap on the manifold.
I made sure that the wrap was nice and wet so I could get it tighter and stop me getting itchy hands.
I thought it wouldn't be that tough to wrap the manifold, just a more complicated Christmas present wrap lol.
Soon found out having to feed the whole wrap through the pipes became tedious so I worked out how much I would need, and cut it down.
I still had to feed it through the pipes and I found with the wrap I was using, feeding it through caused it to fray on the edges which wasn't too much fun.
I eventually got the manifold wrapped, but only just as I ran out just by the joining bit.
So I made sure the clips where holding it nice and tightly on.
I originally bought some metal cable ties, but these where rubbish imo as you couldn't get the tightness on them to hold the wrap down.
So I resorted to some jubilee clips and that did the job nicely.
Here's the manifold once wrapped:

Having run out of the manifold wrap, I had to order some more from rally design.
This time I thought I would go on the safe side and buy some 2' x 50" so I would definitely not run out.
The down pipe was a lot easier to wrap due to it only having 2 pipes to go through, this was soon done and this is what it ended up like.

Whilst the manifold was off I decided to give the area around here a good clean up. and cable tied the fuel lines close to the clipping points so they couldn't get near the belts area.


Whilst I was cleaning the engine bay I noticed that the starter motor live was loose on its connection

So with some pliers I made the crimped connection smaller so now it was a lot stiffer to go onto the starter motor.
So a lot less chance of it coming off.
With the manifold and down pipe wrapped up, it was time to fit it back to the car, this was easy enough to get the manifold back in, once I remembered what way you had to put it so it would slot back in.
But I couldn't get the down pipe to mate back onto the manifold.
After abit of time playing around, I realised where I had put the jubilee clips on the down pipe to stop the wrap coming off this was making the pipes stick outwards more.
So a quick adjustment of the clips and it soon went back together, and bolted it back up.
Here's what it looked like all fitted again.

After driving around with the wrapped manifold, I noticed that the engine bay was a lot cooler, the car felt more responsive.
The exhaust also popped more, so I would say that it was worthwhile doing.
Whilst driving about, I noticed that the exhaust wasn't sitting correct at the back and was making abit more noise.
It turned out that the securing bracket which had come with the exhaust had decided to depart the cars company.
So I needed to make up a new one.
Playing around at work I came up with this:

Fitted it with some new nuts and bolts and double nutted it to so it wouldn't escape again.
It did the job nicely.
With the cage in, and the floor lacking its sound insulation.
I decided it would be a good time to get the floor painted.
So I went and got a tin of hammerite smooth blue to paint the 1st half of the car, and some spray cans to paint the boot.
The plan being I would be getting a carpet for the front so no need for a top quality paint finish at the front.
So I slowly masked the cage up and proceeded with painting the floor.


With the floor painted up, I proceeded to put everything back in once it had dried.
I had the enjoyment then of driving around in a car which smelt of paint for a few weeks.
I got a call from Matt Wills to have a little burn and chat to see his new Trophy so popped up and had a look:

Was nice having a comparison between the two, the Trophy is a very nice car.
It wasn't getting far away from the Oulton park track day I had booked, and there where quite a few jobs left to do and not a lot of time to do it in.
Due to work and lack of motivation, I decided to get the outstanding jobs I had left to be done at Rentech. Rentech - Independent Renault Specialist.
This meant that I had new discs and bearings fitted at the rear.
A new front hub and bearing on the driver's front.
Trackrod ends fitting and tracking
And new pads as well as the 2 main engine mounts and cam cover.
And a full bleed of the brakes and an oil change.
Engine bay with its new cam cover:

As usual I can fully recommend mike for getting anything Renault related done.
In the end it turned out the track day was cancelled due to snow so that was quite annoying.
Luckily I ended up getting a refund for the day so not to bad.
Driving the car with no door panels and trim meant that I was slowly losing the novelty of a fully stripped out car.
So with this in mind I set about buying some Williams interior.
After a while I came across everything I needed bar a carpet.
So a trip up north later to get it, I had some interior trim:


With the new trim, I soon set about cleaning it all up with shampoo so it was good as new.
I then got around to fitting it into the car.
Before fitting I decided I would spray paint up the boot.
So with some aerosol cans and a lot of masking up, the boot was soon sprayed up in a nice shade of 449.
When fitting the trim I found in some places I had to cut the panels to get the around the roll cage which was abit annoying.
This was the end result though:


All that's left is to fit the roof lining and source a carpet.
After being messed around with Avo and Motorsport World I had to buy the correct springs for the car to sort it out.
So I fitted some 9" 180lbs springs to the car.
This didn't take to long and the springs where finally compressed in the shocks. This was the end result:

Finally the car drove better absorbed bumps and didn't grind on everything.
I also got around to fitting some genuine headlight protectors I bought of Justin.
They look good and keep the new headlights in good condition.

I helped organise a route with some of the people over at Cliosport for a breakfast run meet.
So I went along and ended up leading most of it.
Wasn't a bad meet, but there where far too many people.
As such people got lost.
Car was driving real well on the meet which was good.


As I had done quite a lot of servicing to the car and it was running a lot better than when I first got it, I decided to take it down to Santa pod along with Summeh to see if I could improve on my times.
It was a good day out, the weather was good and a decent turnout of Clio's where there too.
I managed to get nearly 30 runs in so I was happy with that.
I ended up beating my best time, and ended up with a 1/4 mile of 14.88

After Santa pod the car was booked into the bodyshop to have the previous owners handiwork sorted out.
These are the pictures after it had been sprayed up:


I also purchased some white Speedline stickers and put these on:

Due to the good turnout of the Cliosport breakfast run and already having tested out the route, I decided to have a breakfast run too.
This was a good turnout and the drive was enjoyable.
Clio was yet again driving well.


I went over to Germany to have a drive of the Nurburgring.
The morning before, I was awoken being told that the car had a puddle of green fluid under it.
Turns out the radiator had decided to give up at the best of times.
So after a mad panic of sorting out the radiator by fitting a new one from Gsf I was ready to go.
What a place, brilliant atmosphere and the ring itself is brilliant fun to drive.
Defiantly worth going to at least once.
Heres some pics:


At the end of the trip, I was reminded of Avo.
So I had to source a new shock..
Basically only use products for there intended use, as the Coilovers I bought where not for track days so they have a design weakness....
Shortly after Germany I had a track day at Brands Hatch.
All that needed doing to the car for the track day was an oil change, fitting the new shock, and tracking.
The actual day itself was great fun and it raining made it good fun.
Didn't half chuck it down. Which made for some interesting corners.
Unfortunately after the Ring, Paddock hill wasn't quite a dip as it would have been but still a fun corner in the wet.
Here's a couple of pics of the day:


After brands I managed to source a Williams carpet so I can get that fitted.
Should be nice to have the proper carpet in the car.
Other than that I have just been driving it.
[BREAK= Subframe]
Update:
I had been noticing that my rocker cover gasket had been leaking down the back of the block abit more than usual so I decided I would go and buy a new rocker cover gasket and some gasket sealant and replace the gasket.
This went well, no pictures unfortunately but the leak was stopped with the new gasket.
And whilst everything was out I changed the sparkplugs as well.
I managed to source a Williams carpet at a decent price so when I had that I used the valver carpet I had purchased before as my template and cut the Williams carpet so that it would fit around the cage.
This was the end result:

As the mot was looming up I got the cat refitted at the local kwik fit.
There nice and cheap and do a good job so not worth the hassle of lying down on the floor.
I got the mot booked in at Rentech. And she unfortunately failed.
They said that the rear handbrake efficiency was to low :roll:
A couple of lines where not properly clipped in and the rear brake bias valve was seized. And a rear pad was worn.
Also the good old headlight alignment had to find its way in as well.
So it would appear that I had found another decent mot station :roll:
I soon bought some new handbrake cables and some rear brake pads and got these fitted.
What had happened to the pad was that the pad next to the piston had come dislodged so the pads notch wasn't sitting correctly in the pistons indent so the pad was at an angle. Which was odd.
I then set about unceasing the rear brake bias valve. The valve took 2-3 moves before it was fine so hardly seized up and they could have done that at the station really.
I gave it a load of lubrication and plenty of moves to make sure it wouldn't happen again though.
The rear brake lines didn't quite sit inside the clips on the torsion bar so I had to zip ties these in place. This seemed rather petty imo.
So it went in for its retest and passed but had an advisory on worn ball joint which had been replace recently and a worn boot on the driveshaft which was also recently changed.
So I just found myself another rubbish mot station.
As I apparently had 1 worn ball joint I went and bought myself another one to remedy this.
So I jack the car up and it turned out I had 5mm play in the bearing which was not safe at all. So they obviously know how to do there job at the mot station.
Quite a while ago my sump came into contact with a large log in the road which unfortunately over time had meant my sump was giving away its oil to the tarmac.
So I really had to go and sort out replacing this.
I kept an eye on eBay and managed to source a new one which had been sprayed up locally.

So with a new sump I went and bought the sump gasket which is for a 1.9d but fits the same which is a bonus.
I went about removing the subframe inside my garage.
This is quite simple once you have done one before
The manifold came apart quite easily which was nice and so did the other parts so this didn't take to long.
So it was just to lower the subframe off which remained.
And just like the last subframe I did, the rear drivers side bolt decided to spin, due to the cage corroding away allowing the nut on top to spin.
This was quite annoying so I had to spend some time hack sawing away at it but it eventually surrendered.
Dropping the subframe off was fiddly due to the space constraints of my garage. But with a combination of a couple of jacks and axel stands I managed to lower it down to the ground.
Mid was through lowering it I had forgotten to support the passenger side driveshaft so this fell out thus depositing the gearbox oil onto the floor of the garage lol.
So a mad panic later and abit of cleaning I had lost near enough all of the gearbox oil as the rubber had popped off and wouldn't go back in, lesson learnt there.
After this the subframe was on the floor and ready for cleaning up.
I set about with some white spirit and rags cleaning all the old oil and dirt off.
After this I used a screwdriver to get off the old paint which had been put on over time and sanded down surface rust and existing paint.
With this done I gave the whole subframe a couple of coats of hammerite kurust to protect it

Whilst I was waiting for the kurust to dry I set about cleaning the lower engine bay components.

Here you can see the old sump with no subframe in place

After cleaning the surrounding lower components I set about sanding up any surface rust on the chassis rails so I could kurust them and paint them up whilst I could still get to them.

Once the kurust had dried up I started giving the subframe a few coats of hammerite silver.
I then proceeded with removing the sump once it had drained the oil out of it.
This was going pretty well but in as luck would have it the last bolt decided to round itself off.
So I had to drill the head off and then I could remove the sump.

Once the sump was removed this was what I could see the oil pump and big end caps.

In this picture you can see the end result of the painting of the chassis rails and surrounding parts.
I proceeded with cleaning up the gasket faces as there was quite a lot of old sealant on the bottom of the block still.
Once this was cleaned up I exchanged the plastic baffling from the old sump to the new one and went about fitting it.
Using the gasket sealant I had left over from the rocker cover and the 1.9 sump gasket I went and fitted the sump.
With this fitted and done up correctly I could now start to put everything back together.

Here you can see the subframe in its final painted up state ready to go back on:

When I went to the Renault dealer to get some new bolts etc, they ordered one of the bolts wrong so they gave me the subframe bush instead of a bolt.
So as they had given me a new one I pressed the new one into the painted subframe ready for fitting.
I proceeded with putting the subframe back onto the car; I had new rear bolts and cages, so this went back together a lot easier.
I soon had the subframe bolted back up and I proceeded with connecting back up the steering rack, down pipe etc.
With the other parts back in there homes I decided to crack on with the Renault 19 mount as everyone said it didn't take to long to do.
First of all I removed the battery and its mounting bracket so that I could jack up the gearbox to get enough height to put the mount in place.
On eying up the mount with the subframe the bracket supporting the air feed pipe was in the way of it sitting straight.
So I decided to cut this in half as it was rather overkill for its application.


With this gone I could now get the actual mount to sit correct.
After messing around with bolt configurations I would have to basically cut the wrap around support for the upper mount to allow the 19 mounts bracket to sit correctly.
So using Northys picture in his thread as reference I cut my bracket.

With the bracket cut I could put this on and do up the R19 bracket in the correct position.
With it bolted in I had to rub the paint off the bracket so the earth there could still function and I had to relocate the earth on the top of the gearbox.
With the earths relocated all I had left to do was secure the power steering pipe which runs close to the mount.
With this done I could put the battery mount and re-align the upper gearbox mount.
This was more fiddly due to the 19 mount having to be slightly compressed to make things sit right.
Once done I went and fitted the driveshaft which fell out and refilled up the box with Millers fully synthetic gearbox oil.

Overtime the exhaust wrap had begun to show signs of wear and was looking past its best.
So I had to remove it off the manifold.
This took ages as the clips had all rusted in place and the wrap kept on breaking into smaller pieces.
Looking back at the costs of wrapping. I would defiantly recommend getting it ceramically coated rather than wrapping it up.
With everything back together and connected up all I had to do was wait for a new stub axel and hub
Due to the play I noticed in the bearing earlier on I decided to get a new one.
And fit a new bearing into that.
Unfortunately royal mail weren't playing so it didn't come for ages and I missed another FCS
Once this turned up I fitted it and I was finally back on the road again.
With the Rs Oulton park track day looming up and the lack of free time. I booked the car into Rentech to have the brakes rebled with Castrol response super dot 4 fluid
And have the tracking done.
The car now braked really well with the new fluid in.
When driving up to Oulton Park I heard a clunk along the a34 and didn't think anything of it.
When I came to brake later on the pedal went to the floor, quickly pumping it the car slowed down but sounded like something was grinding.
Pulling over at the nearest parking point it turned out the inner pad closest to the piston had fallen out.
So I went to the nearest town in the hope that there would be a garage which could sort me out for the track day.
I found a kwik fit and thought that would do the job as the one local to me isn't bad.
To cut a long story short I was there for 6 hours and the quote of the day was "Do your brakes look right to you?"
Won't be going back there again.
Oulton Park was good fun and the car performed well. And funnily enough on the intercom they said that someone had lost a pad could everyone check there cars.
I panicked but it turned out a Williams 3 had the same thing happen to him which was odd.


After Oulton Park, i went to the Cadwell Park trackday which was good fun nice circuit.
Unfortunately I haven't got any pictures from the day.
After Cadwell I gave the car a oil change and it went off on a euro trip to do the Spa track day and a detour of the Nurburgring

Not very many pictures of Spa or the Ring unfortunately
Spa is a awesome circuit would say it's my favourite now.
After the Europe trip the Alternator was change as well as the pressure sensor.
Changing the sensor cured the problem I had with the water temp warning and oil warning lights staying always on.
Today I gave the car a decent clean up and changed the front discs and pads which unfortunately I didn't take any pictures of.
This is what the car is looking like now:


[BREAK= Scuttle Work]
Update:
Been quite a while since I have last updated this so here I go:
I left the car in the garage for a while, and found myself a run around car to make do with.
Coincidentally I found a Ph1 Renault 19 16v for sale cheap and up the road.
It was in good condition so I bought this to drive around in whilst doing jobs on the Williams.
One of the first jobs to start off with, was undoing the exhaust manifold again.
The reason I had to take this off was that being a supercrack manifold it needed welding around the headers.
Also taking this off gave me better access for the column as well.
Taking this off was the usual procedure, so didn’t take to long.

I also took off the scuttle panels.


If you where wondering what the tape on the windscreen where for, it was so I knew where the wipers went back on.
I then carried on removing the screen wash tank. You can see in this picture that it never had a proper connector so this will be fixed later on.


In the mean time I continued cleaning up the area. Upon cleaning I found that there is sound insulation on the bottom of the scuttle and against the forward firewall part.
That will be a job to do in the future when I have a power source.
The reasoning behind wanting to take the scuttle off was so that I could do some measurements and make up a template for a Fia battery cut off switch.
So with the scuttles removed I proceeded in making a cardboard template so that I had rough dimensions and angles to work with so I knew what I had to make up.
With the template and abit of time I made this up to mount the cut off switch onto.

With the bracket made up, I tried it for fitment inside the scuttle.
It fitted pretty well with only a few adjustments being needed.

Its not bolted in yet due to needing to drill through the bulkhead. So i will do that later on, as I had more important things to be getting on with.
[BREAK= Cleaning]
Looking inside the arches you could tell that these hadn’t been cleaned for quite some time:


So I set about cleaning these up in slow time..
One of the jobs which I had wanted to do for a while, was remove the charcoal canister and the related piping and brackets.
So I began with disconnecting the pipe work inside the engine bay.

Here you can see the bracket which holds the canister on the Williams. It is very heavy and in my opinion i recon that its purpose is for corner weighting on LHD cars.
As this isn’t needed it’s a good weight saving.

Canister Removed:

So that I could clean up the whole front end of the car, I decided to remove both wings and the front bumper:

I wanted to remove the towing eye as it wasn’t looking its best after 13years of road grime.

To remove the towing eye you have to undo the nut at the bottom and knock out the bolt going through it.
This is easier said than done as its easily seized in.
So after 10mins hammering and alot of Wd40 the bolt was out, and the towing eye could be removed.

Having removed the exhaust manifold, I examined it to work out why it was blowing.
Looking at it, you could see where the manifold had cracked around the headers inside and out.
It was worse on the inside two, but you could see signs of the outer ones going as well.
Talking to Summeh this is where his went as well.
So I will weld that up later on.

To help empty out the engine bay abit, I decided to remove the headlight adjuster pipe work and associated brackets.
So I started with removing the pipe work from behind the adjuster.

[BREAK= Arch Preparation]
Having cleaned up the arches in slow time, I eventually got them all spotless and ready for rust treatment.


I continued with the cleaning onto the cross member.
This took longer as it had signs of hammerite, so this had to be removed.

With the drivers side rust treated with kurust and the surfaces roughed up for painting.
I proceeded with putting on 2 coats of zinc primer.


With these coats on, I carried on with taking off the headlight adjuster pipe work inside the engine bay.

Once this was done, i took out the remaining pipework for the charcole canister.

Once this was removed, I cleaned up the passenger side arch and inner arch.


Whilst cleaning inside this arch, I took off the clip which holds on the airbox feed pipe so that I could get it powder coated


Inside the arch sanded down and awaiting rust treatment:

[BREAK= Arch Painting]
I didn’t take any pictures of rust treating/ primering of the passenger side. Once this was done, I started to hammerite both sides with 2 coats.
So I started with its first coat:


Whilst I was waiting for the paint to dry, I blocked off the vac pipe which was used by the charcole canister.
Now being redundant with that system removed.

Overtime I had noticed that my steering column had been wearing.
So I proceeded with undoing the 4 bolts holding it inside the car. So it could be welded up.
I undone the pinch bolt on the rack, and tried to pull out the column.
I kept on pulling and having a look. But it kept on getting stuck.
I was wondering what it could be getting stuck on.
So after a while looking at it, I decided to remove the pinch bolt completely.
When I removed it. I saw that the pinch bolt had a cam profile on it, which basically falls into a notch on the column. Stopping it come out if the bolt was ever to come undone.
Good safety design, if almost to good


With this removed, I started with the second coats of hammerite outside.


[BREAK= Welding]
As I was going to be relocating the horns to the passenger side, I cut the wiring down and tidied up any wiring I came across.
I soldered on a new plug for the washer pump.
Whilst doing the washer reservoir I removed the rear wiper pump and sealed up the hole for minimal weight loss.


With the exhaust manifold and column off. I stayed behind at work one afternoon and welded it up around all the headers.


When I was welding up the column, I found that the rubber inside kept on melting and catching on fire.
Looked rather cool on the work bench, but something to bare in mind if welding in situation..
Steering column painted up once welded:

As I had fair bit of heat wrap spare from last time, I decided to re-wrap the manifold as the gains in my opinion where worthwhile.

Before I took the car apart, I was suffering from a misfire which would only happen when the car was on all day.
And do it say a couple of times, was rather weird.
So I decided to buy a new coil pack from GSF. This worked out at around £19 so rather cheap. Always thought they where more.

With the steering column welded up, I proceeded with fitting it back in.
I decided that I wanted to lower the column. So I put washers in between the column and mounting points to bring it down as much as possible.

Whilst there was plenty of space, I fitted my newly acquired heat shield from Totti

The assorted brackets that I had taken off, I took to the local powder coaters.
I had the horn brackets, airbox bracket and the 2 wire brackets on the bulkhead done.
As well as the towing eye.


I sourced a new exhaust gasket so that I could fit the manifold back on.

This was where I ended up relocating the horns to

I will see how I get on with them here. I may relocate them slightly in the future.
With all the painting done and the parts fitted. I proceeded with cleaning out the insides of both the wings and bumper and fitted them.
I also cleaned the arch liners and fitted them to.

I then proceeded with putting back on the scuttle panels and wipers. As I didn’t have time to fit the cut off switch.
Exhaust manifold fitted.

And here you can see the towing eye behind the bumper, nice and visible.

[BREAK riving]
Now with the car back together, I went and got the tracking sorted.
With the car all ready, I took it back over to Germany to the Nurburgring with Totti and a friend.

Being April time I thought the weather would be rather good.
I woke up one morning to find this.


Had a great time driving around the track, and despite the random weather the eiffel mountains bring. We got some decent laps in.


Once back from the ring, I left the car in the garage for quite some time…
I recently brought her back out for some fun with Summeh and Wobba

And that’s about it so far.
Im currently taking out the aux tank, and i am going to be cleaning up the underside of the car.
So i shall update in due course.
[BREAK= Rear End]
Update:
With the front end of the car in good nick now. It was time to start with the back :roll:
So off came the rear bumper:

With this off i began with cleaning and scraping away to get it prepared for painting.
Unfortunately i noticed a couple of holes which will have to be sorted out
Inside of the arches prior to cleaning:


Underneith of the car:


The plan is to remove the aux fuel tank, then run a single tank.
I will hopefully drop the main tank, and tidy up the fuel lines later on.
I removed the exhaust so that i had better access to the underside. I also wanted to remove the rear towing eye.

After fighting with the towing eye, I decided to leave it for today as I couldn’t be making noise too late.
So i started with the boring job of cleaning.
It’s always nice to see how the stock underseal hides rust underneath it.

And that's as far as i have got.
I will update more regularly to save me time, hopefully lol.
[BREAK= Rear End Continued]
I continued cleaning up the underneath removing as much loose under seal as practical.
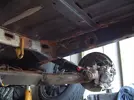
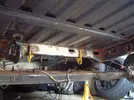
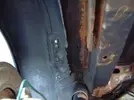
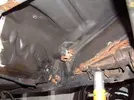
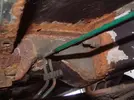
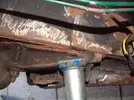
To get access to the rear chassis rail the auxiliary fuel tank was removed:
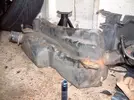
Which unfortunately exposed a hole
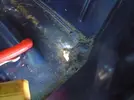
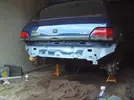
With the areas fully cleaned up back to bare metal.
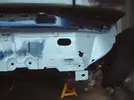
Kurust was painted on and when that was dry, Zinc 182 primer was painted on:


[BREAK= Torsion Bar Removal]
Next up was removing the torsion bar so that i could paint up the mounting areas of the torsion bar along whilst examining it for corrosion.
When the torsion bar was off, i planned on giving it a lick of paint also for aesthetics.
Unfortunately removing the torsion bar was easier said than done..
The bolts was seized sold, which meant they had to be drilled out..
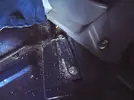
Of all the bolts to not be made of the usual french cheese, these had to be them.. Eventually had to use some cobalt drills to open up the head, and then got a friend to support the nut at the bottom whilst i turned it with a breaker bar and that eventually sheared the nut off
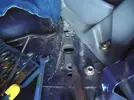
Other side done also:
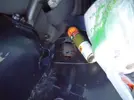
With the torsion bar removed i set about cleaning it up and painting it:
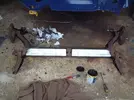
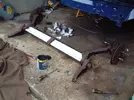

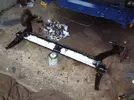
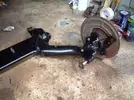
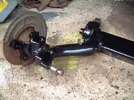
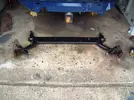
With this done, i finished cleaning up the underneath of the car.
Once treated with primer i began to paint the underside:
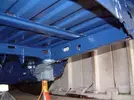
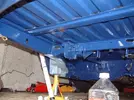
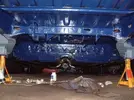
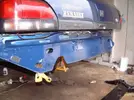
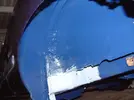
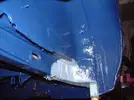
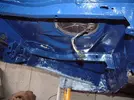
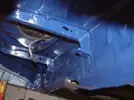
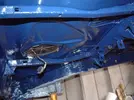
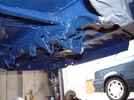
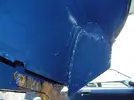
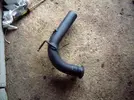
As i was getting bored of painting, when removing the exhaust i had noticed that the exhaust hanger had come away from the exhaust thus making a hole in it.
So i welded it back to the exhaust and built up the surrounding area, then gave it a fresh lick of paint:
[BREAK= Underside Painting]
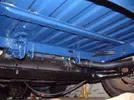
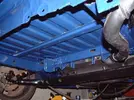
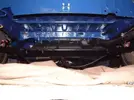
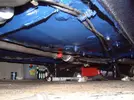
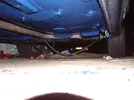
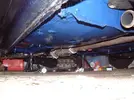
I continued spending many evenings cleaning and painting and refitted the rear suspension and the 1.2 filler neck to replace the aux fuel tank:

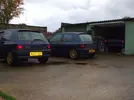
With the car nearly done, Wobba & Leighanne popped down for a mini meet:
[BREAK= MOT & Ace Cafe]
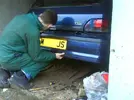
As the car needed welding in a few places along with my lockup not having any power meant i took the car to be finished off at Rentech - Independent Renault Specialist
They had the car for a little while and finished off the brake lines, welded up where was necessary and re-bled the brakes and got it through the MOT
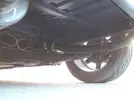
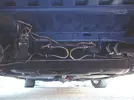
With the car back on the road, there was a French car night on at the Ace Cafe London, so with a few of the locals we drove up to that for the evening:
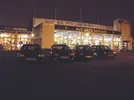
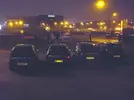
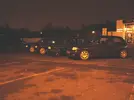

After the meet we ended up driving through London which was fun, especially as my brakes decided to be a tad noisy which drew attention!
Sounded like an old bus coming to a stop..
[BREAK= Wales Run]
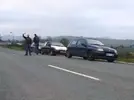
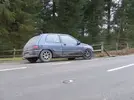
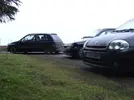
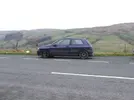
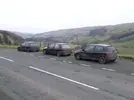
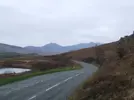
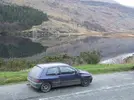
Talking to Matt Wills and Lunner a spontaneous road trip was organized a few days before Christmas Eve heading from South Wales to North Wales.
Route Planned:
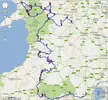
This inevitably required a nice early start..
So we could catch dawn rise in the valleys:
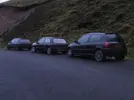
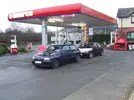
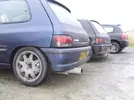
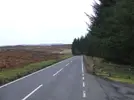
We continued driving across awesome roads, with barely any traffic, along with the weather being on our side not verging on too cold or damp.



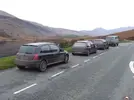
[BREAK= Car Cleaning]
After the Wales the run the car needed a good clean:
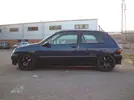
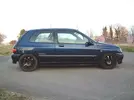
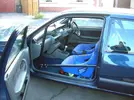
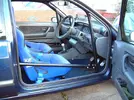
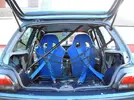
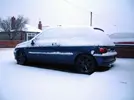
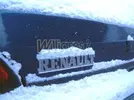
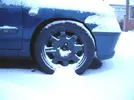
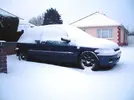
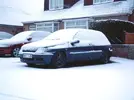
A few weeks later i awoke to quite abit of snow, Que the usual car in the snow photos:
[BREAK= New Coilovers]
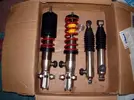
A set of Leda coilovers came up new old stock at an attractive price, and having never been to fond of the AVO coilovers a deal was struck and i had a new set of expensive coilovers:
Before fitting them, i went to a Goodwood run as a part of a PistonHeads.com :: Speed Matters run.
This had a lot of exotic machinery turn up and then was sectioned off into smaller groups for a run to Goodwood.
Nice hearing the various exhaust burbles and seeing some proper cars.
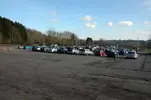
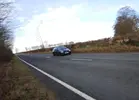

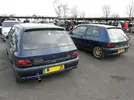
In preparation for fitting the Leda coilovers i had been keeping an eye out for a matching spring rate torsion bar which are found on Renault 5 Extra vans. As luck would have it there was 2 vans at the local scrap yard
I couldn't get one out as it was stuck solid, but the other was on ramps which i was fortunate enough to be allowed to work on, so i struggled to remove a nicely seized torsion bar, hoping that the thread on my bolt wouldn't give way.
Thankfully i got them off and the scrap yard was reasonable on there price so that was something to be fitting later.
I set about fitting the front coilovers first, being a relatively simple task now with the amount of times that the suspension had been removed.
Unfortunately when i came to fit it, it fowled the strut for some odd reason.
Nothing that a little bit of angle grinding couldn't sort out:
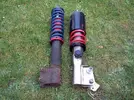

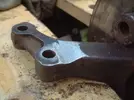
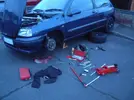
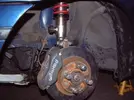
With the fronts done, i set about fitting the rear torsion bars, which was simple enough, what was trickiest was making them so that i could attain the heights as specified in the Group N manual:
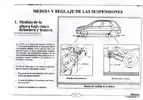
With both the front and rears setup as per the manual it was time to adjust the rebound to suite.
Initially i had to much rebound, which meant the car wanted to oversteer just going around a corner normally!
That was soon remedied and the car felt far better than it ever did with AVO's
The rear uprated torsion bar really evened up the car, making it feel closer to the standard car setup albeit a lot stiffer!
[BREAK= 3 Peaks Run]
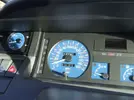
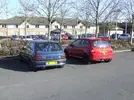
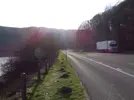
With the new suspension fitted, what better way to test it out than with another cross country drive.
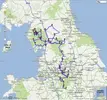
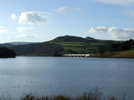
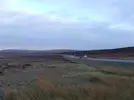
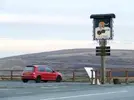
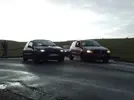
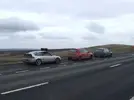
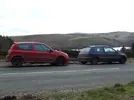
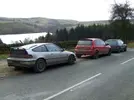
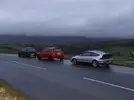
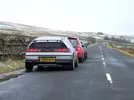
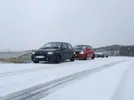
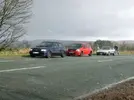
This time the plan was to meet up in the Peak District, and then drive through the Peak District up into the Yorkshire Dales and then across to the Lake District.
Route Planned:
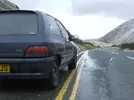
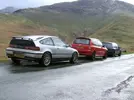

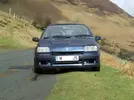
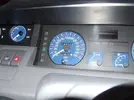
[BREAK= FCS]
After the 3 peaks drive i decided to sell the car. After having the Renault 19 16v for a while, i fancied something more normal and comfortable like the 19 but more modern.
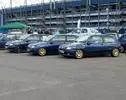
The car was put up for sale, and i decided to pop up to the French Car Show as it was a good excuse to advertise the car whilst there:

[BREAK= Williams Standardized]
Unfortunately i had no interest in selling the car, as per the sale thread: 1995 Renault Clio Williams 2
And despite dropping the price numerous times i still had no interest which was a shame.
I decided that looking into the scrappage scheme it was quite a good offer if you didn't buy a highly depreciating car.
So a deal was done, and the car was traded against a new one and i set about removing all that was of any worth on the car and replacing it with standard bits sourced cheaply as possible.
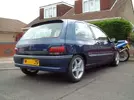
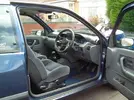
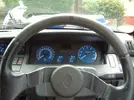
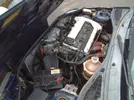

It was a shame that the car couldn't be sold on for an acceptable price, so at least it could of lived on.
A lot of the parts where sold on to various Clio's so it still lives on in ways on many cars
And in case you was wondering what the natural replacement for a Williams was:
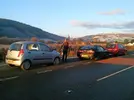
Hyundai i10 :lol:
Thanks for reading!
When I went up to have a look at the Williams, I took some spare wheels which Naples Kindly lent me.
When I was happy with the car, I left the wheels up there and got a train back up there later on.
This is what she looked like on the drive back from Wales:

As you can see it had an odd coloured fuel cap where the locks had been changed at some point.
So when I got home I set about taking the lock out of the original 449 cap and swapping them over.
After breaking the 449 one, I worked out the proper way of taking the lock out.
So I did it right on the one which counted, and put it on which improved the look straight off.
After doing that I proceeded with putting the cat on, so I could put it in for a Mot.
Which when I did, I realised that the spring joint flange wasn't on and the original one had been butchered by some exhaust place.
After a lot of filing away, I managed to get it to fit well enough so I could put the cat and exhaust on.
So I was ready to get a Mot in time for FCS :roll:
Got my phone call and it failed well.
Which was annoying, it needed headlight alignment, side repeater bulb, Exhaust had a hole in it, Front brakes seized, rear handbrake efficiency 3% and corrosion.
With my lack of a welder I booked it in to have the corrosion sorted, and thought I would fix what it failed on.
I took the Scorpion centre section off, and took it up to my mates to get welded up. This came back good.
I then set about un seizing the rear callipers, these where pretty seized.
I kept hammering them back and forth for a while with plenty of wd40.
After a while it seemed they where moving happily, but the handbrake wasn't working well still.
So I adjusted the cables and still no joy.
So new callipers seemed the best option, and I had wanted decent rear brakes for a while.
So I ordered 2 new rear callipers, new handbrake cables and some Mintex rear pads.
When I got these I fitted, I bled them up and the handbrake was a lot better.
Now when I did the wheels up the car wouldn't move lol.
Then I set about unceasing the Wilwood 4 Pots, these where making plenty of creaking and had worse stopping power than my revised valver setup.
So I took the pads out, and Wd40 / Copper greased the pistons up, and after a lot of pushing of each piston back.
I got them lovely and quiet and the stopping power is now what people comment about them.
When I looked at the headlight to adjust the aim it turned out the adjustment screw had broken which was annoying.
I decided that most of my driving is at night, so a pair of new headlights would be a good idea.
So went and got some from Gsf, and put them in and the difference they make I would say are worth for the cost.
With all the faults fixed as far as I was concerned, I gave her a clean and rebooked an Mot


I was confident I would finally get an Mot after not being able to drive it for a month, and when they rang me up saying it had failed again, I was most displeased :evil:.
They said the rear handbrake wasn't up to the required efficiency despite all new parts.
And failed it on the headlight alignment despite asking them to do it before testing.
But they "fixed" it for some more money even though I doubt they did, but that's the benefit of the new mot system :roll: and I eventually had an Mot
I also got advisory's on: 'Racing suspension' 'Buckets and Harnesses', don't think I will be going there again.
With an mot I set about refurbing the Williams wheels which I had bought off Kj16v.
They where pretty corroded and curbed, so I used a file to take out the curbing and then used sandpaper to get a good finish
Came out a lot better than you would think, with this done I sent them to be shot blasted and powder coated.
This was the end result:

With some painted Williams wheels I put on some new Goodyear Eagle F1's, and they where put onto the car.
As I wanted to tidy up my interior I decided I would take out the roof glue and stuck on cardboard bits.
This took ages to get off, but eventually found a good way of using the blade to get it evenly off.


When I took this off I was surprised at how much glue and bits of cardboard soon added up.
My eventual plan is to take all the sound deadening and glue/clips out and spray up the inside in 449.
Other jobs which I have done have been fitting a new Fuel Filter, Fitted my Magnecores, And a CD player as im not hardcore lol.
One of the more recent things I have done has been attempting to sort out the knocking which I was getting from the Gaz Coilovers which where fitted to the car.
I initially thought they where the top mounts, but it turned out that it was the design of the Coilovers which was at fault.
This meant the top mount wouldn't spin on its bearing, so I bought some washers from B&Q and used 12mm worth on each side, and rebuilt them back together.
This has made them quieter but they still make noises and need servicing.
The bonus is they have lowered the top threads as you can see:

As I now had an mot, I no longer needed to have my cat fitted.
So I booked the car in to get an extended flange made up for the supersprint manifold.
As the early ones where apparently not long enough and needed modifying so this was done.
This was the end result:

This was done allright, but they failed to sort out the exhaust hanging really low, I have found a way of sorting it out after trial and error but im not happy with the Scorpion.
Will see how it goes though.
This is how it was looking up to this point:


The Final thing I have done to it so far was changing the stickers.
I thought I would go for some black Williams Stickers to match the black wheels.
This was one of those ideas which seemed a good idea in theory, but when I did it the stickers it went wrong and the black didn't work out how I had intended, so think I will go for gold again.

That's as far as I have got with the car for now.
The future plans are to renew the front suspension - Wishbones, Arb Rubbers, Track Rod Ends,
New Coilovers.
Paint the Inside 449.
Sort Out The Paintwork.
Exhaust Wrap.
[BREAK=Sound Insulation]
I recently did an oil and oil filter change so I knew the history of when it had been changed, no pics as its not really very exciting but always buy a genuine filter, the one which was in there was twice the size of the normal one which made it a tad tricky to get out of the engine bay :roll:
As I wasn't too happy with the aerial on the roof and not actually having a cable going to it I decided to take it out and to use a rubber bung to stop it leaking:

As you can see I had to use some tape as I didn't take into account that there would be 2 holes.
So will have to sort that out later.
Another thing I have put in where some Williams mats which Zollo kindly gave me:


These have come in handy for day to day duty's for keeping the car clean inside and still making it feel like a normalish car lol.
I decided that I would start the fun task of taking out the sound insulation; this was one of those jobs which I eventually wish I didn't start as it was so boring and took quite a while.
Here are the pics for when I started it:


As you can see I slowly got through the sound insulation with the trusty hammer and scraper / heat gun combo.
With only half the sound insulation taken off during the evenings, I have been taking odd bits off:


As you can see, I still had remnants of the tar and due to me being paranoid decided not to use the heat gun on areas near the fuelling system, as apparently the heat guns can set alight a bbq.
Due to not using a heat gun I resorted to a "chisel" and hammered it off which took ages and left a lot more remnants of tar.
When I got to the front of the car I took the passenger bucket seat out and then decided to take out the roll cage for ease of access so somehow managed to take that out on my own.
With it out I got rid of the remaining sound deadening in the front of the car.
Its surprising what the insulation hides from you, I have noticed a couple of rusty bits which id never of known about.
With just the remnants of the sound insulation left I set about using a scraper to get rid of the fine bits and white spirit to get rid of the glue which is left.
After a while this was the end result:


As you can see there a few bits which need cleaning but I have run out of motivation to do those so will late till later.
It is a boring job to do lol.
I weighed all the sound insulation which I have taken out and it came to 12kg on some scales, so not the most accurate but a good indication of how much it weighs.
Due to my bonnet having horrible dents on it and wanting to shed some more weight I managed to find this nice and cheap:

A carbon fibre skin bonnet. Nice and light just need to get some pins for it later on.
Not sure to spray it or not due to it having scratches in the lacquer.
Another addition was fitting my fire extinguisher, as these can come in quite handy :wink:
I put it under the passenger seat as this is the easiest place to reach and unhook it in a rush.


Other odd jobs which I have done where change the coolant for some nice new Type D, since doing this I have been getting better mpg to!
I also got some Piaa headlight bulbs to improve night driving, and they have been a good improvement and give a nice white light.
Not bad for £29.
Quick pic of them:

One of the problems I found of driving a stripped out car day to day is that there is no where to store you phone and odd bits, so after keeping an eye out in the scrappy I managed to get hold of the rare vent pocket for £5
So I went and fitted it:

Another job which I did was to fit the Rocker cover which I had powder coated and fit my carbon fibre inlet manifold cover
Before fitting this, I had to fit the rocker cover breather hose which I got off Mat brown.
This was a simple job, but I took the airbox off to make it nice and simple and to also clean out the throttle body.
So I did this and when I had the airbox off, I looked at my air feed pipe and it was full of gravel from the gravel trap :roll:
There was loads of it in there which wouldn't have done any help for the induction.
So if your car ever goes into the gravel trap its worth cleaning this pipe out.
With everything fitted and cleaned back up, I fitted the rocker cover.
This was pretty simple so only the end result picture:

I have the pulley cover to go on as well but I haven't gotten round to fitting that yet.
After driving the car and getting quite fed up of it driving bad, I have decided to take it off the road for a while so that I can get all the parts which I want to fit.
Then when it's back on the road it will drive just how I want it
So it's now gone in my garage now, and I have begun saving up for a nice long list of parts which should hopefully have me setup for track days next year.
Ironically on the last night of driving the car I got in and hear the lovely noise of air coming out of the tyre.
So I will now have to buy another Eagle F1
Here it is tucked away for quite a while...

So will update the thread in a while.
[BREAK= New Parts]
Update:
I now have the car back on the road, abit sooner than expected, but I was getting bored not having any transport and whilst it was off the road I had accumulated a small pile of parts to go and fit:


First off all I needed to sort out the exhaust, due to having problems with it hanging low in the middle.
I decided to change exhaust to one which had a centre mount which would keep it hanging high.
When I got the exhaust, I decided to give it a good clean up and paint it in black high temp paint to make it look tidier.


Unfortunately I didn't take any pictures of the exhaust after being painted but it's the same but black.
I went to fit the exhaust, and if only Clio exhausts where made to fit anything. Things would be so much easier.
I spent some time sorting out the blow I had on my manifold so took that off and resealed it.
When I came to mate up the decat to the exhaust, there was smaller bit of pipe inside the decat to ensure a good fit normally.
Due to the Devil having a smaller pipe diameter, it meant the gaskets wouldn't sit flush
Also when I went to line the centre hanger up, the hanger on the exhaust seemed to be too far away for the exhaust rubber to stay on the hanger which sucked.
So I had to take the decat off and grind away the lip it had, to ensure that the gaskets fitted fine.
And with the central exhaust hanger, I took it off the car which was easier said than done.
My drill had broken so I had no real way of getting the seized bolt out.
After borrowing a drill from my friendly neighbour.
I got the bracket plate out and decided the best way to sort this would be to make some spacer plates to bring the mount closer to the exhaust hanger.
Then weld a washer onto the end of the hanger to stop the rubber sliding off if it was at abit of an angle.
So with that done and me foolishly forgetting to take pics, it was fitted to the car and that worked great and all lined up well which was good.
Shame that when I got round to fitting the backbox in the dark and rain that it wasn't simple to line up.
After looking at it, it would seem that there is to much bend on the pipe to get it over the torsion bar, so instead of it hitting the torsion bar like usual its hitting the chassis.
The only way I have solved this temporarily is by the trusty cable ties.
I think I will get an exhaust place to sort it out later on, as laying on wet tarmac in the cold is losing its novelty value.
Pic of the centre section on the car (only one I took unfortunately)

With the exhaust on, albeit with the aid of cable ties.
I proceeded to crack on with fitting my new suspension.
When I bought the car it came with Gaz Coilovers.
But due to all the shopping runs the previous owners must have done :wink: they where well past there best.
So after looking at what was on offer and listening to what people had on the forum, I decided to go with some Avo Coilovers with 180lbs springs
I decided that I would proceed with fitting the easier shocks first which in theory should be the rear shocks.
One of the shocks came out fine, but the one near the petrol tank I couldn't undo the bolt with a spanner.
So I had to use a breaker bar to undo it.
Great if I could get to the bolt from that direction but as the tank was in the way it wasn't easy to get to.
So I got my sister to stand on the torsion bar whilst I undid it.
It worked well and eventually I had the shock out, and I could proceed with fitting the new ones.
Here are the new shocks fitted:


With the rear shocks on, I started to fit the front shocks.
I had to take off old Coilovers first which was simple enough.


With these off, I proceeded with fitting the new Avo Coilovers.
Following the drawing supplied, this was relatively straight forward with just having to cut the bump stop to suit the ride height.
So I put the new top mount bearings on and rebuilt the shock and put it back onto the car.
When I put it on I noticed that the thread wasn't long enough on the top of the unit for the securing nut and top threaded plate.
So I had to take the nut off and only run with the threaded top plate to get it to fit on the thread correct.
With both shocks on (only took one picture)

I proceeded to put the car back on the ground.
When it was on the ground it was very low, I could just see half the tyre.
It looked good like that but had no handling or practicality benefits being like that, so I had wind it up to get it to a useable height.
After a lot of messing around I got it to the top of the thread and this was as high as I could get the shock:

This is still to low imo, so im going to have to measure my spring lengths and see what Avo say about it..
I have also got a few more parts to fit so that it will be good as new.
Got some new wishbones to fit when I do the Arb rubbers and track rod ends

I also won these on eBay for £11.50 which was a bargain, should fit on the bonnet nicely.

And after some jumping out of gear incidents, I have invested in some new engine mounts and the R19 gearbox mount.
So it should be good for some time.

That's it for now.
I have got to crack on and fit a lot of the parts I have.
Unfortunately it keeps raining
[BREAK= Assorted Work]
Update:
It's been an age since I have updated this, so I will try and remember back from where I left it.
After buying the new wishbones and Arb rubbers, I proceeded with fitting them.
The Arb rubbers where a lot easier to fit than valver ones due to the revised clamping setup which made things a lot quicker.
The old rubbers where cracked so it was worthwhile changing.

Putting the new wishbones on was easy enough, the bolts where co-operative so it didn't take too long.


And here's the new ball joint with a see through rubber;

With the new parts put on, I proceeded to put it back together.

I then repeated this for the other side, but I didn't get pictures for it.
Also around this time I got my roll cage professionally fitted at Xsport Racing - Motorsport Preparation, Roll Cages, Composite Panels & Much More of whom I would recommend, as they did a good job welding it in.
Unfortunately when they where fitting it in, they let something slip and cracked my windscreen:

This meant I got a new one for free, which I was quite happy about as it was the aged original one.

I unfortunately didn't really take many good pictures of when it was first fitted.
With the cage fitted in, I preceded to paint and under seal some of the areas where the old under seal had been damaged by the heat of welding.
And to under seal up the additional harness mounting point which they had fitted.


Next on the agenda was having a go at wrapping up my manifold with heat wrap.
This meant having to take off the manifold, I thought I may be lucky and take it off as a whole.
After a lot of messing around and trying to push the engine back and forwards, it was clear there isn't enough room unless you start taking off the starter motor etc.
So I just separated the down pipe and took it off the normal way.

Here is the manifold off and cleaned up ready for wrapping.

I proceeded with wrapping up the manifold with my 1' x 50" wrap on the manifold.
I made sure that the wrap was nice and wet so I could get it tighter and stop me getting itchy hands.
I thought it wouldn't be that tough to wrap the manifold, just a more complicated Christmas present wrap lol.
Soon found out having to feed the whole wrap through the pipes became tedious so I worked out how much I would need, and cut it down.
I still had to feed it through the pipes and I found with the wrap I was using, feeding it through caused it to fray on the edges which wasn't too much fun.
I eventually got the manifold wrapped, but only just as I ran out just by the joining bit.
So I made sure the clips where holding it nice and tightly on.
I originally bought some metal cable ties, but these where rubbish imo as you couldn't get the tightness on them to hold the wrap down.
So I resorted to some jubilee clips and that did the job nicely.
Here's the manifold once wrapped:

Having run out of the manifold wrap, I had to order some more from rally design.
This time I thought I would go on the safe side and buy some 2' x 50" so I would definitely not run out.
The down pipe was a lot easier to wrap due to it only having 2 pipes to go through, this was soon done and this is what it ended up like.

Whilst the manifold was off I decided to give the area around here a good clean up. and cable tied the fuel lines close to the clipping points so they couldn't get near the belts area.


Whilst I was cleaning the engine bay I noticed that the starter motor live was loose on its connection

So with some pliers I made the crimped connection smaller so now it was a lot stiffer to go onto the starter motor.
So a lot less chance of it coming off.
With the manifold and down pipe wrapped up, it was time to fit it back to the car, this was easy enough to get the manifold back in, once I remembered what way you had to put it so it would slot back in.
But I couldn't get the down pipe to mate back onto the manifold.
After abit of time playing around, I realised where I had put the jubilee clips on the down pipe to stop the wrap coming off this was making the pipes stick outwards more.
So a quick adjustment of the clips and it soon went back together, and bolted it back up.
Here's what it looked like all fitted again.

After driving around with the wrapped manifold, I noticed that the engine bay was a lot cooler, the car felt more responsive.
The exhaust also popped more, so I would say that it was worthwhile doing.
Whilst driving about, I noticed that the exhaust wasn't sitting correct at the back and was making abit more noise.
It turned out that the securing bracket which had come with the exhaust had decided to depart the cars company.
So I needed to make up a new one.
Playing around at work I came up with this:

Fitted it with some new nuts and bolts and double nutted it to so it wouldn't escape again.
It did the job nicely.
With the cage in, and the floor lacking its sound insulation.
I decided it would be a good time to get the floor painted.
So I went and got a tin of hammerite smooth blue to paint the 1st half of the car, and some spray cans to paint the boot.
The plan being I would be getting a carpet for the front so no need for a top quality paint finish at the front.
So I slowly masked the cage up and proceeded with painting the floor.


With the floor painted up, I proceeded to put everything back in once it had dried.
I had the enjoyment then of driving around in a car which smelt of paint for a few weeks.
I got a call from Matt Wills to have a little burn and chat to see his new Trophy so popped up and had a look:

Was nice having a comparison between the two, the Trophy is a very nice car.
It wasn't getting far away from the Oulton park track day I had booked, and there where quite a few jobs left to do and not a lot of time to do it in.
Due to work and lack of motivation, I decided to get the outstanding jobs I had left to be done at Rentech. Rentech - Independent Renault Specialist.
This meant that I had new discs and bearings fitted at the rear.
A new front hub and bearing on the driver's front.
Trackrod ends fitting and tracking
And new pads as well as the 2 main engine mounts and cam cover.
And a full bleed of the brakes and an oil change.
Engine bay with its new cam cover:

As usual I can fully recommend mike for getting anything Renault related done.
In the end it turned out the track day was cancelled due to snow so that was quite annoying.
Luckily I ended up getting a refund for the day so not to bad.
Driving the car with no door panels and trim meant that I was slowly losing the novelty of a fully stripped out car.
So with this in mind I set about buying some Williams interior.
After a while I came across everything I needed bar a carpet.
So a trip up north later to get it, I had some interior trim:


With the new trim, I soon set about cleaning it all up with shampoo so it was good as new.
I then got around to fitting it into the car.
Before fitting I decided I would spray paint up the boot.
So with some aerosol cans and a lot of masking up, the boot was soon sprayed up in a nice shade of 449.
When fitting the trim I found in some places I had to cut the panels to get the around the roll cage which was abit annoying.
This was the end result though:


All that's left is to fit the roof lining and source a carpet.
After being messed around with Avo and Motorsport World I had to buy the correct springs for the car to sort it out.
So I fitted some 9" 180lbs springs to the car.
This didn't take to long and the springs where finally compressed in the shocks. This was the end result:

Finally the car drove better absorbed bumps and didn't grind on everything.
I also got around to fitting some genuine headlight protectors I bought of Justin.
They look good and keep the new headlights in good condition.

I helped organise a route with some of the people over at Cliosport for a breakfast run meet.
So I went along and ended up leading most of it.
Wasn't a bad meet, but there where far too many people.
As such people got lost.
Car was driving real well on the meet which was good.


As I had done quite a lot of servicing to the car and it was running a lot better than when I first got it, I decided to take it down to Santa pod along with Summeh to see if I could improve on my times.
It was a good day out, the weather was good and a decent turnout of Clio's where there too.
I managed to get nearly 30 runs in so I was happy with that.
I ended up beating my best time, and ended up with a 1/4 mile of 14.88

After Santa pod the car was booked into the bodyshop to have the previous owners handiwork sorted out.
These are the pictures after it had been sprayed up:


I also purchased some white Speedline stickers and put these on:

Due to the good turnout of the Cliosport breakfast run and already having tested out the route, I decided to have a breakfast run too.
This was a good turnout and the drive was enjoyable.
Clio was yet again driving well.


I went over to Germany to have a drive of the Nurburgring.
The morning before, I was awoken being told that the car had a puddle of green fluid under it.
Turns out the radiator had decided to give up at the best of times.
So after a mad panic of sorting out the radiator by fitting a new one from Gsf I was ready to go.
What a place, brilliant atmosphere and the ring itself is brilliant fun to drive.
Defiantly worth going to at least once.
Heres some pics:


At the end of the trip, I was reminded of Avo.
So I had to source a new shock..
Basically only use products for there intended use, as the Coilovers I bought where not for track days so they have a design weakness....
Shortly after Germany I had a track day at Brands Hatch.
All that needed doing to the car for the track day was an oil change, fitting the new shock, and tracking.
The actual day itself was great fun and it raining made it good fun.
Didn't half chuck it down. Which made for some interesting corners.
Unfortunately after the Ring, Paddock hill wasn't quite a dip as it would have been but still a fun corner in the wet.
Here's a couple of pics of the day:


After brands I managed to source a Williams carpet so I can get that fitted.
Should be nice to have the proper carpet in the car.
Other than that I have just been driving it.
[BREAK= Subframe]
Update:
I had been noticing that my rocker cover gasket had been leaking down the back of the block abit more than usual so I decided I would go and buy a new rocker cover gasket and some gasket sealant and replace the gasket.
This went well, no pictures unfortunately but the leak was stopped with the new gasket.
And whilst everything was out I changed the sparkplugs as well.
I managed to source a Williams carpet at a decent price so when I had that I used the valver carpet I had purchased before as my template and cut the Williams carpet so that it would fit around the cage.
This was the end result:

As the mot was looming up I got the cat refitted at the local kwik fit.
There nice and cheap and do a good job so not worth the hassle of lying down on the floor.
I got the mot booked in at Rentech. And she unfortunately failed.
They said that the rear handbrake efficiency was to low :roll:
A couple of lines where not properly clipped in and the rear brake bias valve was seized. And a rear pad was worn.
Also the good old headlight alignment had to find its way in as well.
So it would appear that I had found another decent mot station :roll:
I soon bought some new handbrake cables and some rear brake pads and got these fitted.
What had happened to the pad was that the pad next to the piston had come dislodged so the pads notch wasn't sitting correctly in the pistons indent so the pad was at an angle. Which was odd.
I then set about unceasing the rear brake bias valve. The valve took 2-3 moves before it was fine so hardly seized up and they could have done that at the station really.
I gave it a load of lubrication and plenty of moves to make sure it wouldn't happen again though.
The rear brake lines didn't quite sit inside the clips on the torsion bar so I had to zip ties these in place. This seemed rather petty imo.
So it went in for its retest and passed but had an advisory on worn ball joint which had been replace recently and a worn boot on the driveshaft which was also recently changed.
So I just found myself another rubbish mot station.
As I apparently had 1 worn ball joint I went and bought myself another one to remedy this.
So I jack the car up and it turned out I had 5mm play in the bearing which was not safe at all. So they obviously know how to do there job at the mot station.
Quite a while ago my sump came into contact with a large log in the road which unfortunately over time had meant my sump was giving away its oil to the tarmac.
So I really had to go and sort out replacing this.
I kept an eye on eBay and managed to source a new one which had been sprayed up locally.

So with a new sump I went and bought the sump gasket which is for a 1.9d but fits the same which is a bonus.
I went about removing the subframe inside my garage.
This is quite simple once you have done one before
The manifold came apart quite easily which was nice and so did the other parts so this didn't take to long.
So it was just to lower the subframe off which remained.
And just like the last subframe I did, the rear drivers side bolt decided to spin, due to the cage corroding away allowing the nut on top to spin.
This was quite annoying so I had to spend some time hack sawing away at it but it eventually surrendered.
Dropping the subframe off was fiddly due to the space constraints of my garage. But with a combination of a couple of jacks and axel stands I managed to lower it down to the ground.
Mid was through lowering it I had forgotten to support the passenger side driveshaft so this fell out thus depositing the gearbox oil onto the floor of the garage lol.
So a mad panic later and abit of cleaning I had lost near enough all of the gearbox oil as the rubber had popped off and wouldn't go back in, lesson learnt there.
After this the subframe was on the floor and ready for cleaning up.
I set about with some white spirit and rags cleaning all the old oil and dirt off.
After this I used a screwdriver to get off the old paint which had been put on over time and sanded down surface rust and existing paint.
With this done I gave the whole subframe a couple of coats of hammerite kurust to protect it

Whilst I was waiting for the kurust to dry I set about cleaning the lower engine bay components.

Here you can see the old sump with no subframe in place

After cleaning the surrounding lower components I set about sanding up any surface rust on the chassis rails so I could kurust them and paint them up whilst I could still get to them.

Once the kurust had dried up I started giving the subframe a few coats of hammerite silver.
I then proceeded with removing the sump once it had drained the oil out of it.
This was going pretty well but in as luck would have it the last bolt decided to round itself off.
So I had to drill the head off and then I could remove the sump.

Once the sump was removed this was what I could see the oil pump and big end caps.

In this picture you can see the end result of the painting of the chassis rails and surrounding parts.
I proceeded with cleaning up the gasket faces as there was quite a lot of old sealant on the bottom of the block still.
Once this was cleaned up I exchanged the plastic baffling from the old sump to the new one and went about fitting it.
Using the gasket sealant I had left over from the rocker cover and the 1.9 sump gasket I went and fitted the sump.
With this fitted and done up correctly I could now start to put everything back together.

Here you can see the subframe in its final painted up state ready to go back on:

When I went to the Renault dealer to get some new bolts etc, they ordered one of the bolts wrong so they gave me the subframe bush instead of a bolt.
So as they had given me a new one I pressed the new one into the painted subframe ready for fitting.
I proceeded with putting the subframe back onto the car; I had new rear bolts and cages, so this went back together a lot easier.
I soon had the subframe bolted back up and I proceeded with connecting back up the steering rack, down pipe etc.
With the other parts back in there homes I decided to crack on with the Renault 19 mount as everyone said it didn't take to long to do.
First of all I removed the battery and its mounting bracket so that I could jack up the gearbox to get enough height to put the mount in place.
On eying up the mount with the subframe the bracket supporting the air feed pipe was in the way of it sitting straight.
So I decided to cut this in half as it was rather overkill for its application.


With this gone I could now get the actual mount to sit correct.
After messing around with bolt configurations I would have to basically cut the wrap around support for the upper mount to allow the 19 mounts bracket to sit correctly.
So using Northys picture in his thread as reference I cut my bracket.

With the bracket cut I could put this on and do up the R19 bracket in the correct position.
With it bolted in I had to rub the paint off the bracket so the earth there could still function and I had to relocate the earth on the top of the gearbox.
With the earths relocated all I had left to do was secure the power steering pipe which runs close to the mount.
With this done I could put the battery mount and re-align the upper gearbox mount.
This was more fiddly due to the 19 mount having to be slightly compressed to make things sit right.
Once done I went and fitted the driveshaft which fell out and refilled up the box with Millers fully synthetic gearbox oil.

Overtime the exhaust wrap had begun to show signs of wear and was looking past its best.
So I had to remove it off the manifold.
This took ages as the clips had all rusted in place and the wrap kept on breaking into smaller pieces.
Looking back at the costs of wrapping. I would defiantly recommend getting it ceramically coated rather than wrapping it up.
With everything back together and connected up all I had to do was wait for a new stub axel and hub
Due to the play I noticed in the bearing earlier on I decided to get a new one.
And fit a new bearing into that.
Unfortunately royal mail weren't playing so it didn't come for ages and I missed another FCS
Once this turned up I fitted it and I was finally back on the road again.
With the Rs Oulton park track day looming up and the lack of free time. I booked the car into Rentech to have the brakes rebled with Castrol response super dot 4 fluid
And have the tracking done.
The car now braked really well with the new fluid in.
When driving up to Oulton Park I heard a clunk along the a34 and didn't think anything of it.
When I came to brake later on the pedal went to the floor, quickly pumping it the car slowed down but sounded like something was grinding.
Pulling over at the nearest parking point it turned out the inner pad closest to the piston had fallen out.
So I went to the nearest town in the hope that there would be a garage which could sort me out for the track day.
I found a kwik fit and thought that would do the job as the one local to me isn't bad.
To cut a long story short I was there for 6 hours and the quote of the day was "Do your brakes look right to you?"
Won't be going back there again.
Oulton Park was good fun and the car performed well. And funnily enough on the intercom they said that someone had lost a pad could everyone check there cars.
I panicked but it turned out a Williams 3 had the same thing happen to him which was odd.


After Oulton Park, i went to the Cadwell Park trackday which was good fun nice circuit.
Unfortunately I haven't got any pictures from the day.
After Cadwell I gave the car a oil change and it went off on a euro trip to do the Spa track day and a detour of the Nurburgring

Not very many pictures of Spa or the Ring unfortunately
Spa is a awesome circuit would say it's my favourite now.
After the Europe trip the Alternator was change as well as the pressure sensor.
Changing the sensor cured the problem I had with the water temp warning and oil warning lights staying always on.
Today I gave the car a decent clean up and changed the front discs and pads which unfortunately I didn't take any pictures of.
This is what the car is looking like now:


[BREAK= Scuttle Work]
Update:
Been quite a while since I have last updated this so here I go:
I left the car in the garage for a while, and found myself a run around car to make do with.
Coincidentally I found a Ph1 Renault 19 16v for sale cheap and up the road.
It was in good condition so I bought this to drive around in whilst doing jobs on the Williams.
One of the first jobs to start off with, was undoing the exhaust manifold again.
The reason I had to take this off was that being a supercrack manifold it needed welding around the headers.
Also taking this off gave me better access for the column as well.
Taking this off was the usual procedure, so didn’t take to long.

I also took off the scuttle panels.


If you where wondering what the tape on the windscreen where for, it was so I knew where the wipers went back on.
I then carried on removing the screen wash tank. You can see in this picture that it never had a proper connector so this will be fixed later on.


In the mean time I continued cleaning up the area. Upon cleaning I found that there is sound insulation on the bottom of the scuttle and against the forward firewall part.
That will be a job to do in the future when I have a power source.
The reasoning behind wanting to take the scuttle off was so that I could do some measurements and make up a template for a Fia battery cut off switch.
So with the scuttles removed I proceeded in making a cardboard template so that I had rough dimensions and angles to work with so I knew what I had to make up.
With the template and abit of time I made this up to mount the cut off switch onto.

With the bracket made up, I tried it for fitment inside the scuttle.
It fitted pretty well with only a few adjustments being needed.

Its not bolted in yet due to needing to drill through the bulkhead. So i will do that later on, as I had more important things to be getting on with.
[BREAK= Cleaning]
Looking inside the arches you could tell that these hadn’t been cleaned for quite some time:


So I set about cleaning these up in slow time..
One of the jobs which I had wanted to do for a while, was remove the charcoal canister and the related piping and brackets.
So I began with disconnecting the pipe work inside the engine bay.

Here you can see the bracket which holds the canister on the Williams. It is very heavy and in my opinion i recon that its purpose is for corner weighting on LHD cars.
As this isn’t needed it’s a good weight saving.

Canister Removed:

So that I could clean up the whole front end of the car, I decided to remove both wings and the front bumper:

I wanted to remove the towing eye as it wasn’t looking its best after 13years of road grime.

To remove the towing eye you have to undo the nut at the bottom and knock out the bolt going through it.
This is easier said than done as its easily seized in.
So after 10mins hammering and alot of Wd40 the bolt was out, and the towing eye could be removed.

Having removed the exhaust manifold, I examined it to work out why it was blowing.
Looking at it, you could see where the manifold had cracked around the headers inside and out.
It was worse on the inside two, but you could see signs of the outer ones going as well.
Talking to Summeh this is where his went as well.
So I will weld that up later on.

To help empty out the engine bay abit, I decided to remove the headlight adjuster pipe work and associated brackets.
So I started with removing the pipe work from behind the adjuster.

[BREAK= Arch Preparation]
Having cleaned up the arches in slow time, I eventually got them all spotless and ready for rust treatment.


I continued with the cleaning onto the cross member.
This took longer as it had signs of hammerite, so this had to be removed.

With the drivers side rust treated with kurust and the surfaces roughed up for painting.
I proceeded with putting on 2 coats of zinc primer.


With these coats on, I carried on with taking off the headlight adjuster pipe work inside the engine bay.

Once this was done, i took out the remaining pipework for the charcole canister.

Once this was removed, I cleaned up the passenger side arch and inner arch.


Whilst cleaning inside this arch, I took off the clip which holds on the airbox feed pipe so that I could get it powder coated


Inside the arch sanded down and awaiting rust treatment:

[BREAK= Arch Painting]
I didn’t take any pictures of rust treating/ primering of the passenger side. Once this was done, I started to hammerite both sides with 2 coats.
So I started with its first coat:


Whilst I was waiting for the paint to dry, I blocked off the vac pipe which was used by the charcole canister.
Now being redundant with that system removed.

Overtime I had noticed that my steering column had been wearing.
So I proceeded with undoing the 4 bolts holding it inside the car. So it could be welded up.
I undone the pinch bolt on the rack, and tried to pull out the column.
I kept on pulling and having a look. But it kept on getting stuck.
I was wondering what it could be getting stuck on.
So after a while looking at it, I decided to remove the pinch bolt completely.
When I removed it. I saw that the pinch bolt had a cam profile on it, which basically falls into a notch on the column. Stopping it come out if the bolt was ever to come undone.
Good safety design, if almost to good


With this removed, I started with the second coats of hammerite outside.


[BREAK= Welding]
As I was going to be relocating the horns to the passenger side, I cut the wiring down and tidied up any wiring I came across.
I soldered on a new plug for the washer pump.
Whilst doing the washer reservoir I removed the rear wiper pump and sealed up the hole for minimal weight loss.


With the exhaust manifold and column off. I stayed behind at work one afternoon and welded it up around all the headers.


When I was welding up the column, I found that the rubber inside kept on melting and catching on fire.
Looked rather cool on the work bench, but something to bare in mind if welding in situation..
Steering column painted up once welded:

As I had fair bit of heat wrap spare from last time, I decided to re-wrap the manifold as the gains in my opinion where worthwhile.

Before I took the car apart, I was suffering from a misfire which would only happen when the car was on all day.
And do it say a couple of times, was rather weird.
So I decided to buy a new coil pack from GSF. This worked out at around £19 so rather cheap. Always thought they where more.

With the steering column welded up, I proceeded with fitting it back in.
I decided that I wanted to lower the column. So I put washers in between the column and mounting points to bring it down as much as possible.

Whilst there was plenty of space, I fitted my newly acquired heat shield from Totti

The assorted brackets that I had taken off, I took to the local powder coaters.
I had the horn brackets, airbox bracket and the 2 wire brackets on the bulkhead done.
As well as the towing eye.


I sourced a new exhaust gasket so that I could fit the manifold back on.

This was where I ended up relocating the horns to

I will see how I get on with them here. I may relocate them slightly in the future.
With all the painting done and the parts fitted. I proceeded with cleaning out the insides of both the wings and bumper and fitted them.
I also cleaned the arch liners and fitted them to.

I then proceeded with putting back on the scuttle panels and wipers. As I didn’t have time to fit the cut off switch.
Exhaust manifold fitted.

And here you can see the towing eye behind the bumper, nice and visible.

[BREAK
Now with the car back together, I went and got the tracking sorted.
With the car all ready, I took it back over to Germany to the Nurburgring with Totti and a friend.

Being April time I thought the weather would be rather good.
I woke up one morning to find this.


Had a great time driving around the track, and despite the random weather the eiffel mountains bring. We got some decent laps in.


Once back from the ring, I left the car in the garage for quite some time…
I recently brought her back out for some fun with Summeh and Wobba

And that’s about it so far.
Im currently taking out the aux tank, and i am going to be cleaning up the underside of the car.
So i shall update in due course.
[BREAK= Rear End]
Update:
With the front end of the car in good nick now. It was time to start with the back :roll:
So off came the rear bumper:

With this off i began with cleaning and scraping away to get it prepared for painting.
Unfortunately i noticed a couple of holes which will have to be sorted out
Inside of the arches prior to cleaning:


Underneith of the car:


The plan is to remove the aux fuel tank, then run a single tank.
I will hopefully drop the main tank, and tidy up the fuel lines later on.
I removed the exhaust so that i had better access to the underside. I also wanted to remove the rear towing eye.

After fighting with the towing eye, I decided to leave it for today as I couldn’t be making noise too late.
So i started with the boring job of cleaning.
It’s always nice to see how the stock underseal hides rust underneath it.

And that's as far as i have got.
I will update more regularly to save me time, hopefully lol.
[BREAK= Rear End Continued]
I continued cleaning up the underneath removing as much loose under seal as practical.


To get access to the rear chassis rail the auxiliary fuel tank was removed:

Which unfortunately exposed a hole

With the areas fully cleaned up back to bare metal.
Kurust was painted on and when that was dry, Zinc 182 primer was painted on:


[BREAK= Torsion Bar Removal]
Next up was removing the torsion bar so that i could paint up the mounting areas of the torsion bar along whilst examining it for corrosion.
When the torsion bar was off, i planned on giving it a lick of paint also for aesthetics.
Unfortunately removing the torsion bar was easier said than done..
The bolts was seized sold, which meant they had to be drilled out..

Of all the bolts to not be made of the usual french cheese, these had to be them.. Eventually had to use some cobalt drills to open up the head, and then got a friend to support the nut at the bottom whilst i turned it with a breaker bar and that eventually sheared the nut off

Other side done also:

With the torsion bar removed i set about cleaning it up and painting it:


With this done, i finished cleaning up the underneath of the car.
Once treated with primer i began to paint the underside:


As i was getting bored of painting, when removing the exhaust i had noticed that the exhaust hanger had come away from the exhaust thus making a hole in it.
So i welded it back to the exhaust and built up the surrounding area, then gave it a fresh lick of paint:

[BREAK= Underside Painting]
I continued spending many evenings cleaning and painting and refitted the rear suspension and the 1.2 filler neck to replace the aux fuel tank:


With the car nearly done, Wobba & Leighanne popped down for a mini meet:


[BREAK= MOT & Ace Cafe]
As the car needed welding in a few places along with my lockup not having any power meant i took the car to be finished off at Rentech - Independent Renault Specialist
They had the car for a little while and finished off the brake lines, welded up where was necessary and re-bled the brakes and got it through the MOT


With the car back on the road, there was a French car night on at the Ace Cafe London, so with a few of the locals we drove up to that for the evening:


After the meet we ended up driving through London which was fun, especially as my brakes decided to be a tad noisy which drew attention!
Sounded like an old bus coming to a stop..
[BREAK= Wales Run]
Talking to Matt Wills and Lunner a spontaneous road trip was organized a few days before Christmas Eve heading from South Wales to North Wales.
Route Planned:

This inevitably required a nice early start..

So we could catch dawn rise in the valleys:

We continued driving across awesome roads, with barely any traffic, along with the weather being on our side not verging on too cold or damp.


[BREAK= Car Cleaning]
After the Wales the run the car needed a good clean:


A few weeks later i awoke to quite abit of snow, Que the usual car in the snow photos:


[BREAK= New Coilovers]
A set of Leda coilovers came up new old stock at an attractive price, and having never been to fond of the AVO coilovers a deal was struck and i had a new set of expensive coilovers:

Before fitting them, i went to a Goodwood run as a part of a PistonHeads.com :: Speed Matters run.
This had a lot of exotic machinery turn up and then was sectioned off into smaller groups for a run to Goodwood.
Nice hearing the various exhaust burbles and seeing some proper cars.


In preparation for fitting the Leda coilovers i had been keeping an eye out for a matching spring rate torsion bar which are found on Renault 5 Extra vans. As luck would have it there was 2 vans at the local scrap yard
I couldn't get one out as it was stuck solid, but the other was on ramps which i was fortunate enough to be allowed to work on, so i struggled to remove a nicely seized torsion bar, hoping that the thread on my bolt wouldn't give way.
Thankfully i got them off and the scrap yard was reasonable on there price so that was something to be fitting later.
I set about fitting the front coilovers first, being a relatively simple task now with the amount of times that the suspension had been removed.
Unfortunately when i came to fit it, it fowled the strut for some odd reason.
Nothing that a little bit of angle grinding couldn't sort out:


With the fronts done, i set about fitting the rear torsion bars, which was simple enough, what was trickiest was making them so that i could attain the heights as specified in the Group N manual:

With both the front and rears setup as per the manual it was time to adjust the rebound to suite.
Initially i had to much rebound, which meant the car wanted to oversteer just going around a corner normally!
That was soon remedied and the car felt far better than it ever did with AVO's
The rear uprated torsion bar really evened up the car, making it feel closer to the standard car setup albeit a lot stiffer!
[BREAK= 3 Peaks Run]
With the new suspension fitted, what better way to test it out than with another cross country drive.
This time the plan was to meet up in the Peak District, and then drive through the Peak District up into the Yorkshire Dales and then across to the Lake District.
Route Planned:


[BREAK= FCS]
After the 3 peaks drive i decided to sell the car. After having the Renault 19 16v for a while, i fancied something more normal and comfortable like the 19 but more modern.
The car was put up for sale, and i decided to pop up to the French Car Show as it was a good excuse to advertise the car whilst there:


[BREAK= Williams Standardized]
Unfortunately i had no interest in selling the car, as per the sale thread: 1995 Renault Clio Williams 2
And despite dropping the price numerous times i still had no interest which was a shame.
I decided that looking into the scrappage scheme it was quite a good offer if you didn't buy a highly depreciating car.
So a deal was done, and the car was traded against a new one and i set about removing all that was of any worth on the car and replacing it with standard bits sourced cheaply as possible.


It was a shame that the car couldn't be sold on for an acceptable price, so at least it could of lived on.
A lot of the parts where sold on to various Clio's so it still lives on in ways on many cars
And in case you was wondering what the natural replacement for a Williams was:

Hyundai i10 :lol:
Thanks for reading!
Last edited by a moderator:

